This blog is a record of my creative journey. I love to share my passion for paper crafting so I design projects and then create tutorials and workshops to show you how to make them. Please feel free to wander around to check out all the things I share both here, in my ETSY shop and over on my You Tube channel. Thank you for popping by!
Just popping in to remind you of this months Rubber Dance Colour Challenge. For the month of May the colours are Yellow, Pink and Purple and I am sure that you can come up with lots of wonderful projects using these sunny colours. If you are living here in the UK you know we need all the sunshine we can get right now….We actually had hail here yesterday!!!!
There is an optional prompt of flowers this month if you need somewhere to start your creative process.
I decided to have a play in what I am calling my experimental journal and you will see from the video how I got on trying out two ways of revealing all the texture I created with my Round in Circles Rubber Dance stamps.
So the first reveal was created using a butterfly stencil from Tando and the second reveal was created by cutting around my butterfly wings to help them fly off the page!
If you watch the video you can see how much fun a colour challenge is as the first page in my experimental journal was created using the colours from the April Challenge.
Hi Everyone This blog hop is to celebrate the 1st year anniversary of the Rubber Dance Stamp's blog (http://rubberdance.blogspot.com).
Each member of the Design Team have chosen 3 of our own favorite DT makes for this blog hop, and we will also let you know which 3 are our favorite single stamps. 3 seems to be the lucky number here, so there'll be 3 winners, too!
TWO lucky winners drawn at random will win the Design Team members' favourite stamps!
ONE additional winner who shares this gift giveaway on Facebook gets a €20 voucher (approximately $25) to spend in the Rubber Dance webshop any time she wants! Just tell Bibi that you have shared it on Facebook when you leave a comment on the main blog (http://rubberdance.blogspot.com/…/1st-year-anniversary-give…), and you're in!
To participate in this blog hop giveaway, all you have to do is to visit the blog posts below and leave a comment on all of them. It'll just take a few minutes of your time. You do not have to be a follower on any of the blogs in our hop, but you're of course very welcome to become one - if you aren't already.
Hop along and see the Design Team's fave DT makes and fave three Rubber Dance stamps!
As you have read above Bibi has asked the Design Team to share our 3 of our favourite creations and pick 3 of our favourite Rubber Dance stamps that will be part of the stamp prize bundles!!!! I am sharing creations that feature my favourite stamps so that you will have lots of ideas if you are one of the lucky winners!!!
This was my first ever Design Team creation and I just love, love, love this shell stamp! It showcases the beautiful detail you will find in each and everyone of your Rubber Dance stamps.
Another favourite stamp of mine requires me to show you two projects so you can see the versatility of this stamp……….so starting out with the feminine and romantic …….
and moving on to the vibrant and funky!
Love these butterfly wing stamps - hopefully this counts as one stamp!!!! You can never go wrong with a butterfly embellishment ….or hair do…….I say!
Then for my third favourite stamp and I have to say I found choosing only three very difficult indeed…….but I have chosen this cute daisy stamp! I used a masking technique to set my daisy against a text background for this card.
So to round them up and give you the details, my three favourite stamps are; the Shell from the Beach Sentiments stamp set, the Butterfly Wings from the Collage Elements 1 set and the Daisy from the Da Vinci set!
This was a fun post to write and I hope you have enjoyed looking at just some of the projects I have created over the year using my fabulous Rubber Dance Stamps. You will see just how versatile and inspiring these stamps are when you visit everyone on the Blog Hop - have fun and don't forget to leave a comment a quick comment along the way x
Happy Anniversary Bibi - It has been a pleasure to be part of your exciting online journey and your fabulous Design Team - I will raise a glass of something sparkling to toast to even more success and creativity in your second year!!!! You deserve it. Sending big hugs and kisses and hopefully lots of blog hoppers your way!!!
Just nipping in to post a card tutorial and to join in with the SDC 193 Stampotique challenge this week! I thought this card would fit the bill as I always like to include a few dots in any arty backgrounds I make and this card was no exception!
I used my Dots Fades stencil for tiny polka dots and some sequin waste for larger ones! Don't forget the dots I made with splattering too ;-) This tutorial looks at how you can create fun arty background like I did using a variety of items and mediums. I think they are perfect for showcasing your fabulous Stampotique stamps - let me know what you think.
The stamps I have used are designed by Magda and Daniel Torrente for Stampotique. Here are the cutting dimensions:
Yellow card - 11 1/2" x 8" scored and folded at 5 3/4"
White card - 4 1/2" x 6 3/4 " - cut 2
Navy card - 4 3/4" x 7 " - cut 2
As always I show you how to make your inner match your outer!!! That's it from me I am off out into the sunshine to do some pottering in the garden. I hope you find the tutorial useful as there are a million versions of this technique that you can come up with to create fun backgrounds for your stamps!
Before I get to posting my April tutorial I just wanted to let you know if you don't already that I didn't make it on to the Graphic 45 Design team for this year. I was a bit sad yesterday as you can imagine but I managed to stay away from the chocolate which is good!!!! ;-)
Today I just wanted to thank you all for the tremendous support and good wishes that you sent to me. It means the world to me and you will be pleased to know you can uncross those fingers at last! The good news is that I feel a renewed determination on the crafting front and you will see two brand new tutorials appearing on my ETSY shop shortly as a result of the work I did for the audition.
I do always have fun auditioning as I completely indulge myself and bury myself in all that lovely Graphic 45 paper. On the plus side too I did get a step closer this year ;-) I wish the new design team lots and lots of fun this year and I look forward to seeing what they create as always. I especially want to say congratulations to Clare for her second term as the Graphic 45 UK ambassador. Hopefully we will bump into each other again soon.
Here is the promised tutorial for this month's 12 Tags of 2015. I hope that with the post yesterday and all the fun you can see I had with my tag on today's tutorial that I inspire some of you who are perhaps thinking about it to have a go in May. Which reminds me I must pop over and see what Tim's inspiration is for this month.
and just for fun and a blast from the past here are a couple of other tag tutorials. This from way back as I was just learning this videoing malarky and it is a review of the first year I played along with the 12 tags of 2012.
I still have all my tags from Tag Tuesday hanging on my wall for inspiration! Many fond memories of a lovely group.
And last but not least a fun tag video I made when I was just starting out on my YouTube journey! Please imagine me laughing away to myself as I edit the final shots in the video!
So that is it from me for today. I hope you have fun watching some of my videos. Don't forget to like and share them as it really helps me promote both my YouTube Channel and my Blog. X
Wishing you all a wonderful weekend - we have a bank holiday weekend here in the UK so more crafting time for all ;-)
Today I am posting my tag for April - can you believe we are a third of the way through the year already?!
As usual I am getting to my tag late so I will post the photos today and the tutorial tomorrow or Friday depending on upload times! At least if I post the photos today I can actually join in the challenge!
For those of you new to my blog I thought I would explain what this tag challenge is all about. Each month I play along with the Tim Holtz 12 Tags of 2015 challenge which you can see if you follow this link. Anyone who wants to play along can do so and we all link up over on Tim's blog. On the first of every month Mr Holtz publishes a tag to inspire us. There are always detailed photo instructions of how he made his tag and that always involves interesting techniques for us to try. There are always lots of lovely products to see so plenty of inspiration every month…..oh and there are prizes to be won too!!!
Then it is over to you/us. If you are a beginner you may wish to mimic Tim's tag and try out new techniques but nine times out of ten we don't have all that Tim has used so that is the fun part of the challenge. That is our chance to give our tags our own unique twists.
From Tim's Inspiration to our Interpretation. When you look at the tags of all the people that join in each month you will see the variety of tag designs Tim's original tag inspires.
I have been playing along for 3 years now and I love to see where the journey takes me - sometimes you can instantly recognise the original inspiration and you will definitely see that this month but other months you would have to look hard to see the elements I have taken from the original tag.
So without further ado here are my April tags and of course the matching 3" sample square.
One of this months techniques was using water colour paper and water colouring techniques. You will see my colouring is a bit more vibrant than Tim's and if you watch my tutorial you will see how I achieved the look using both my Distress Inks and Distress Stains.
I decided to add a little decoupage element to my flowers and used my ink pads to create the two tone ribbon to match my project. Tim used his Distress Markers to create an ombre effect on his ribbon and as I don't have many Distress Markers I did things a little differently.
Here is a close up of the sampler square:
I have four little squares now so I thought I would show you just how each month takes you in a totally different crafting direction.
I am looking forward to seeing what the whole sampler looks like when I frame it at the end of the year.
Thought I would share another tutorial today that matches the sunny weather we are having here today! Mind you it is very chilly out there despite the sun - I believe our weather system is drawing down cold polar air…..someone needs to tell Mother Nature we are expecting spring weather round about now ;-)
So for those of you newly popping by I am in the process of waiting to see if I make it on to the Graphic 45 Design team…..I am convinced about now that someone is slowing down time so I am going to fill it with crafting and gardening this week to see if I can't speed it up a little.
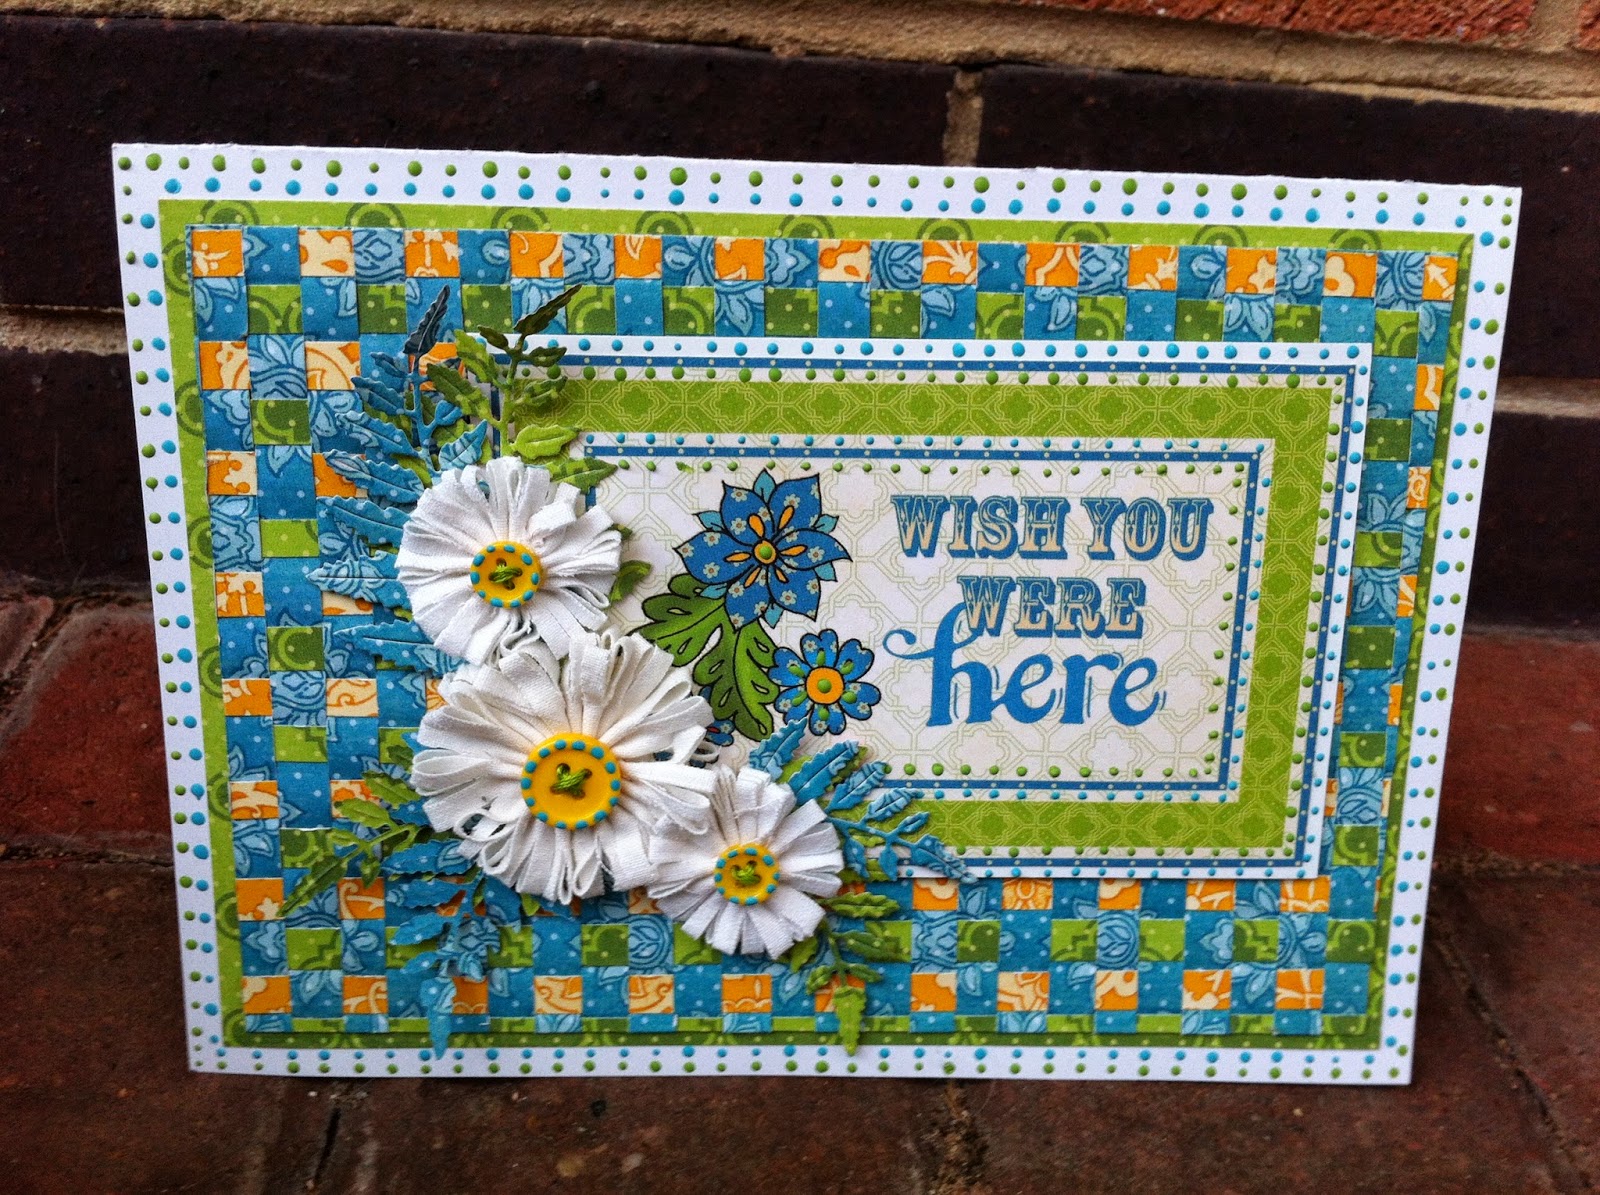
For my round one submission I made several new projects and as usual they were all videoed to turn into tutorials to share with you all. I thought I would share this fun, bright and breezy card today that was inspired by the sunny patterns of the Graphic 45 Bohemian Bazaar paper collection.
In the tutorial I show you how I created the pretty paper woven background for this card as well as how to make a quick topper with the fabulous journalling cards that come in the Graphic 45 Paper collections. This is just one of their many uses.
As usual I had fun making the inner as fabulous as the outer using some Tattered Lace dies which I borrowed from my Mum! Thanks Mum x
I also show you how to make some gorgeous fabric daisy embellishments which work perfectly with my bright and breezy papers.
I know this card will make anyone smile when they receive it on their special day. If you don't have Bohemian Bazaar papers in your Graphic 45 Collection I know that you can make this card in any of the paper collections you have treated yourself too. You might need to change your accent card and perhaps make the flowers in a different colour but I know that this will look great whatever you choose to use.
Cutting Guide Using Graphic 45 Bohemian Bazaar papers:
White Card: 11 1/2" x 8" scored and folded at 5 3/4" and used in the landscape position.
'Wish you were here' card topper taken from the Lap of Luxury paper
White card mat for topper: 3 3/8" x 5 1/4"
Green Vivid Splendour: 5 1/4" x 7 1/2"
Blue Jasmine Nights for inner: 5 1/4" x 7 1/2"
White Card for inner: 3 1/4" x 7 1/4"
Woven panel in the tutorial was created originally at 5 1/4" x 7 1/2" but was later trimmed down to 7 1/4" x 5"
I suggest you work with these new measurements to avoid that step!
One piece of Blue Jasmine Nights for base of weave 7 1/4" x 5" see tutorial for guide to cutting.
The woven strips were cut from the Green Vivid Splendour and Yellow Bohemian Bazaar papers.
The strips measure 7 1/4" x 1/4" cut approximately 8 of each colour.
The Daisies:
Cotton fabric strips for small daisies: 1" x 4" (cut 2)
Cotton fabric strip for large daisy: 1 1/2" x 6" (cut 1)
I hope you find all the techniques in the tutorial I am sharing today useful and that you are inspired to get out your Graphic 45 papers and to get weaving - these panels would look great on cards or scrapbooking pages and I am sure on lots of your paper crafting projects too!
I'm off out to walk the dog in the sunshine now but I think I am still keeping my coat on……'Cast not a Clout 'till May is out,' as my Grandma used to say! Brrrrrr See you again soon and thank you again for all your good wishes and messages of support. Sending you all big hugs - Thank you for popping by X
Today I am featuring over on the Rubber Dance Blog and I am just giving you a sneak peak of the cards I am sharing today. My tutorial looks at stamping on acetate and I love how the technique turned some lovely Antique Botanicals images into a modern card design.