This blog is a record of my creative journey. I love to share my passion for paper crafting so I design projects and then create tutorials and workshops to show you how to make them. Please feel free to wander around to check out all the things I share both here, in my ETSY shop and over on my You Tube channel. Thank you for popping by!
Here is a sparkly little Shaker Card Tutorial for you. This one features papers from the Graphic 45 Voyage Beneath the Sea paper collection but you could make this with different themed papers too.
The Journalling cards that come in this collection were the perfect choice for the fish tank background and the sentiment inside the card too.
I really hope you find this tutorial inspiring enough to give it a go yourself. Don't forget to let me know how you get on.
If you need any more inspiration for using up some more of the Beneath the Sea Paper collection you will find more Graphic 45 inspiration on this play list. Click here to see more.
Hi Everyone from a cold and rainy England today....well it is here where I am and it is perfect crafting weather! Every Cloud..........has a crafting lining LOL!
Before I get on with editing another video here is a little card making inspiration for you. This works for lovers of Graphic 45 like me who may have Precious Memories papers in their stash or who have similar patterned papers they can adapt. Equally you may have other papers from other collections that would also suit making a card like this one.
Here is the tutorial to show you how.
Whilst you are there you might want to have a look at other ways of using Graphic 45 Precious Memories papers like these which all have tutorials of their own.
Happy crafting everyone and thank you for popping by X
It has been a little while since I last posted but am back again with another tutorial. This is a really easy project to make and is very versatile.
These little boxes can be made in any scrapbooking papers you may have in your collections. I of course have used Graphic 45 here as it was one of the little projects I made during my audition. You can decorate them to suit your style or the style of the person you are going to gift it to.
These little boxes can be used for storage or as a pretty gift box. I first designed this project between 5 and 8 years ago when someone at our crop showed us how to fold origami boxes. I adapted the design a little to make it more decorative and in the tutorial you will see exactly how to make these for yourself.
These were the original boxes and if any of you recognise these Kay and Co papers you may be able to date these boxes more accurately! In the tutorial you will see what I store in them suffice to say they are catch all boxes that I have dotted about my home ;-)
If you decide to make this project as a gift box why not make a matching card as I did here.
What a pretty way to give a gift and to show someone that you care.
Before I go I would like to let you know that I didn't make it through to the Graphic 45 Design Team :-( but I would like to say if luck and good wishes had anything to do with it I would have sailed through! I am so grateful for all your support and good wishes you guys have been awesome and definitely helped me get over the disappointment as did as this little chap……..
You can find out more about him if you stay watching until the end of the tutorial!
I have had a problem this past week with a video uploading to YouTube but this one seems to be ok so I am going to try to upload the other one again tomorrow so two videos in quick succession …..YouTube willing!!!
See you again very soon and thank you for popping by X
Today I am sharing my Graphic 45 Design Team 2016 Final Round submission. I can share with you how nervous I have been since I made the top 30 list of finalists and that has led me to sharing two tutorials with you today! I had two ideas for projects and I thought I would make both and then pick one to submit but I can't choose!!!!…..what if I pick the wrong one!!
They are both so different and I love them equally so as this round of the audition is all about showing who you are as a Designer I think this is me! I love to design projects and share tutorials and the more I share the more I love it. I have had some fabulous feedback from my first round pieces and I just want to tell you all how much I appreciate your support and hope that you love these projects just as much as the first ones.
So…..in no particular order ;-) Here is my first canvas inspired by the vibrant patterns and images of the Voyage Beneath the Sea paper collection.
In the tutorial you will see how much fun is to be had when using Graphic 45 papers to create canvas art. I loved adding all of the detail and sparkle to this ocean scene and even though there is a steampunk element to this collection I just had to go with Mermaid all the way!
Here is a fabulous shot (if I say so myself!) of the mermaids tail which is such a fun technique. So lots of hints and tips on this tutorial to help you create sea themed works of art of your own. Wouldn't it be fun to take some of these elements and add them to a scrapbook page of a favourite day at the beach?
I will show you how using more than one image means you can bring real dimension to your projects with just a little patience for all the fussy cutting.
Another thing about me is a designer is that my mind is always whirring away and more often than not one project leads to another as you can see…….
…….and I know just where to store all the shells I love collecting from the beach…….
…….and on to my second tutorial from Mermaids to Ballerinas! It is always nice to mix and match the different Graphic 45 Collections you may have and I have mixed up a little bit of Sweet Sentiments with Precious Memories for this pretty Canvas.
This design really took me back and I think this tutorial will remind many of happy days making clothes for Cindy Dolls or cutting out paper clothes for paper dolls! It is probably where our love of creating started!
In this tutorial I will show you how to make paper roses which is something I know you will be able to use on lots of other projects and home decor pieces.
Instead of a quote you might want to add the name of a little ballerina you know and this would make a lovely gift.
Learn how to turn paper into fashion! Graphic 45 prints are perfect for this kind of paper crafting. I know I have not finished with this technique yet! My inner fashion designer is trying to break out!!!!
….and of course one thing led to another for this piece of canvas art too!
Look at all the lovely dimension you can create when you have more than one piece of a particular design. This Baby's Breath paper actually inspired this whole set of creations as it was my favourite paper in the Precious Memories collection.
Well I think that is about it. Time to cross everything and wait! But before I go I just wanted to say a big thank you to Graphic 45 for this opportunity and to all of you who have supported me with kind words and good wishes. Please keep those fingers crossed for a little while longer! Good luck to my fellow finalists who I know will be as nervous and excited as me right now! Time for me to press publish and then I am off to eat chocolate! Designing uses up calories you know ;-) I think I am due a family sized bar lol!
Just popping in to tell you about my latest tutorial. This is an oldie but a goodie so it is about recycling which is Graphic 45s challenge this month and I am also recycling an idea I posted about way back in 2012 when I had no clue about YouTube or that I was heading that way!
Way back then I shared a post that was all about turing old video cases into mini albums or stamp storage! It was a photo tutorial so I am also upcycling that to a YouTube tutorial. Three up cycles for the price of one!!!!
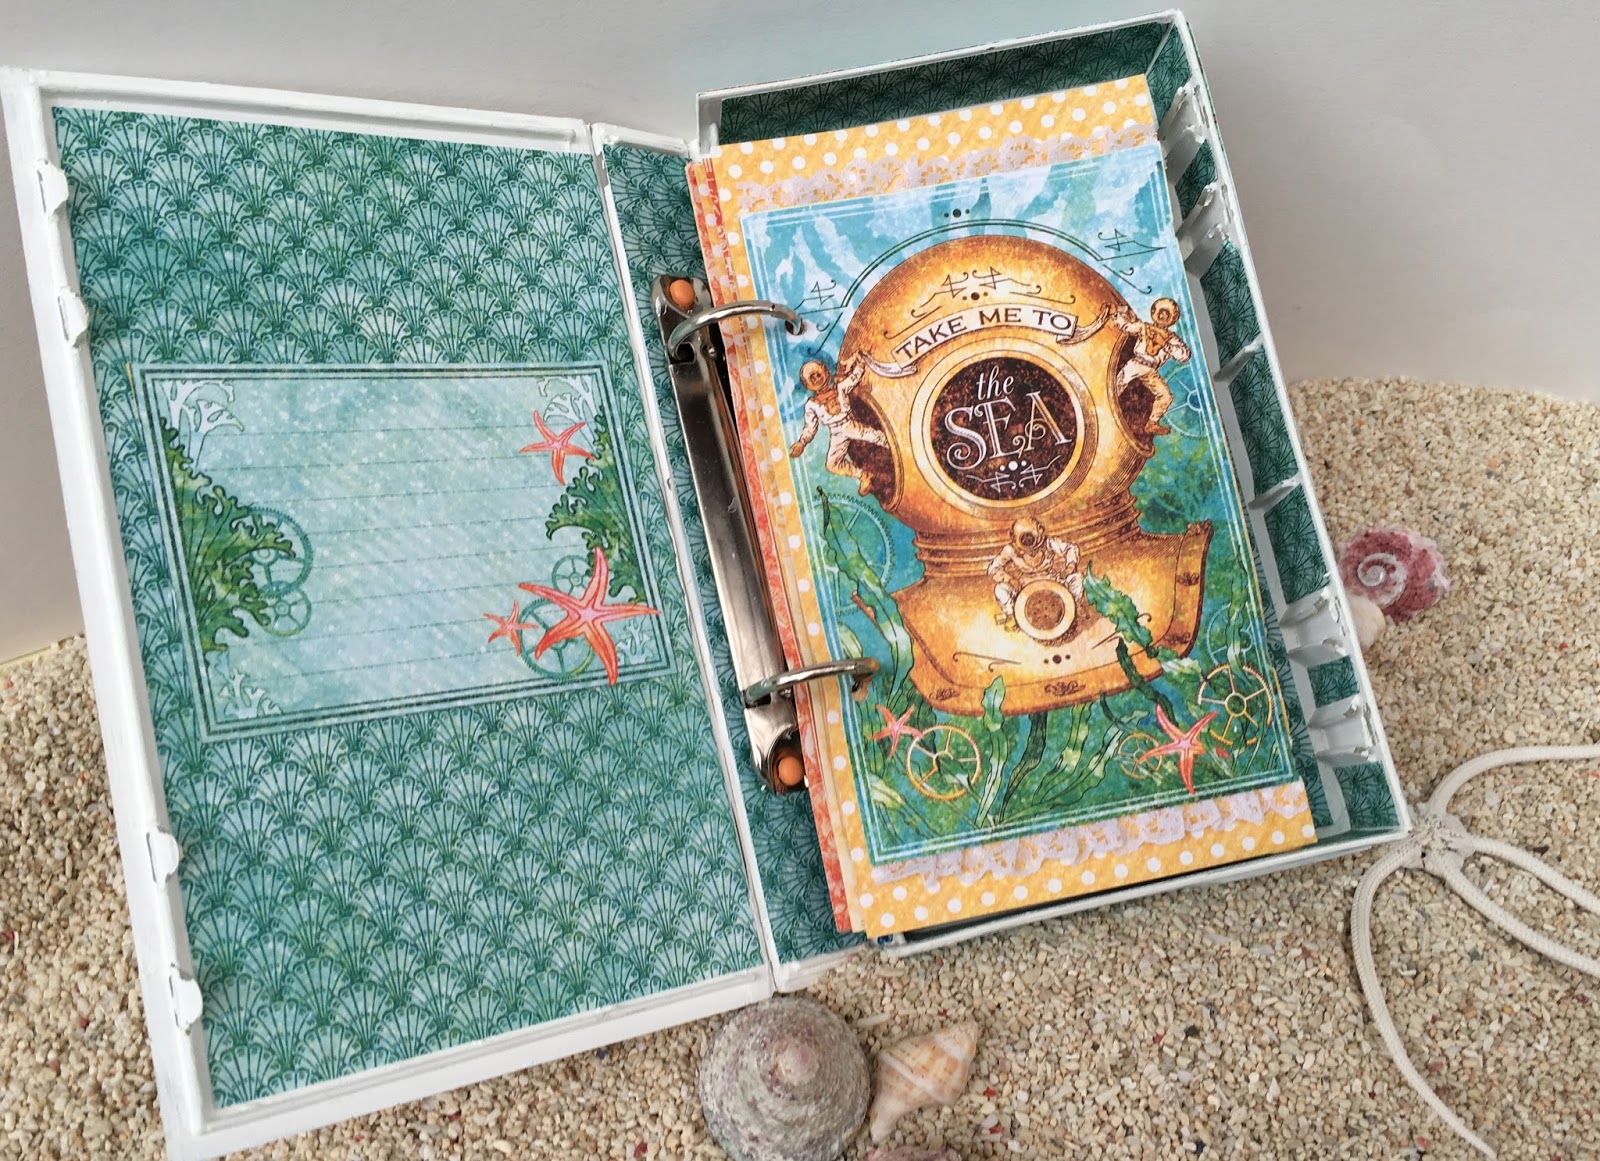
In the tutorial I will show you how to turn your old video cases into mini albums (or stamp storage) and storage boxes. As you can see from the sides of my boxes I stuck to a theme in the way I decorated them and they now look fabulous as well as being really useful sitting on my shelves.
As you know I am through to the second round of the Graphic 45 Design Team Audition 2016 and I am up to my eyes in my projects! I say projects because I can make up my mind which one to pick to submit as my final tutorial. I love my first one but I think I am in love with my second one too. I am hoping to finish it off tomorrow and then try to make a decision. They are very different in style which is what I love about Graphic 45. There are so many combinations of papers you can choose and each one will lead you to a different creative result!
As you can see here you can really ring the changes and reflect the contents of each of your little storage boxes and because I have stuck to the same layout for my decoration they still look like a set.
In this photo you can see two of the sets of papers I am using in the two projects I have on the go at the moment!
The top box with the mermaid on (from the Voyage Beneath the Sea Collection is the one that contains the mini album which you will see me create in the video tutorial. All the rest are storage boxes and you will see how easily this is done too.
Hope you enjoy the tutorial and get busy with some recycling of your own! Now where did you put all those old videos?!……..
First of all I wanted to say a huge thank you to everyone who is supporting me whilst I try out once again for this years Graphic 45 Design Team. As you will have seen if you follow me on Facebook I have made it through to the second round and I am now excitedly preparing my final piece for the final audition round. My mind is a whir and I am stuck between two ideas so I think I am making both and then I will choose. I know my fellow design team hopefuls will be feeling the same pressure. Mind you it could be worse at least I don't have to write a thesis!!!! Here I am covered in paint and glue with scraps of Graphic 45 all over the place…..happy days!
Because I am making a tutorial (or two) I have had a clear out of my iMovie files and have found two online workshops almost ready to go……I do let myself get sidetracked sometimes….so many UFOs. I know you identify with me ;-)
If you want to learn how to turn boring picture frames into totally awesome ones then this is the workshop for you. I will teach you how and then once you have mastered the techniques you will be creating fabulous frames for all occasions to showcase your family photographs in style.
If you purchase this workshop you will receive a pdf file with detailed project notes and the links to two videos that will show you how to make these three seaside themed frames and give you details of a Christmas and a Halloween idea too.
They make great home decor items as well as beautiful gifts. Just think how happy the Grandparents would be to receive one of these with their grandchildren smiling back at them!
I have of course used Graphic 45 papers….because I love them …….and because they work so well for this kind of work but lots of other paper collections will be suitable for these projects too!
So if you want to know more please watch this video advert.
Is it that time already? I can't believe how the year has flown by. It doesn't seem long ago that I almost made it on to the Graphic 45 Design Team. It was so tantalising to get to the second round and I am not sure I can stand the suspense but here I go again!!!
We have been asked for three projects and a tutorial and I interpreted that to mean 4 project in total. Most of the projects I share have tutorials with them so three of my projects have tutorials to share how to make these pieces. We were asked to share projects that show our strengths and I just had to make new things because I take any opportunity to design with my lovely Graphic 45 papers and as I had just had a really good tidy up of my stash I was reminded of some papers past and in particular Poppy Fields from the Magic of Oz collection which inspired me to make this canvas.
I have made hundreds of crafting tutorials all of which are on my YouTube channel and that is where I love to share my creativity. There are a huge variety of projects to be found over there and of course this canvas comes with its very own tutorial. Lots of techniques including how to use paper doilies to add fabulously delicate texture to your creations.
I show you how to fussy cut the poppies, to layer them up and bring them to life. I hope this project, whilst only using two designs of paper really shows off all that Graphic 45 personality we all love so much. This project is for fussy cutting gurus or trainee fussy cutting gurus! I definitely recommend you sit in a comfy spot with a cup of coffee whilst you tackle this little lot!
The feathers, cut from ABC Primer's Bed Time Stories, were easy to make as you will see but they are a labour of love and the perfect way to give wings to your heart full poppies!
I would say one of my main strengths as a designer is that I am very much led by what I am using. That is why Graphic 45 is such a joy so many beautiful papers and so many ways to combine them to create new looks. I hope you can see that in the designs I am showing you today.
Next up is this canvas which was inspired by a couple of peacock feather papers in two different paper collections, one was from The Couture Collection and one from the Olde Curiosity Shoppe. It was fun to combine them together to make a beautiful peacock made entirely of paper.
Different papers and an entirely different design is born….maybe I should say hatched?! ;-)
There are four different paper collections bought together to make this piece and of course the tutorial will step you through so you can make this for yourself. I hope my tutorials showcase my love of teaching. I want other crafters to feel that they could tackle this or even if this piece is not to their taste that there are techniques and tips shared which could be used in other crafting projects.
I used the doily technique again which makes a pretty background for my fantasy weeping willow tree created with pinched flowers and hand cut leaves.
Check out all that fussy cutting on the tail! I think I am all feathered out for a while at least!!!
I have often wondered if I have a particular style and I have come to the conclusion that I don't and I think when it comes to Design Team work that is a huge strength because my projects are so varied. So on to my penultimate project and tutorial with a completely different look.
Sometimes you come across a paper you like but you just can't think of anything to use it for and this one was that for me. I liked the colours and the cute flying pigs and the fact that it reminded me of the crows in the film Dumbo that sing If I see and Elephant Fly!
But suddenly I had an idea and this Art Journal page was inspired by my son and a sheet or two of Pigs Might Fly paper from the Olde Curiosity Shoppe collection! I will explain more in the tutorial!
It is fun to look at the imagery in all the Graphic 45 collections to see how you can create settings for them. Wouldn't our skies be fun if this little scene came to life?!
One of my all time favourite papers is Calico Kids from the ABC Primer collection. Tiny strips of it make such beautiful borders which is the perfect spot for a bit of doodle embelishment!
It was fun to create this fantasy sky for my cute flying pigs to play in and although this is a humerous page it has meaning too. As I make my tutorial I always share what I was thinking as I designed each piece and highlight how the viewer could make the elements of a project work for them even if they didn't like the final piece. I see that as a strength, teach technique and the process of creativity and you will inspire creativity in others.
Last but definitely not least my final piece showcases my love of creating 3 dimensional pieces from scratch and the new to my collection Graphic 45 Cityscapes paper collection! I have made clocks and pyramids and cakes and all sorts of things and they are always enhanced by using Graphic 45 to construct and decorate! This is still a prototype as there are a couple of design faults I need to iron out but they don't show on camera ;-)
I love to design functional pieces that look great. I hope you agree that this is both. I designed it to sit on your desk looking like a pretty post box and then spin it round and……..
…..Voila! Ribbons at your fingertips! There is no tutorial for this one as it will one day be an online workshop….once I iron out those little wrinkles ;-)
I hope you can see how much I enjoy working with Graphic 45 and that you can see what my design strengths are. I am keeping everything crossed that this time I might make it through! Wish me luck everyone!
Another tutorial aimed at helping you think about using up those pretty paper scraps. Lots of hints and tips as I show you how to make this card using fabulous Graphic 45 scraps!
Mixing and matching old collections with new for this card and I am really pleased with how it turned out. It is the thing I love most about Graphic 45 papers they are so versatile and so interchangeable that you can come up with unique looks time after time.
Remember to make the inside of your card as beautiful as the outside!
Here is the tutorial with lots of hints and tips along the way to help you make the most of your paper scraps whether they be Graphic 45 or anything else.
The sky is the beautifully blue today - still chilly but spring is knocking on the door here in the UK. Thank you for popping by X
As you may know I love Graphic 45 and have a habit of keeping every last scrap! So as I had a recent tidy up putting all the scraps neat and tidy in their collections I felt inspired to create!
I will be sharing a couple of tutorials over the coming days to help you get the most of those beautiful scraps! I have told myself if I use some up I can buy more!!!! Sounds like a plan ;-)
This tutorial shows you how to use those journaling cards that come in the Graphic 45 paper pads or the ephemera kits to turn them into frames for you cards. The tutorial is all about seeing how I did it and then using the same principles for the scraps you have. This card was mainly using the Couture collection with a tiny bit of something else!
As you can see we can make the inside look as lovely as the outside.
I think this could also be an outside too!!!! Hope you enjoy the tutorial.
Don't forget to subscribe if you want to be the first to know when I post new projects. Thank you for popping by X
Thought I would share another tutorial today that matches the sunny weather we are having here today! Mind you it is very chilly out there despite the sun - I believe our weather system is drawing down cold polar air…..someone needs to tell Mother Nature we are expecting spring weather round about now ;-)
So for those of you newly popping by I am in the process of waiting to see if I make it on to the Graphic 45 Design team…..I am convinced about now that someone is slowing down time so I am going to fill it with crafting and gardening this week to see if I can't speed it up a little.
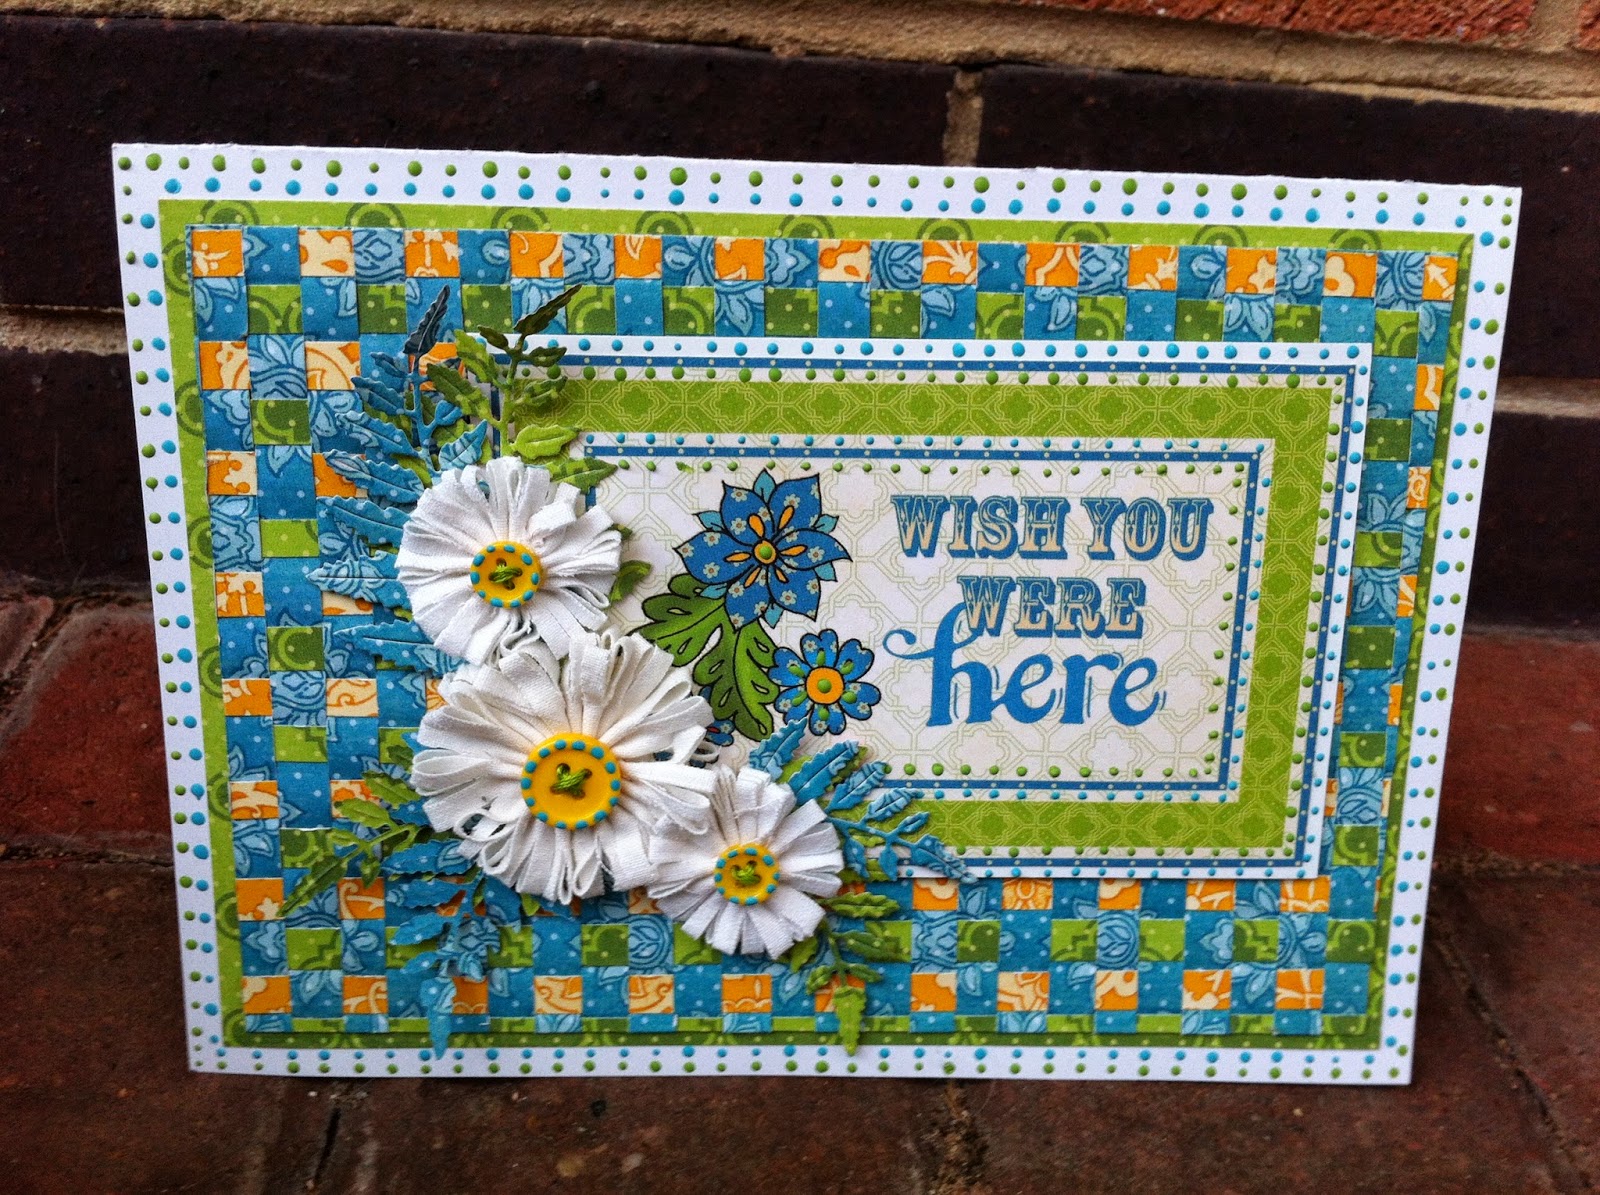
For my round one submission I made several new projects and as usual they were all videoed to turn into tutorials to share with you all. I thought I would share this fun, bright and breezy card today that was inspired by the sunny patterns of the Graphic 45 Bohemian Bazaar paper collection.
In the tutorial I show you how I created the pretty paper woven background for this card as well as how to make a quick topper with the fabulous journalling cards that come in the Graphic 45 Paper collections. This is just one of their many uses.
As usual I had fun making the inner as fabulous as the outer using some Tattered Lace dies which I borrowed from my Mum! Thanks Mum x
I also show you how to make some gorgeous fabric daisy embellishments which work perfectly with my bright and breezy papers.
I know this card will make anyone smile when they receive it on their special day. If you don't have Bohemian Bazaar papers in your Graphic 45 Collection I know that you can make this card in any of the paper collections you have treated yourself too. You might need to change your accent card and perhaps make the flowers in a different colour but I know that this will look great whatever you choose to use.
Cutting Guide Using Graphic 45 Bohemian Bazaar papers:
White Card: 11 1/2" x 8" scored and folded at 5 3/4" and used in the landscape position.
'Wish you were here' card topper taken from the Lap of Luxury paper
White card mat for topper: 3 3/8" x 5 1/4"
Green Vivid Splendour: 5 1/4" x 7 1/2"
Blue Jasmine Nights for inner: 5 1/4" x 7 1/2"
White Card for inner: 3 1/4" x 7 1/4"
Woven panel in the tutorial was created originally at 5 1/4" x 7 1/2" but was later trimmed down to 7 1/4" x 5"
I suggest you work with these new measurements to avoid that step!
One piece of Blue Jasmine Nights for base of weave 7 1/4" x 5" see tutorial for guide to cutting.
The woven strips were cut from the Green Vivid Splendour and Yellow Bohemian Bazaar papers.
The strips measure 7 1/4" x 1/4" cut approximately 8 of each colour.
The Daisies:
Cotton fabric strips for small daisies: 1" x 4" (cut 2)
Cotton fabric strip for large daisy: 1 1/2" x 6" (cut 1)
I hope you find all the techniques in the tutorial I am sharing today useful and that you are inspired to get out your Graphic 45 papers and to get weaving - these panels would look great on cards or scrapbooking pages and I am sure on lots of your paper crafting projects too!
I'm off out to walk the dog in the sunshine now but I think I am still keeping my coat on……'Cast not a Clout 'till May is out,' as my Grandma used to say! Brrrrrr See you again soon and thank you again for all your good wishes and messages of support. Sending you all big hugs - Thank you for popping by X
Hope you have had a wonderful weekend. I spent some quality time with my crafting friends so I had a lovely time! We chatted, ate sweeties, laughed, drank coffee, shopped and maybe indulged in a little crafting now and again….nothing too taxing you understand ;-)
…….actually saying that I was actually quite productive for a change and you will know what was on my mind….well you will do when you see what I made. Trying to keep my mind of hoping too much but I think I am dreaming Graphic 45 right now …..only 10 days to go!!!!
On Friday as well as teaching a class got started on some baby bunting for my friend Rebecca who is opening up a brand new baby shop very soon.
Lots of frilly ribbon and some pearl trims topping off my bunting made from Graphic 45's Precious Memories Collection.
I added the lettering on Saturday Morning. So far I have a string to hang over the Boy Section, The Girl Section and the Pre-Loved section so I only have the shop banner to complete. I might see if I can get to that later in the week. I have left the stringing of the banners until I am in the shop so I can judge the spacing between the flag to get the prettiest effect.
All this baby paper inspired me to make a layout and matching card too. Graphic 45 always have lovely patterned strips you can fashion into frames for your layouts. I carefully cut out four strips from the Puppy Dogs tails papers and I used my fancy edge scissors on the title strips of the pages I had removed from the paper I had used so far creating my bunting (8 strips in total) I edged my blue paper strips with them and then used them to create a frame for my layout.
Working on a coordinating sheet of swiss dot bazzil card stock as my base I mitred the corners of the strips to make myself a very pretty frame.
I then added a pearl trim to create a second frame with lots of texture. Not to be wasteful I removed the centre of the green card stock and then added in a square of the opposite side of the Puppy Dogs Tails card stock over the centre of the layout.
I cut the remaining green card into 3 1/4" squares and edged them with a baby blue ribbon frill. I didn't have any baby pictures with me at the crop but in this case it doesn't matter as you will see at the end of this post.
Next it was out with the scissors and a little fussy cutting latter I have a cute little washing line of little boy outfits draped across my layout.
I created a triple bow for the bottom right hand corner and added a small section of the pearl trim to the centre of all my bows and a couple of green glass hat pins for a little sparkle. Which reminds me I must share a tutorial with you at some point to show you how easy it is to make these gorgeous embellishments.
Here is the finished layout and a matching card that I made. I took this photo in the gorgeous bright sunshine we have here today in Derbyshire.
I know that when the photos are finally attached to this layout they are going to look fab! That is when I had an idea. Rebecca has suggested I might like to make baby cards to sell in her shop and I was thinking ……..what about selling baby layouts in box frames?!!!!
They would make lovely gifts and I could create a couple of different versions. I would need to look at the costing and time they would take to see if it was a viable thing to do but I know I would definitely be using my Graphic 45 papers as they look divine.
I made a matching card using some of the off cuts I had left over so a gift and matching card!!! Check out the pretty button in the middle of the bow. I must say a big, big thank you to Jamie at Punch Place Plus for sending me a package of lovely buttons all the way from America! You may remember last year I won a couple of Crafty Academy Awards for my You Tube videos - Best Tutorials and Best Mixed Media and Jamie at Punch Place Plus was one of the lovely sponsors. So once again a big big thank you Jamie and as you can see I have used one of my lovely buttons already! This is the link to the winners video if you want to pop over and visit the lovely Betty who also makes videos and organised the whole event.
I am hoping for more of this lovely weather and I will spend my week catching up on my Rubber Dance Tutorials and popping in and out of the garden to do some fruit tree pruning. I have tackled the pear and might be able to do the plum on my own but I think I might need a man with a ladder for the Apple, Crab Apple and Cherry which are reaching for the sky right now! I sound like I have a huge garden but I don't. I just love trees in the garden and if you are going to have trees you might as well have fruit ones!!!! I wonder if the birds will leave us any cherries this year? ;-)
Hope you all have a wonderful week and thank you for popping by X