Showing posts with label Projects. Show all posts

Thursday, 27 March 2014

Graphic 45 Design Team 2014 Audition

Welcome to my Graphic 45 Design Team 2014 Audition.

I have loved Graphic 45 papers ever since I bought my first sheet which was 'Bees Knees' it was full of red cherries and polka dots (I still have one piece of it left!).   I love the versatility of the gorgeous mini prints as much as I love the intricate vintage images we all love to fussy cut.  I hope my post showcases my love of designing and that Graphic 45 paper collections fire my imagination.  I am so excited about taking this opportunity again (audition post from last year) to audition once again for the wonderful Graphic 45 Design Team.

I am passionate about designing projects and then teaching others how to make them.  So it is natural for me to run classes and workshops and to share lots of tutorials on my You Tube Channel as well as creating online workshops for larger projects.  I am addicted to creating videos and work hard to make my tutorials and workshops professional and easy to follow.

I have taken this opportunity to create some new projects for this audition and I found it difficult to choose which other projects to include in my audition post as I know I am going to be competing with lots of very talented people out there in Graphic 45 land!  Fingers and toes crossed and here we go……..

Secret Garden Canvas - Lots of fussy cutting with a touch of silver gilding.


This started life as a Scrapbook Layout way back in May last year but I was so pleased with how my flower vines turned out it would have been a shame to squash them in an album so I turned it into a pretty canvas.


Tropical Travelogue Carriage Clock - I loved creating the display of tropical flowers and foliage for this brand new piece.  This project was built from chipboard - This is my favourite kind of designing, from chipboard and paper to carriage clock - I have so many ideas for different versions of this design - I might now have the perfect excuse to get my hands on the By The Sea Collection!!!! ;-)


A close up of all the fussy cutting.


Steampunk Spells Spooky Halloween Mini - A great reminder of Halloweens past and a cute album that can be made with any Graphic 45 paper collection as it uses the cut apart Journalling Card Pages as tags for journalling and more photographs.


This was a little tricky to photograph to capture all the detail so click here to watch the video I filmed to look through this spooky mini.  I am currently editing the tutorial for this.

Ladies Diary - Box of Memories - I wanted try to create faux vintage treasures that may have been left to me by my Great Great Grandmother.


I had lots of fun thinking what might be in my box of treasure.  A valentine given to my Great Grandmother, my Grandma's locket and trinket box, a bobbin of lace and a Christmas pomander from my Great Great Grandmother.


Ladies Diary had all the delicate prints and images I needed to create this set of pretty trinkets.

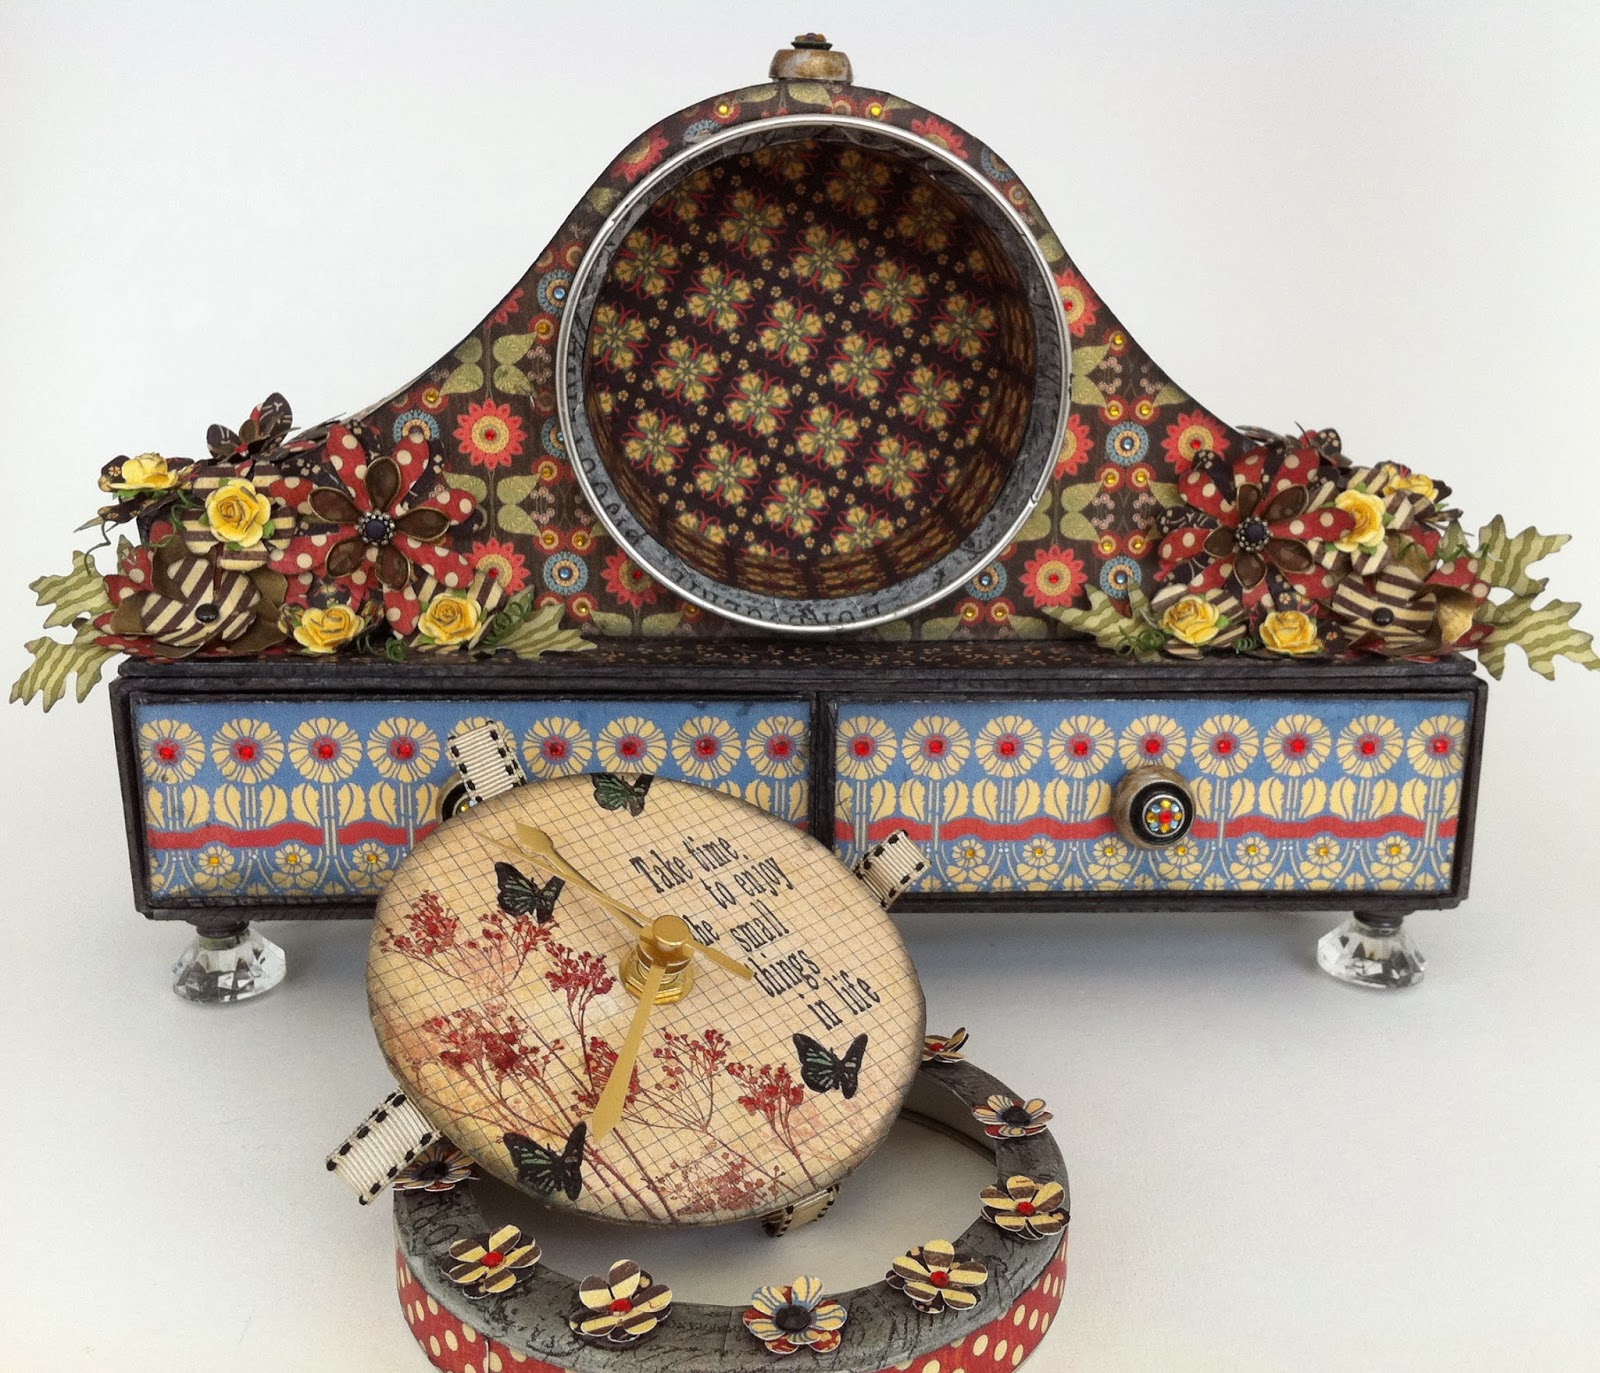
Graphic 45 Mantel Clock - I loved combining Graphic 45 prints for this project.


Drawers for Tags or in my case jewellery as this clock sits on my dresser.


There is even room for a Mini Album behind the clock mechanism or it could be somewhere to store secret treasures!

Pyramid Mini for a Boy or a Girl - One project two very different looks courtesy of two very different Graphic 45 paper collections.


What treasures can you put inside?  This one was originally designed for my son Callum's 14th birthday but I have since taught it in workshops.


Complete with a Mini Album for all those party photos.


This one was just for me as I love the Ladies Diary paper collection.


When I design a large project like this I try to make it as versatile as possible to appeal to as many crafters as possible.

French Country Memory Box and Mini - Made with an altered Matchbook Box.


This is a mini and memory box combined and is a design that could be made for lots of occasions.


I am using it to record happy family memories associated with recipes.  I used the Journaling cards as tags so that I can write down those recipes as well as journal about the memories that are associated with them.


Underneath the mini is a memory box with lots of compartments to store treasures - this would make a great project to record a special holiday too (mmmm By the Sea!!!).


I made a video tour of this project last year so here is the link.  This is another project that is difficult to photograph effectively!

Little Darlings New Baby Cake and Mini Album - I loved making the little stack of cute baby blocks for the cake topper.

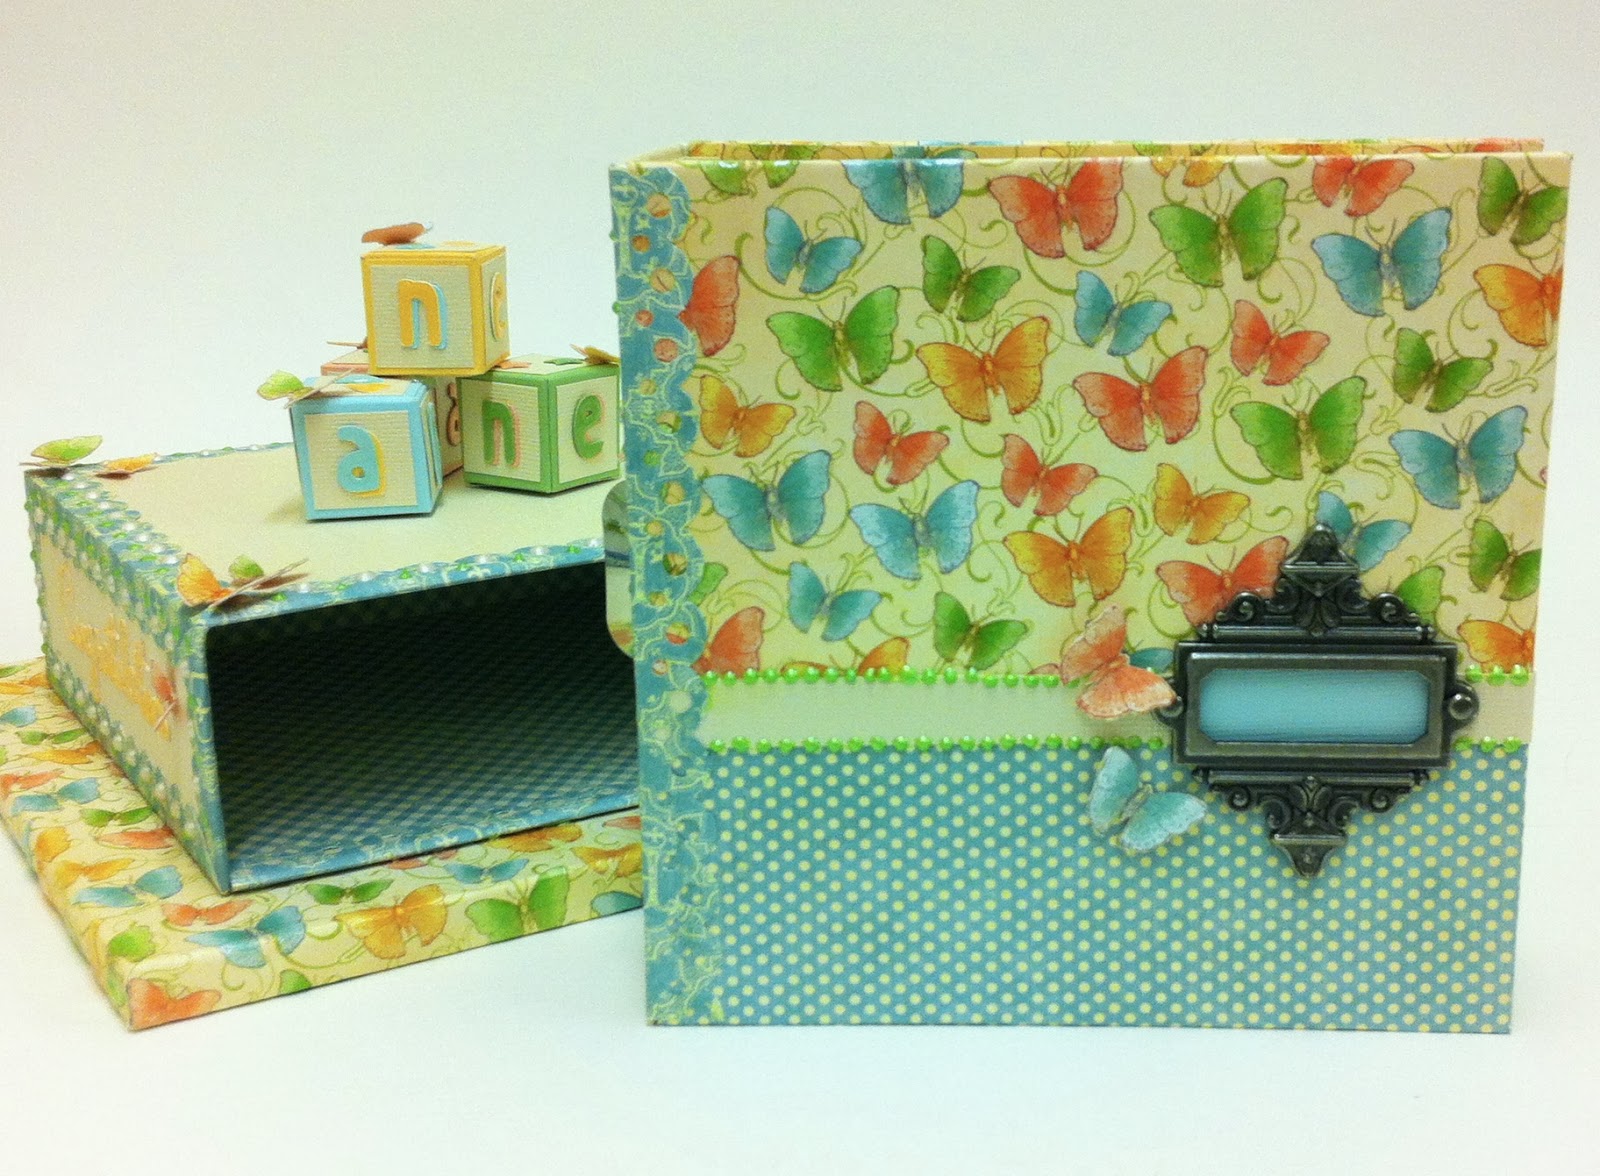

As I wrote all the journaling prompts for the Mini Album it bought back happy memories of filling in baby albums of my own.


The online workshop for this is almost complete and there is a Christmas and Birthday cake version as well as a three-tier wedding cake…... (no pressure on my two handsome sons though!!! ;-)

A Few Scrapbook Pages

Scrapbooking and cards was where my passion for paper crafting began.  During my crafting journey I have made many lovely and very talented crafting friends, both in the real world and more recently in the online world, over the years and I am so grateful for their support and kind hearts.

Mother Goose Layout - Gorgeous bright patterns - perfect for the fun fair photograph - a master class on how to make your supplies go a long way!

Olde Curiosity Shoppe meets Magic of Oz


What to do with such pretty leftovers?
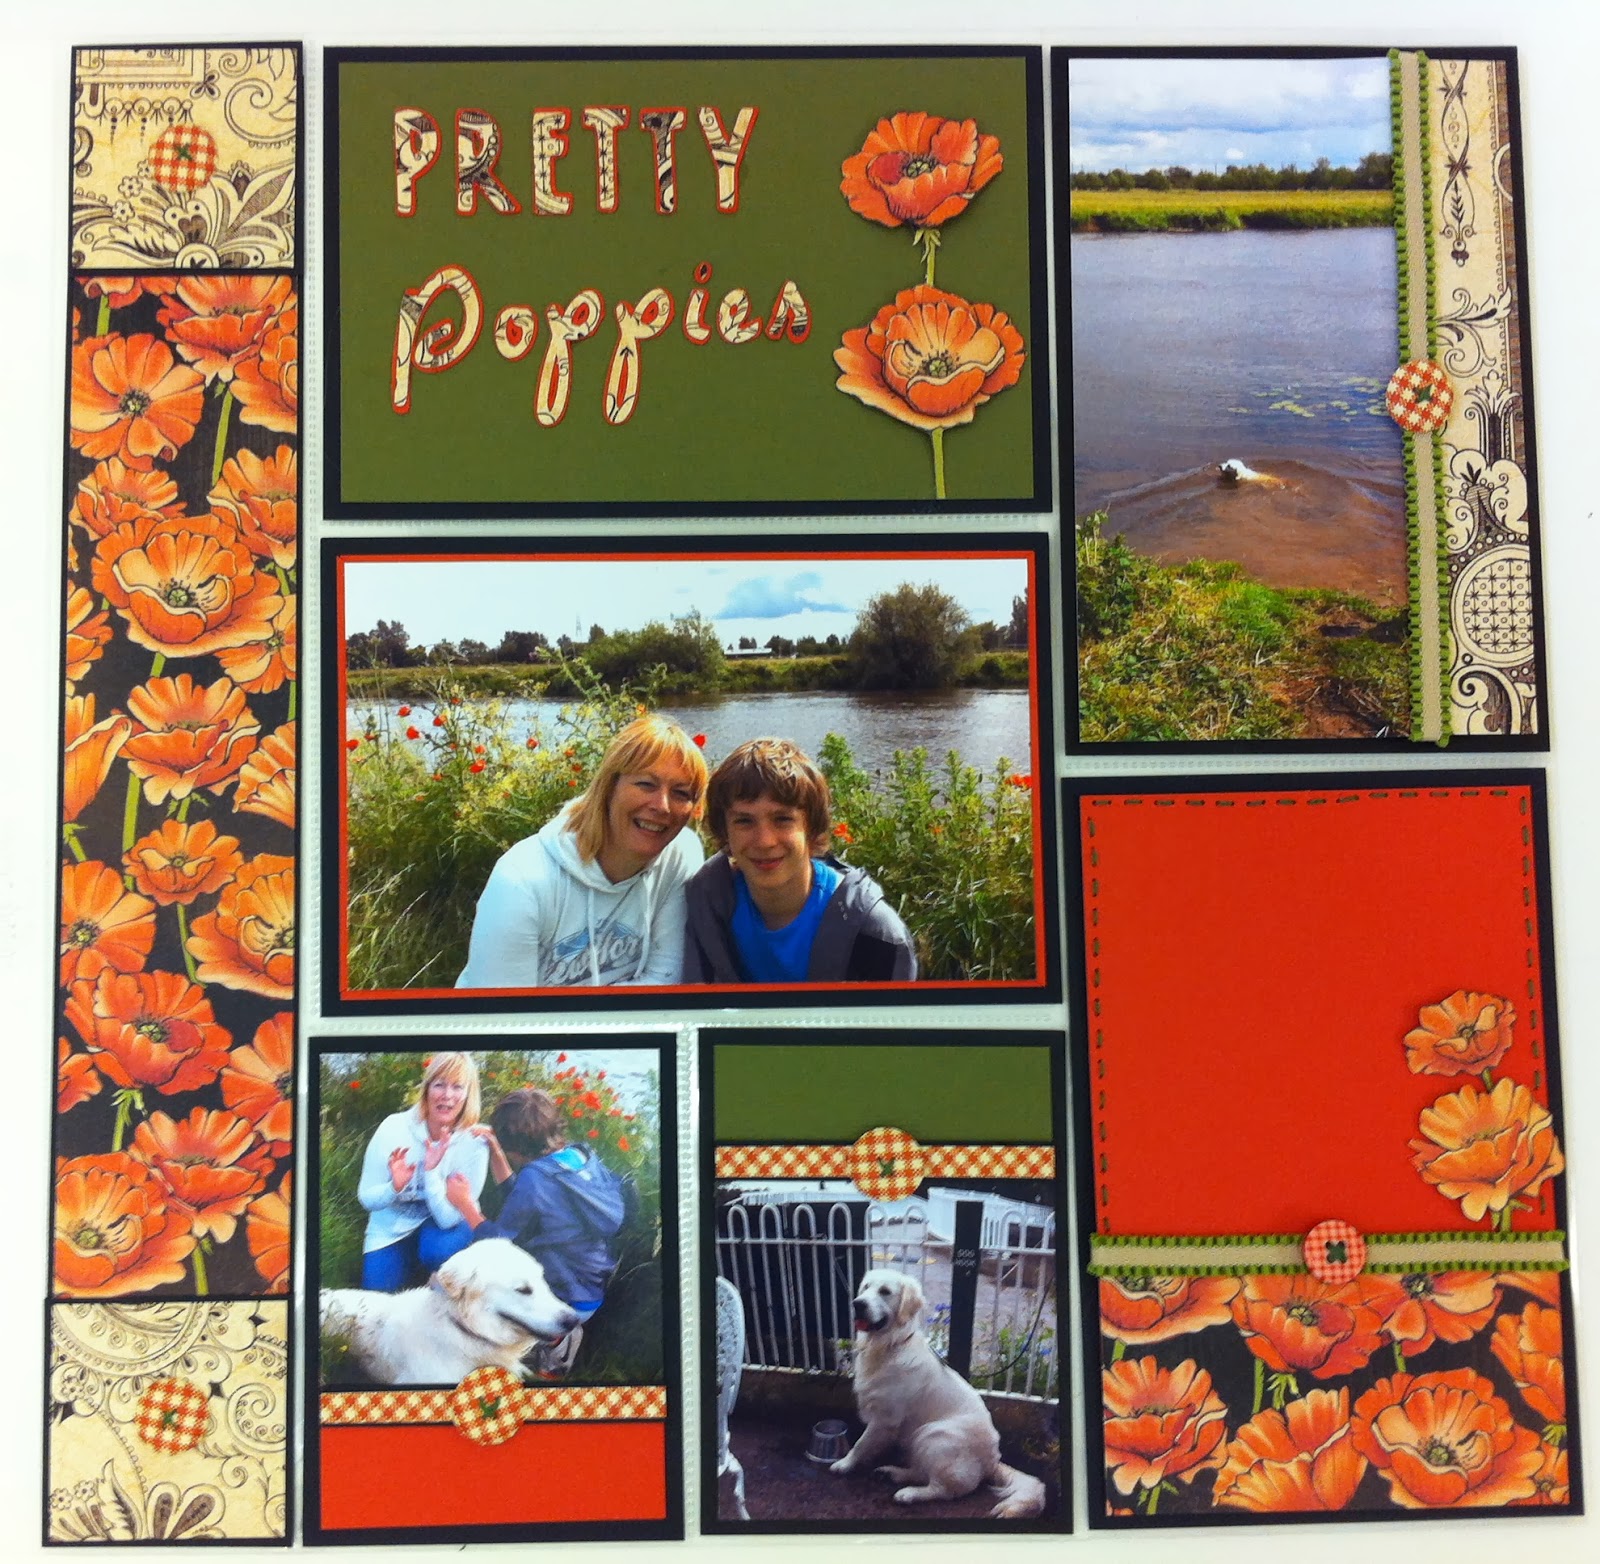


I have a tutorial on how to make companion 'Project Life' style pages on my You Tube Channel.

Tropical Travelogue Layout - I love using Graphic 45 images as embellishments on a page.

There is so much detail on every page to inspire your creativity - I was really pleased with how the fish embellishments and fussy cut frame turned out.


A Couple of Cards


Secret Garden Double Slider Card


Steampunk Spells - An alternative Valentine!


I think I should create an envelope with a health warning - 'Open with care!!!' (tutorial awaiting editing)


Sometimes Layouts Inspire Cards - A great way to use up pretty paper scraps.


I made a tutorial for this double easel card.

I love mixing and matching gorgeous Graphic 45 paper lines this time Little Darlings with ABC Primer for a baby to grown up layout that inspired a fun Birthday card for my lovely hubby who has been a real star supporting me this week.


Phew!  As you can see Graphic 45 fires my imagination and I thank you for that and I really hope you like my projects.  I love to design and I love to make tutorials so that others can make them too.  I hope this post and the links capture that passion.  Thank you so much to Graphic 45 for this exciting opportunity and thank you to my blog friends for your support and for giving me the confidence to give it a go!

As always thank you for popping by X

Monday, 5 August 2013

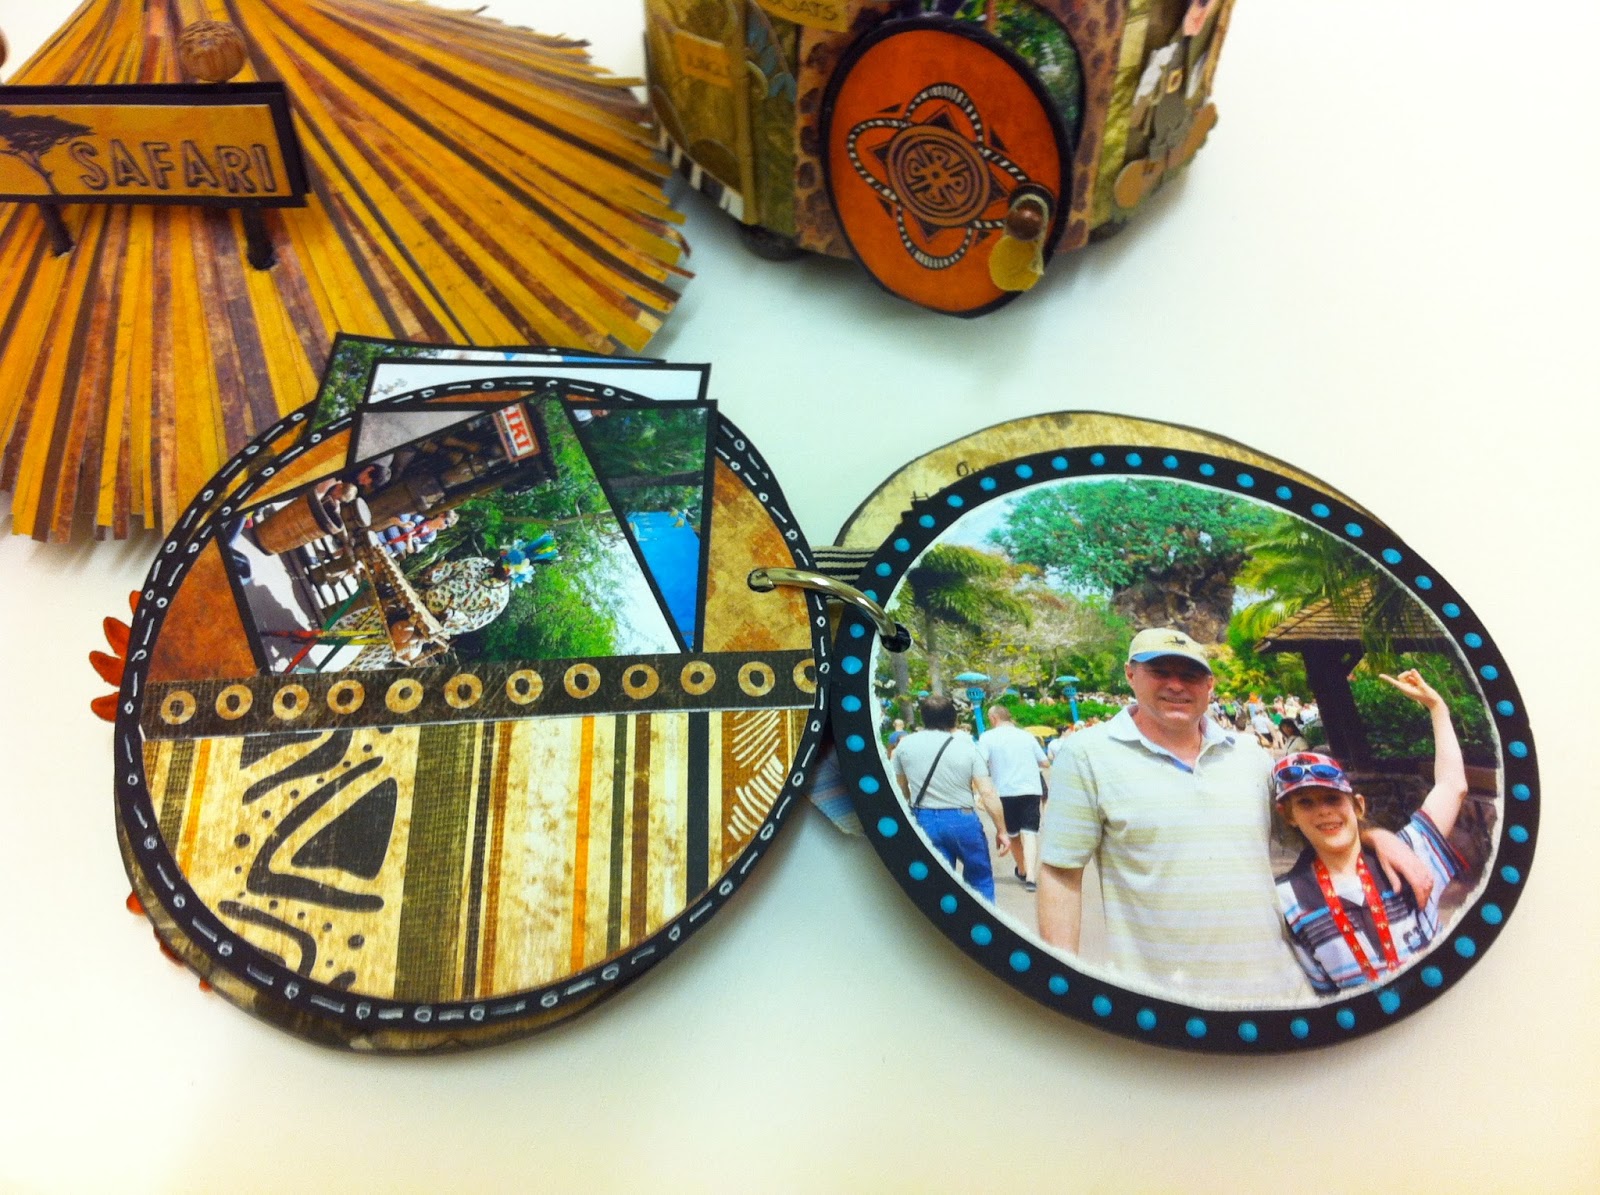
On Safari with Bo Bunny Zoology


Take one round papermache box and some fab Bo Bunny Zoology papers and this is what I came up with!  One cute safari hut which tuned out to be the perfect place to keep our photos of a wonderful day visiting the Animal Kingdom park in Disney World.


I made a circular mini mixing and matching all the fun animal prints and stickers in the collection.   I think that the paper packs we treat ourselves to (every now and then!!!) are perfect for mini albums like these as they already coordinate so you can concentrate on the elements that make your project fun.


I turned the lid of the box into a straw roof and it took a while!!  I love the effect though - well worth the time spent next to the guillotine covered in multi medium!


I added lots of little hiding places for photographs and journaling.  Inside the lid made a perfect frame.  Here is Callum making friends!


Each of the pages of the mini has a large photo on one side and a pocket to tuck more photographs with journalling so I was able to really document a fun packed and magical family outing.


I will always remember the happy time we had.  Here is Callum High Fiving with a huge Bunny!!!!  I know that Callum will love this memento of our trip and will have fun showing it to his children one day.

Wishing you all a creative week - I am prepping for my class on Friday this week - I have a gorgeous set of stamps from Creative Expressions to play with.

Look out for another scrapbook tutorial (probably tomorrow) on my You Tube Channel which is uploading as I post this.  Don't forget if you like my blog or You Tube Channel I have a fun tutorial to give away to anyone that subscribes already or if you are a new subscriber.  Just drop me an email to let me know as I would like to thank you for joining me on my creative journey(email link on my right hand sidebar).

Thanks for popping by X

Sunday, 9 June 2013

Shadows and Scissors

Six hours and 48 minutes left in the Simon Says Stamp and Show Challenge this week!  I don't know where the time has gone????  I seem to be saying that a lot lately.  Did someone fast forward time? ;-)

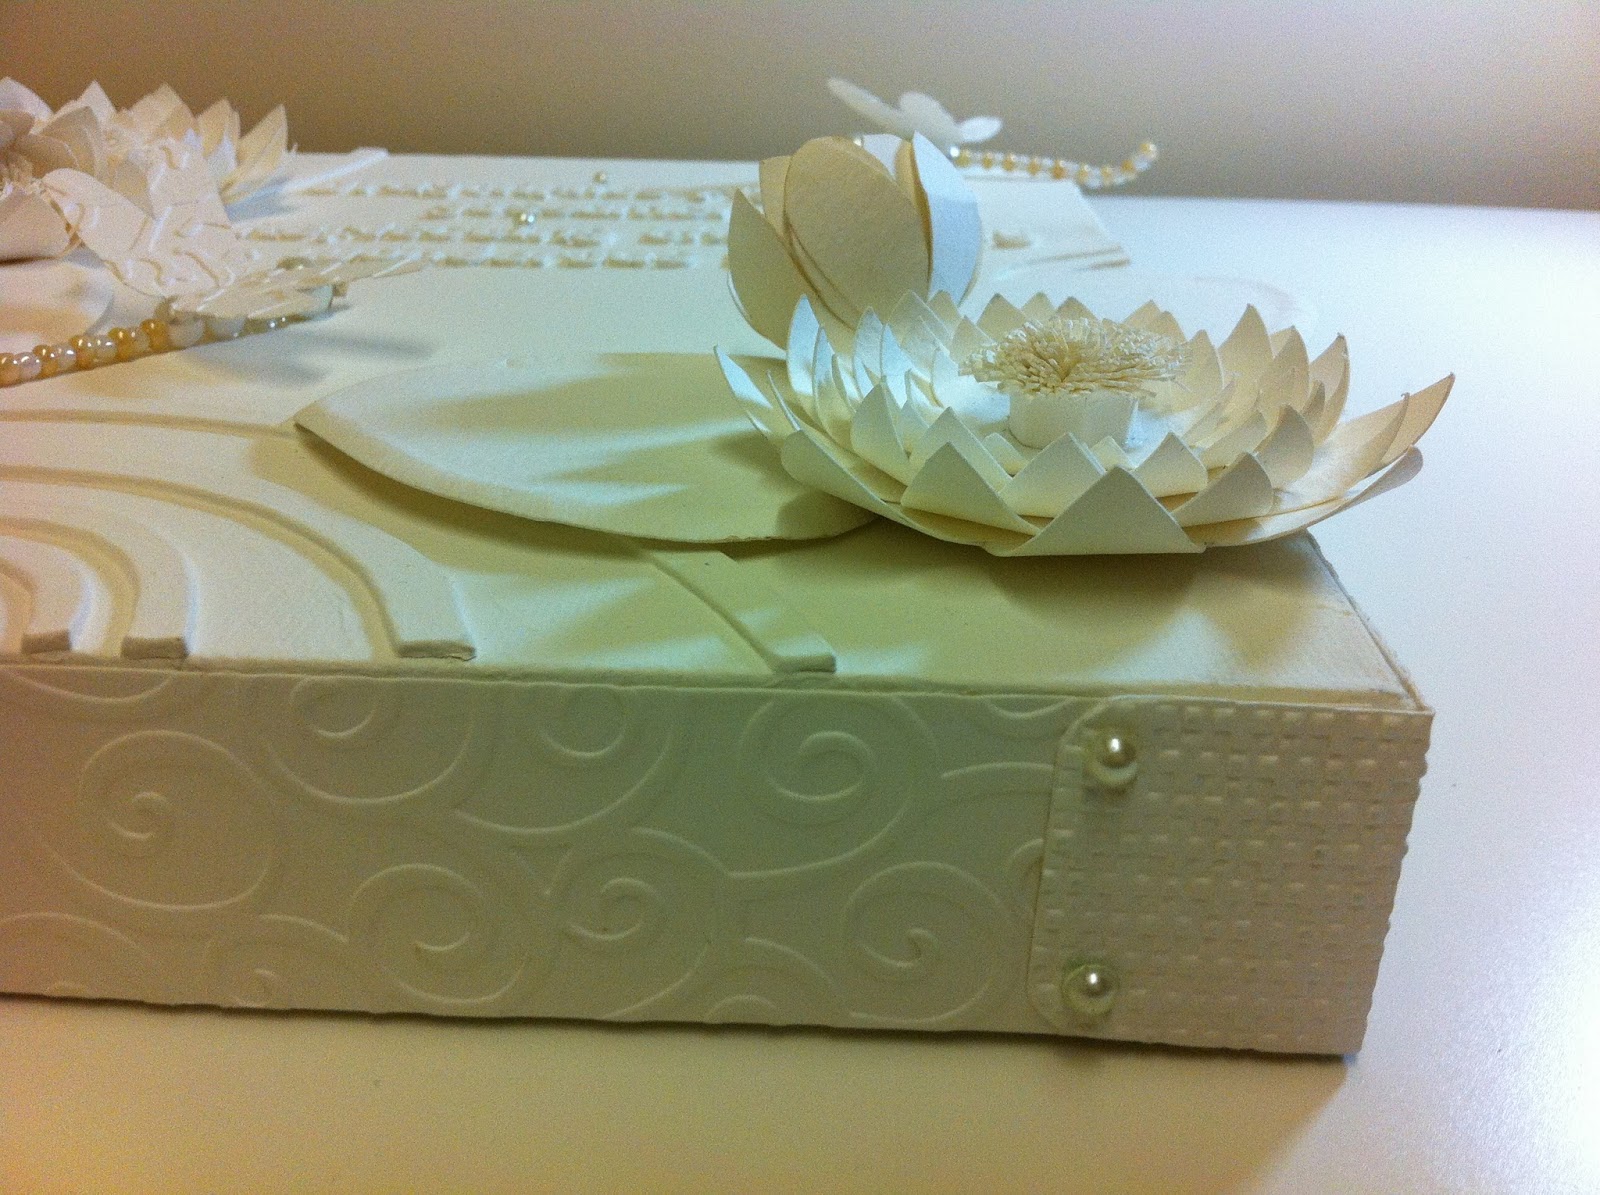
The first 'S' word that inspired me this week was Shadows and as I have made a canvas entirely out of cream card stock and cram paint it is the Shadows that play an important role in how the finished piece looks.    It made me think of all the elements we all include in our work that add texture and layers and even if we are not fully aware of it it is the shadows that we create that add the interest and drama to our creations.  Working entirely in one colour lets you see all the shadows and I think they definitely add the drama to my Water Lilly Pond.

The other 'S' word was Scissors and they were the most used tool as I put together my canvas I used them to cut out my Waterlilies and Leaves and believe it or not all the lettering.  I would rather not have had to cut out the letters but I did not have a chipboard alphabet small enough to use so I hand cut all the letters for my verse.  It took me quite a while as you can imagine and there were a few points when I thought.....'What am I doing?!'  But I got there and I am quite pleased that as they are hand cut they have the same charm as using your own handwriting does on a layout........However, I will be keeping my eye open for a very small chipboard alphabet all the same ;-)


As you can see my Scissors certainly got a work out.  Each of the Water Lilies have 7 Layers and a finely fringed centre.....and as I mentioned before those hand-cut letters.


Look at all that fringing.  It takes a while but I really love the fluffy finish it gives to the Lily centre.


I wrapped my box canvas with embossed strips and corners (more shadows!) and added a few creamy pearls to look like brads.


I also used pearls to make the bodies of the Dancing Dragonflies.

Dragonflies flying on gossamer wings.
Reflecting the beauty of wonderous things.
                                                                            Helen Allen

So with 6 hours and 22 minutes to spare I am pressing the post button and am off to link with the Simon Says Stamp and Show challenge.  I wonder what challenge tomorrow will bring!

Thank you for popping by X


Tuesday, 16 April 2013

Announcing the Daisy Projects


The Daisy Projects is the latest (third) item to arrive on my virtual shelves!  Learn how to make a fabulous Daisy Embellishment (Video Tutorial 1), Gift Box (Video Tutorial 2) and Matching card (Video Tutorial 3) and if that wasn't enough the photo instructions that come with the tutorials show you how to change the Daisy into a Gerbera!  All this for the bargain price of £3.50.  You do need to have or have access to being able to use the Tim Holtz Tattered Florals and Tattered Leaves die to make this Daisy.

I hope you like the projects enough to buy my tutorials and join me in my virtual classroom.  The beauty of my lessons are you can take them any time, in any country and you can pause me anytime you like to take a coffee and cake break!  Oh and I will not mind one bit if you make me repeat myself over and over again! ;-)

I am trying to get PayPal buttons to work on my blog but they are still on trial at the moment.  I hope to be able to try them at the weekend on a different computer to make sure they work so in the meantime if you want to buy this tutorial click on this link to my ETSY shop!

More fabulous flower projects coming soon.

Thank you for popping by x

Thursday, 4 April 2013

Graphic 45 Design Team 2013 Audition

I am keeping everything crossed as I write this post (that is quite a feat I can tell you ;-)).  I am excited and nervous and definitely a little bit shaking in my shoes but here goes.........

This is my Graphic 45 Design Team 2013 Audition Blog Post!!!!


This is my longest post ever so you may want to get a cup of coffee and a cookie or two!  I will do my best to keep you entertained with all the projects I have been designing and making for my audition.  It was definitely hard work but a labour of love so I am not complaining one bit.

Project 1 - The Surprise Package Graphic 45 Style!

I am starting off my audition by showing a project I designed quite a while ago now and I never tire of making it.  I already had this example completed in Graphic 45's Little Darling Papers as I wanted to make a New Baby version that included a surprise pop out baby alphabet block.  I used the green and peachy pink papers in the collection and they make a lovely fresh combination that works well with the cream base card stock.


Keeping it simple with the embellishing I found some pretty flowers and buttons in just the right shades of peachy pink and green.  I distressed the edges of all my Graphic 45 papers as I wanted to add just a touch of shabby.


I really love the Peek a Boo paper that I have used here on the inside of the envelope.  Wouldn't it make the most perfect nursery paper?  One of the many things I love about designing and making projects with Graphic 45 papers is that when you look beyond the obvious uses for a particular collection there is always so much more than first meets the eye.  The photos above and below show what I mean perfectly.  Peek a Boo above is definitely a baby project paper but look at the delicate patterns below and you could make something pretty for your Mum on Mother's day or a cute Easter Card and soooo much more.....


I just couldn't resist making another version of the Surprise Package project especially for this audition (any excuse to play!) so I rummaged through my papers ;-) and made this yummy Bird Song Version.  The Cherry Blossom paper was my collection favourite and was it perfect to use as I could show off both sides and I love the delicate peachy tones which I used on the outside of the envelope and then that beautiful shot of turquoise when you open up the envelope to reveal the surprise within.  This is how the project is designed to be displayed once it has been opened.


I had the perfect die (recent treat to myself!) to compliment this gorgeous Graphic 45 Cherry Blossom paper!!  I really loved decorating the little pop out cube with branches of blossom.


I added micro beads to the centres of the cherry blossoms with a dot of glossy accents and I printed all the wording on my computer - I really hope they are correctly translated!!!


I used a few of the Bird Song Stickers for this project.  The pretty bird stamp makes a fab pocket on the inside of my envelope that is just perfect to pop in an extra surprise for some lucky birthday person!  I cut lots of strips of butterflies from the Endless Spring paper to use on the edges of my envelope and as pretty trim.  They were the perfect fit as you can see.


Another pretty sticker made a seal for the closure of the envelope and a border strip sticker added a pop of colour to embellish the outside of the envelope.


Photographs can't really do the surprise element of my project justice so I have included this video to show you just what the 'Surprise' actually is!!!!


Project 2 - Scrapbook Layout

I often wonder if I have a particular style that is recognisable as mine and I don't think I have.  I do know that when it comes to scrapbooking I have a hard time putting things on the page that are not straight.  I almost have to force myself!  My friends chuckle as elements I place down on the page at an angle gradually straighten themselves as I put the design together ;-)

This layout illustrates exactly what I mean.  Not an angle in sight!!!.........


..........Oh, except perhaps the one the camera appears to have taken on in this photo!  Something else which makes Graphic 45 paper a favourite is that one collection easily mixes with another.  For this layout I have used a relatively new paper Old Curiosity Shop - Exquisite Motif and mixed it with an older collection Transatlantique - Travelogue paper, a dash of golden yellow and voila!  Gorgeous (if I do say so myself ;-)  May I draw your attention to the pleated frame that took forever!!!!!


I love to scrapbook and always try to journal as much as I can about the photos on my page.  I am always writing to my sons when I journal and I often hide the journalling as I have here on this large but surprisingly discrete tag.  I really enjoyed making the flower embellishment that also acts as a pull for the journaling tag.  It is amazing how the flat brass Graphic 45 flowers come to life with a few tweaks of the piers.

Is that an angled ribbon I see????

I love making videos, though I have learnt they are very, very time consuming to produce!  I thought you might like to see the design process I went through to make this layout.  I always aim to produce as professional a video as I can particularly when making a tutorial but now and again I like making fast forward videos as they are 'slightly' quicker to edit but I still think they are a great way to share inspiration and ideas.  I once made a video of a tag I made that had a xylophone on it and I decided to play it with full audience sound effects at the end of the video.  I was laughing so much at my idea that my husband came in to see what was going on!  It thrilled me that when after I had shared the video on my You Tube Channel I received a lovely comment from a viewer that had chuckled along too......result!  This video is a bit longer than the previous one so only watch it if you have time to spare.  Go on have another cup of coffee and a cookie!


Project 3 - Family Recipe Memory Box


I altered a Graphic 45 Matchbook box (a bit of a tongue twister to say out loud!) for my third project and it features the lovely ......and brand new to my stash.......French Country collection of papers.


This project started out life in my head as a memory box and mini that was somewhere you could put those items we treasure that don't fit in a scrapbook and that have a story we want to preserve.  Whilst I was working on it my friend Deb commented that it would make a lovely recipe book and I combined the two!  It is perfect for our family as we have so many memories attached to great food that we have shared with family and friends over the years.


Lots of fussy cutting to make these pretty sunflowers.  A bit more below to complete the Rooster.  I added the chicken wire to the aperture to capture the look of those lovely old kitchen dressers you see in country kitchens.


The A La Cart paper was perfect to use for my recipe cards.  Each of my pages have a pocket at the bottom so I can tuck in photos and my pretty recipe cards.  I have dedicated this page to our friends Andreas and Eleni who always treated us like family and taught us all we know about dining in Cypriot style.


I know I am going to enjoy recording more memories of friends, family and the happy times we shared eating the most delicious meals!


Tucked away underneath the mini album is a secret compartment to store all those items that defiantly won't stick on to a scrapbook page but we want to treasure them just the same.  My friend Deb lent me some precious items that her Grandmother gave her especially for my photo.  There is even a cute rooster cookie cutter - perfect!  I am going to store some of the herbs and spices that are in the recipes I am journalling about.


I made a little video tour to tell you a bit more about my Memory Box project.


Project 4 - Graphic 45 Clock


This clock sits on my dresser.  It is made from chipboard and an old tin that used to hold paper flowers! I have mixed and matched from my Graphic 45 paper stash and I think the papers tones bring a vintage elegance to my piece.  I originally made this in March last year for a D's Paper Studio Challenge that was sponsored by Graphic 45 (I do love a good challenge!)


I have two drawers in the base that I have earmarked for some family tree tags (one day!).  I think you can see the fun I had adding tiny jewels to the patterns on the papers.  Fiddly but worth the effort.


I needed to be able to remove the clock to change the batteries so I also have a secret compartment!.....or the perfect place for a mini album!

Project 5 - The Pyramid Mini

For my fifth audition piece I wanted to show you this Pyramid Mini that I designed for my youngest son's 14th Birthday.  I wanted to make something he could keep so this seemed to be perfect to give in celebration of his special day.  I just had to use some of my Graphic 45 papers and these seemed perfect for a teenage boy.


The little drawer in the base of the Pyramid is a cute mini album - I haven't managed to put photos in it yet!!!  I loved using the pattern of the harlequin paper to add interest to the spine of the mini.


I was originally thinking an exploding box would be a great way to make a keepsake card but as you can see as I designed it it became so much more.  I am in my element when I am constructing with paper!


The pyramids explode open to reveal a birthday celebration centre piece!  I find that when I am designing a project like this that now and then something happens by accident that turns out to be so fab that I wish I could lay claim to having come up with it on purpose ;-)  Those bottle top embellishments are what keep the centre pyramid from opening all the way out and doesn't it look like that is what I intended all along!!!?


I had such fab feedback from my Pyramid Mini design that I taught it in a workshop recently so there are now 8 other pyramid minis out there plus this next one!  I made this pretty version from the beautifully feminine Ladies Diary papers.  This one is all mine!!!!


It was a real treat to do something so totally girly!  The new Graphic 45 Ornate Metal Label holders make fab drawer (mini album) pulls.


I kept the decoration a little more minimal for this piece as I wanted to see the gorgeous Ladies Diary papers!


The centre pyramid pops open to reveal a pretty layered flower nestling in more pretty lace.


I don't know what I am going to put in the mini at the moment but I think it should be something romantic and dreamy just like these papers.


...And Last But Not Least!

Project 6 - Lucky Tag?

I couldn't finish my audition post without making a tag!  Anyone that knows me knows I love taking time out to make a tag or two......or three.  Last year I made so many I decided to put them on my wall for inspiration!  I find they are the perfect way to try out ideas and to try something new and of course to use up all the tiny pieces of paper I squirrel away!  I had plenty of Graphic 45 snippets to rummage through but I decided I really should use some more of the paper that began my passion for Graphic 45 designs the very first piece of paper I ever bought from a Graphic 45 collection.  Here it is before I started on my tag.  As you can see I have only used a small piece so far and carry it with me always!!  One thing that puzzles me though is how it got the name Bees Knees?


I started out with some Graphic 45 packaging and decided to try to make myself a lucky tag!!


I have used a bit more of my precious cherry paper which I have christened 'my Lucky Paper'.  I made a Wheel of Fortune to spin.....I did think about loading the spinner in my favour but I couldn't make the numbers work!


 So with my odds being even I gave myself a whole shaker full of stars to wish upon and then just in case........


.......... I delicately cut out a four leafed clover and captured it in a locket.


And here is, what I hope will prove to be, my lucky tag!


This was without doubt the most preparation I have ever done for an audition/interview and I have enjoyed every single moment.  Thank you for this wonderful opportunity and  I really hope I have managed today to show you the passion I have for designing, teaching and paper crafting.  I have done all I can do to make my dream of being picked for the Graphic 45 Design Team come true and all I can do now is hold on to my lucky tag, make a wish and press the button to post.


Helen
X
Related Posts Plugin for WordPress, Blogger...