Wednesday, 18 September 2013

12 Tags of 2013 - September

Here is my September tag for 12 Tags of 2013.  This tag made me want to shop for more stencils!!!  It also let me play with my newly acquired Distress Glitter!!!!  Any excuse I know ;-)

I think it was the mixing and matching of Distress Product as I wanted to use my Glitters that led to the tag you see before you.  I didn't have the right colours of Distress Stain but did better with the Distress Paints (both in the gradually collecting process!!!)  I know you are reading this and empathising with me ha ha !   Crafters are selective hoarders don't you agree ;-)


My Distress Glitter Collection so far comprises Peacock Feathers, Mustard Seed and Shabby Shutters so that became the colour scheme for my tag!  I glittered and Glossy Accented my butterflies fussy cut from the paper you also see before you.  There is a texture paste resist in there somewhere!  I think because I used Distress Paint it has blended in a bit!!!


Another new product I used was the Industrious Stickers.  You can see my happy accident on this close up.  Where I didn't quite line up my stickers back to back the sticky caught the Peacock Feathers Distress ink and I really like the result!!!  I love the stickers I just wish there was more of them in the pack!!!!!


Here is my collection building up nicely one crafting month at a time.  It is fun to look back and see all the techniques we have tried and what they inspired us to do.  If you don't already play along with this monthly challenge and love to get messy with inks and paints then why not follow this link to Tim Holtz 12 Tags of 2013 and join in the fun.

I have an online workshop available to show you how to make my tag storage and display unit.  If you would like to make one you can purchase the video workshop and full photo instructions from my blog or my ETSY shop.

A video of how I got from Tim's Inspiration to my Interpretation is coming soon!!!  A watched uploading video never uploads ;-)  (new interpretation of old saying 'A watched kettle never boils!!!')

Finally after an aborted upload here is the promised video:


Thank you for visiting me today X

WOYWW 224


Hi fellow desk hoppers.  Here is my video desk this morning and considering I have filmed two videos over the last two days it is relatively calm and tidy.  Particularly as one of those videos was for my September tag (12 Tags of 2012) which normally calls for collecting copious amounts of stash on my desk while I make decisions about which way my tag is going to look!  So not too much of a tidy up job for me this morning!!! ;-)


Here is a close up of the results of all that filming.  If you want to know how to make the beaded heart that is my latest free video tutorial which you can get to by clicking here.  Today I will edit the tag video and get it posted to 12 Tags of 2013.

I have a relatively quiet day today so plenty of time to go desk hoping for a while!  WOYWW and Pinterest two activities sure to enthral me so I do not notice the hours slipping by!!!  If you are just passing and want to know why I am showing you my desk this morning then please follow this link and join in a world wide desk hop!!!  It is great fun and you meet lots of lovely WOYWW folk along the way.

Part of me is glad we can't offer coffee and cake (or Percy Pigs) to our visitors or we would end up thudding rather than hippety hopping across the craft desks of the world!!!!

Wishing you all a happy WOYWW and thank you for popping by and saying hello X

Tuesday, 17 September 2013

New Tutorial from a New Angle!!

I have just posted another free tutorial to You Tube and from an entirely different angle!  As I mentioned yesterday I learnt to flip my video in iMovie!  Who knew????? Not me.  I think that is one of the disadvantages of being self taught.  You learn the bits you use but do not necessarily find out all the possibilities of a software package.

This tutorial will show you how to make this pretty beaded and buttoned heart.


I have made several of these hearts for Christmas and they look fab hanging from drawer and cupboard handles.


This one was the first one I ever made and as you can see it is less encrusted in beads and has more wire showing which is also a fun folk art look.  I made this one in the colours of my bedroom and it hangs on my bedside table.


These pretty hearts make thoughtful gifts and this one I gave to my husband on our 28th wedding anniversary coz I luv 'im!!!!!

So if you like these pretty beaded trinkets and want to give it a go then here is the link to the tutorial.  Hope you like it and and make a beaded heart of your own.  Let me know if you do!!!


Thank you for popping by X

Monday, 16 September 2013

Callum's Room Update.

Just a quick post before tea!  Thank goodness the painting is all but finished!!! The carpet is laid and the wall paper is up.  Callum is really pleased with how things are taking shape.


I used my Cricut to cut out the words for my mural in vinyl and it worked a treat!  My next job is to paint the sofa!  I am going to use Distress Paints and the plan is the Callum will help and the sofa will become a colourful statement piece!  A little Interior Design terminology ;-)

Here is a close up of the new home for Callum's Guitar and if you look closely at the edge of the wall paper you will see I have used TH Tissue Tape to edge the Photo Mural  It worked perfectly and it covered up an untidy edge where I didn't quite get to grips with the craft knife I used to trim along the skirting board and coving.


Hubbies next job is to create the shelving in the alcove above the guitar and above the bed.  We are now saving up for a 3/4 bed so Callum has room to spread out a bit!!  I noticed Callum put his shoes and his uniform away in his wardrobe when he came in .....Result!!!!

I had a bit of a result too today.  For a while now you may have heard me talk about researching a camera rig that would allow me to film tutorials from my view point.  I think it was a case of 'can't see the wood for the trees'.  I was so focused on the rig that I didn't think to look to see if imovie could flip my video.  Thanks to my pal Helen and a link to a very quick tutorial I now have the power!!!  No extra expense and one extra click per film clip.  So if you are reading this Helen I will tape my next Art Journal video the right way up and dedicate it to you!!!!

One final thing I thought you might like to see..... Here is a layout that I made sometime ago to celebrate beauty shining through in the face of adversity.


Here is a close up of the sunflower growing out of the old brick work....Amazing!


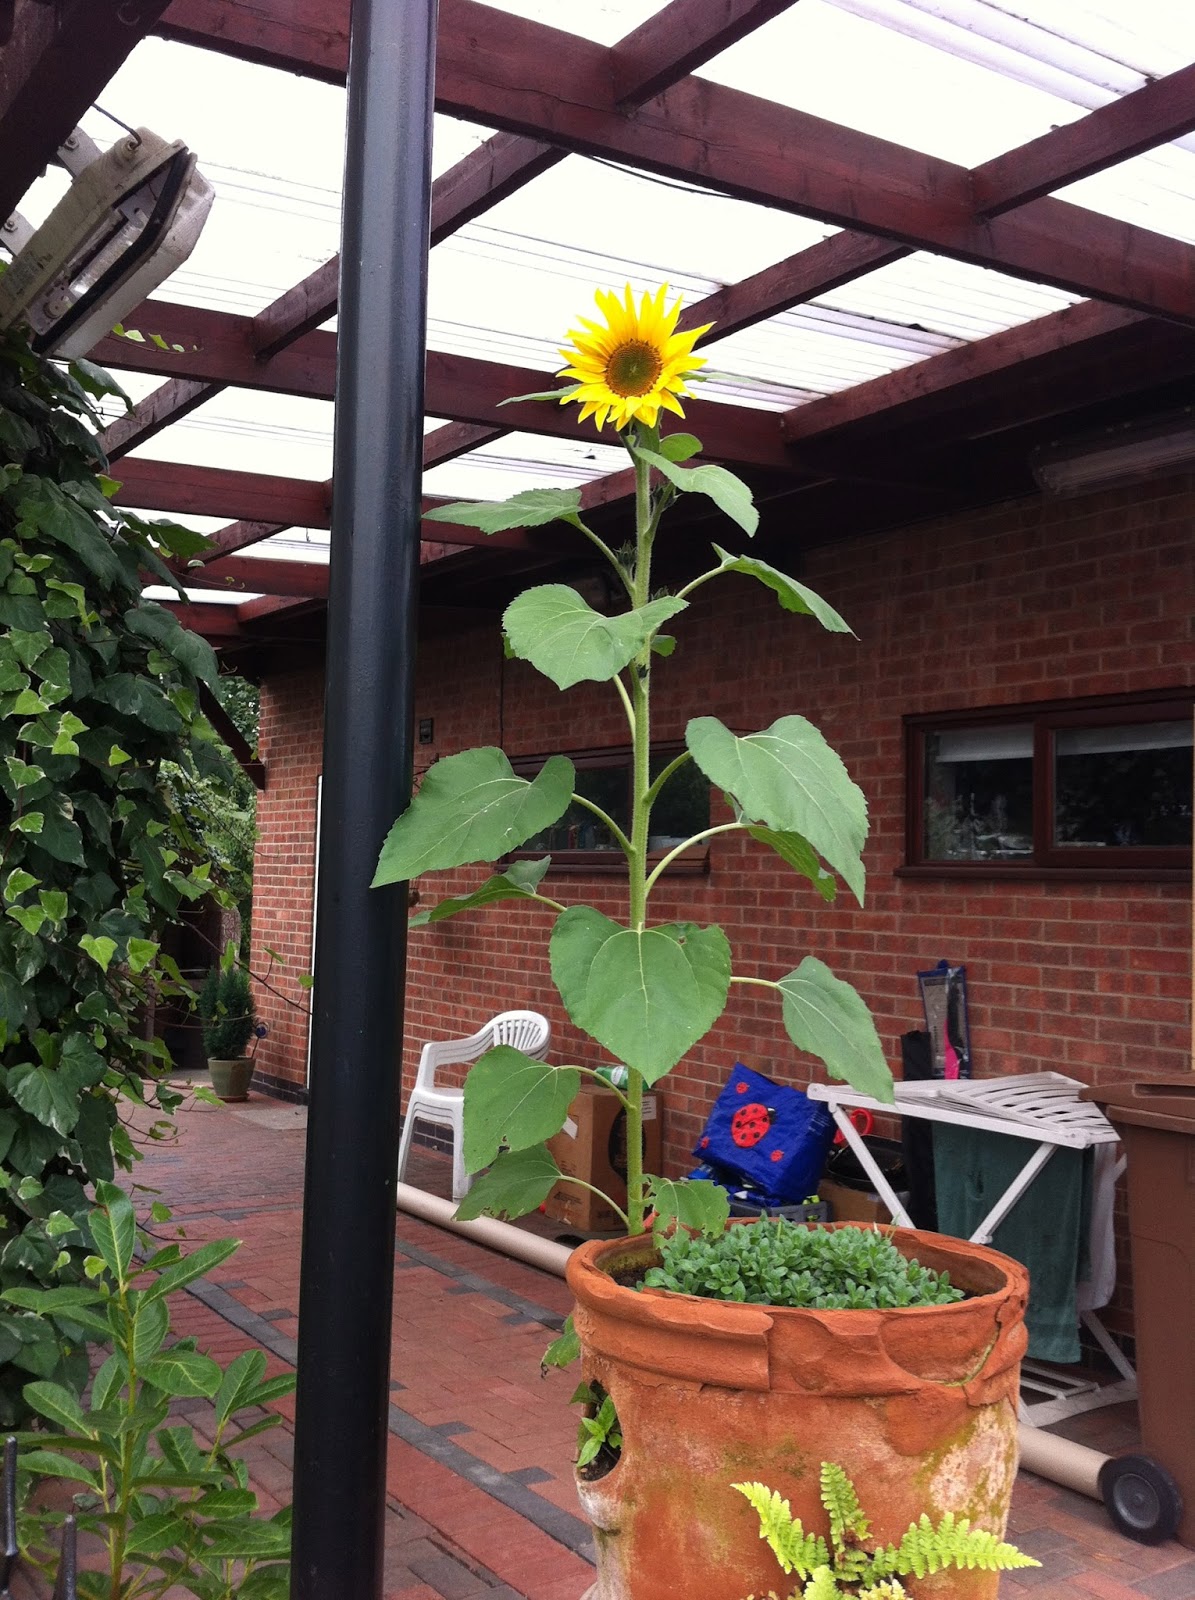
Now look what grew out of my strawberry tower this year!


No Strawberries as you can see!!!!  The ferns and the Sunflower just appeared!


Please excuse the junk in the background of the photo - we are getting ready for a car boot sale!  Concentrate instead on the lovely sunflower that magically appeared this year.  I am glad it is a miniature on rather than  a giant one!  You can see the windows of my craft room too in this photo.  Unfortunately I can't see the sunflower just the roof of the carport when I am sat at my desk :-(

That's it from me today except to say look out tomorrow for a free You Tube tutorial to show you how to make a wire beaded heart that makes a great home decor item or thoughtful gift......and of course it is filmed using my new improved camera angle!!!!

See you tomorrow and thank you for popping by X

PS Please subscribe if you like my blog.  Let me know if you do by leaving me a comment and I will send you a free tutorial to say thank you for joining me on my creative adventure X

Sunday, 15 September 2013

Halloween and Steam Punk Spells!

Hope everyone is having a fab Sunday

I have a huge list of things to be getting on with but they are all fun so I don't mind.  I have had a fab weekend of crafting with my friends and I thought I would share a layout that I actually managed to finish in between the chatting and eating of cake.  Alison gave us the perfect excuse to eat copious amounts of cake as she organised a Macmillan coffee morning and so we had a tasty time doing our bit for charity.  Great cause and great cake Alison.  The lemon drizzle was scrummy!!!

Graphic 45's Steam Punk Spells recently fell into my shopping basket and I have used a little bit to make a halloween layout.  These photo's were taken 5 years ago before Callum and Charlie (in the main photo) got too old for trick or treating!!!!


There is a bit of a glare on the photo so I have taken a close up of the little pocket watches I created.  I was pleased with how these embellishments turned out.  They look cute on my spooky page!!!  I fussy cut a couple of watches from the G45 paper and then I attached a tiny Tim Holtz clock hand with a brad and finished them off by cutting up some circle bubble plastic wrap and it was the perfect size to finish off a realistic looking fob watch what do you think?  Easy peasy but the perfect embellishment for my layout.


I made a couple of little tags (tucked in behind the Mummy and Witch photo ready for some journalling about the spooky exploits of trick or treating at Halloween.  That holiday is fast approaching again.  I know it is not as big here as in the US but I love it.  Even though the kids have grown out of it a bit I am still going to decorate for the trick or treaters that pop by.  I'll share some photos of my creepy garden when the time comes.

Just a quick post today and I am back to ticking off the jobs on my list.  One down lots to to........!!! Have a great week and thanks for popping by x

Wednesday, 11 September 2013

WOYWW 223

Busy day ahead for me final prepping for class today.  Yesterday afternoon was spent designing two cards and this is the aftermath minus the paper debris!  I did tidy up a bit yesterday.


Some times a card takes a while and this not very traditional Christmas card did take a while to come together.  I had an idea in my head but I struggled with it for a time.  I loved using Distress Glitter on it.  It was perfect.  A sugary coating rather than bling.  Great for the non traditional look I was going for.

Then I had to design something that didn't take as long for the second card and it came together quick as a flash - sometimes it is like that.  So as you can see I am easing my class and myself gently into Christmas!!!

At the end of the desk you can see my New Theresa Collins Christmas Cottage Papers.  The are fab and I am looking forward to running a Christmas Workshop with them!!!!!

Can you see my growing collection of Distress paints peeking out from behind the Chinese containers....no Chinese left only glue and glitter now!!!


Here is a close up of the Christmas Card - love the sugary finish that the Clear Rock Candy Distress Glitter adds to the card!....Hope you can see it a bit on the photo.


And this is the quick card design.  Perfect for any colour combination of card stock.  I am in love with book pages at the minute.  I bought a lovely pile of old books when we went out on a day trip recently.  Seemed rude not to get some use out of them really!!!

If you have enjoyed this peek at my desk this morning then I suggest you follow this link and pop along to see what Whats On Your Workdesk Wednesday is all about - You will love it!  Happy WOYWW to you and thank you for popping by X

Tuesday, 10 September 2013

Announcing my Latest online Workshop - Available to Purchase now!


I am always so pleased to get to this point.  The project is designed.  The videos have been filmed edited and uploaded.  The Photo Instructions have been written and now it is time to put the product on the virtual shelves!!!

Announcing the Waterlily and Dragonfly Projects online Workshop!


This online workshop comprises 6 videos and full Photo Instructions.  You will learn how to make a gorgeous paper Waterlily (all templates included), an iridescent beaded Dragonfly, you will learn how to create a watery background effect with Distress Inks and Dylusions sprays and then I show how to use them to embellish a pretty tag and a fabulous easel card.


Once you purchase this item you have unlimited access to the workshop videos.  You can join me in my virtual classroom any time day or night and from anywhere in the world!

This workshop can be yours for only £5.00.


My Angel and Copyright Policy is outlined on the last page of the Photo Instructions or click on this link to read them now.

This project can be purchased from this post right now!!!  Hope you like it.  You can use the Waterlily or Dragonfly on lots of crafting projects so you are not limited to just the projects I show you how to make.  I have beaded dragonflies fluttering about my craft room!

In the future it will be available to purchase from my left hand side bar or my ETSY shop.

Brrrrr it is chilly in my craft room today I think I need something warming for lunch!!!

Hope you are cosy wherever you are!!!  Thank you for popping by X
Related Posts Plugin for WordPress, Blogger...