Tuesday 28 May 2013

Graphic 45 May Challenge

I am taking part in the Graphic 45 May Challenge and I thought I would share my layout here too.


This layout was going to include a vine of flowers I made using some of the die cut flowers from the Secret Garden collection but the more the design evolved the less they looked right.  It works like that sometimes.  I spent quite a bit of time getting the details into this layout and much fussy cutting in front of the TV!


I love to find ways to incorporate hidden journalling into a layout and the May Flowers 12 x 12 had the most gorgeous post card designs which I created this pretty panel with and when you lift it up it reveals......

......a great place to journal and a spot for another photo too!  I fussy cut around the ribbon and tucked a photo of hubby and I underneath so we are bound together forever!  You can see I haven't journaled yet as I have decided to make my layout into a canvas as these gorgeous Secret Garden papers will look fab in our bedroom so I may get romantic with my journalling ;-)  So I am sparing your blushes and mine !!!


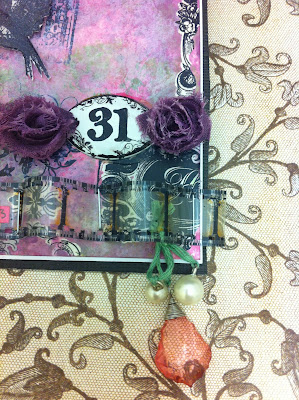
I have two secret places to journal if you count the little pocket and tag which is from the Secret Gardens Tag and Pockets die cuts - these are so cute.  I shaped some of the flower centre die cuts with my embossing tool to make the little paper buttons top left and bottom right.  I spent ages looking at all my letters.  You know how you do and you can never find the letters you want for the title you have in mind so I decided to mix and match letters and to coordinate them by painting them white with my new Picket Fence Distress Paint and then I added silver gilding.  As you can see I accented the whole layout with silver gilding and I am really pleased with the way it turned out as it compliments the shabby chic look of this layout without overpowering it with too much bling.  A couple of charms strung on strings of pearls and I am ready to put this onto a box canvas.  I might add a bit more of the fussy cut blossom branches to the edges of the canvas as I spent so long cutting it all out!

And I still have my flower vines so I am going to use them on another little project and will share them later along with my finished canvas......so long as there is no peeking at the journalling mind!!!! ;-)

Thank you for popping by and brightening an otherwise very grey day! x

Friday 24 May 2013

Tag Tuesday - Time for 'T'!

Hello there.  Running a little late again but here is my Tag Tuesday for this week - Hope you think it's TWEET! ;-)


Gradually moving into the blues of the Distress Ink rainbow with Evergreen Bough.  My T patterns this week are TWILE on the leaves, TADPOLES on the sun (although I think they look like laces) and the most feathery T pattern I could find TAGH on the birdie!  Just had to give him a googly eye to finish off this happy bird tag.

Better get my thinking cap on for my Zentangle Tag storage idea as the end of the alphabet is looming fast.  I hope we finish with the sun shining as it is horrible again here today.  Winter is trying to come back I think!

It was my birthday yesterday and hubby took me to my favourite little Shabby Chic cafe for lunch and we arrived in bright sunshine and left in Hail!  Bizarre! Talk about changeable May and it is no better today.  They do say though....

'Cast not a clout 'till May is out'

And I for one definitely will not be casting a clout!  Brrrrrrrrr.

Thank you for popping by X

Monday 20 May 2013

Fun use of an Embossing Tool!

Hi everyone - Just had to share this fun little post with you.


Take one embossing tool and a crafter with time on her hands and see what happens?!...........


Ha Ha!  Firstly please excuse the 'staying in my craft room today' hair do!  Even my elastics don't match!........ and don't mention that I have left  all my cupboard doors open nor the big pile of stuff to put away on my spare shelf - I mean chair!!!!

Focus instead on the nail art!  I saw a photo of pretty candy coloured nails with polka dots on Pinterest and thought .......'I am going to try that,' and some time later!!!  Voila!   I think I need to be a little more delicate when I dot but not bad for a first attempt!  I have admired many nail art design photos and always thought to myself .......'not something you can do yourself' (what about your other hand issues)  But this was so easy.  Paint nails and then when they are dry dip your embossing tool into a puddle of varnish and dot away!

If you like painting your nails and want a fun look I recommend it!  I think I might try red and black and make ladybirds!  They might not be sophisticated but they are fun!

Thanks for popping by x

Wednesday 15 May 2013

Trash to Treasure and 12 Tags of 2013 - April!

Me again - two posts in one day!!!  I uploaded another video in my series of 12 Tags of 2013 and I have caught up with my April Tag.  I did have to wait to do this one as it was the perfect excuse to try out some of the new Distress Paint!!!!  Any excuse to shop right?!  So following Tim Holtz technique tutorial for my background and using his fab Dragon fly tag as my inspiration this is where I ended up.....


You can see the foiling I was telling you about earlier popped up again on this tag!  I really liked the Distress Paints.  I do use acrylic paint and I really liked the versatility of this product.  Easy to apply direct from the bottle, great coverage but doesn't overload the paper and dries with a smooth finish which is great for stamping over.  Needless to say I will be adding to the 4 bottles I purchased to try out this faux patina technique. Ha ha!

Here is the link to the video I made of how I got from A - Tim's Inspiration April Tag to B - my finished April Tag.


It's looking a bit messy on my desk there but this shot is nothing compared to the state of my desk when I had finished playing with my new Distress Paints!!  Steel yourself.......


See how I push everything out to the sides so I can keep my video frame looking all neat and tidy ish!!!!

The reason I am posting this as a Trash to Treasure Post as well as 12 Tags of 2013 is because I did actually use my plastic wrap to make the little bubbles to capture my bugs under.


I know it is a bit naughty to keep bugs in a jar but this is ok right?!!!  I am a bit late doing this but I promised to send a card to someone that commented on my Last Trash to Treasure Post and the winner is.........The lovely Mo!  I hope you read this Mo.  I will get that card off to you soon with a little surprise for you too.  Better Late than Never ;-)

I am off to finish off one of the tutorials for my Etsy shop.  I have two projects almost done and I keep way laying myself.....Focus Helen.....Focus!

Thank you for popping by X

WOYWW 206

Hi fellow desk hoppers!  Another grey day here - who has stolen the sun?  Come on now share and share alike ;-)


On my desk today - and skilfully hiding the bulk of the messy bits as I take my photos!!!  At the weekend I had fun trying out a couple of products that I want to feature in my next card class.  One of them is a blast from my childhood.  Did you ever do one of those pictures where you start with a black board and then scratch away at it to reveal the metal beneath?  Well this is that with a new lease of life!  I had great fun die cutting, scratching, embossing and sanding it as my test samples show!  I also had a play with gilding flakes (do not sneeze when you are using them!!!) and top right is a card that I tried different ways of applying the flakes.  I had great fun just playing.


Now that I know what the products can do I need to design two cards to teach in my next class.  If I have sparked an interest then just to let you know I got the Foil and Flakes from Creative Expressions.


In contrast next to all that glitters is a much more delicate project.  I am working on a Graphic 45 layout which I think may end up mounted on to a canvas as I have made two very delicate vines of flowers that definitely won't like being squished into a page protector!!!

Wishing everyone a happy and creative WOYWW and if you have no clue what that means then follow this link to join in the fun.

Tuesday 14 May 2013

Tag Tuesday Alphabet - The Letter S


This tag was inspired by a blog friend of mine, Shoshi.  She created the Zentangle pattern SPAWN and I wanted to use it on my tag this week and the tadpole pattern inspired the rest of the design.  It seemed apt to me to place SPAWN in water and then this Lily pond tag appeared!  I used the dragonfly template from my Zentangle card blanks that I sell on line and they fit perfectly as embellishments on my tag.

The other patterns this week are; on the lily pads SNAYLZ TRAYL, in the sky SUNRAY and on the dragon flies wings SHARDS.  If you want to see one of Shoshi's gorgeous Zentangle pieces then please visit her blog.  She has a much more expert hand and delicate hand than me!

I found a really cool irridescent ribbon in my stash that pulled up into a lovely bow to top off my tag and match the Glittery Stickles I used on my fluttering dragonfly wings.

As I was downloading the photo of my tag I also down loaded some photos of our dog Comet that I took this morning in the park and I just had to share this one!


Look at him.....butter wouldn't melt ;-)  Don't worry though a little while later and after a dip in the stream.......


......and a really big shake!  Hey Presto back to white doggy again!  If a little soggy doggy!

If you want to see more tags inspired by the Alphabet then please follow this link to Tag Tuesday.

Thank you for popping by X

Thursday 9 May 2013

Sarasota - Oh to be there right now!


This layout was in my to do Q on Wednesday and it is almost done.  As with many of my layouts the journaling spot is waiting for inspiration to strike.  These are photos we took on holiday in 2009 and boy do I wish I lived on a beach like this one in Sarasota.  The sand is like icing sugar and no matter how hot it got this gorgeous white sand remained cool.  No crazy ungainly dashes to the waters edge for us!  The main photo was taken in the morning and we were the only ones on the beach.  Just setting up camp for the day.  The photos of Mr Seagull were taken at the end of the day.  He came and sat next to us ... waiting for a tasty morsel no doubt.  Just us and Mr Seagull enjoying the last warm rays of sunshine.......it was idyllic!

Mmmmm I think I may have my journalling sorted.  Can I write small enough to fit it on!!

Thank you for popping by x

Wednesday 8 May 2013

Tag Tuesday on a Wednesday!

Who Stole Tuesday???!!!! ;-)

Here is my tag for the Letter R.  I made a spinner tag - can you tell I have just learnt how to make these?....they feature in my card class this week too!  Pass on the knowledge I say.  I am going to make a video of this fun embellishment to a project.  Another thing for the to do list.


There is only one R pattern on this tag and it is RAGZ but I did do two variations of it.  I like the one with the little rivets on it as it looks a bit industrial.  As I said before I made spinners in my tag and I tried to use the Vine app to make a small video of the spinners spinning - but alas although I managed to make the video I cannot seem to find how to get it on my blog.  I know it can be done but cannot work it out at the moment....watch this space!

As I turned my tag over to put the ribbons in I realised I had made a boo boo!  I stuck my tag to the wrong side of its green tag!  What a numpty ;-)  As I couldn't make the video I am sharing the out takes!!


Now I popping to Tag Tuesday to see what the letter R has inspired in the tag art world and then it is time to write my class tutorials....busy, busy.  Thanks for popping by x

I just found the Vine Video when I uploaded some photos from my phone so I hope this is going to work!


It's not HD but you can see the spin!

WOYWW 205 - I can't believe it is Wednesday Again!

It was the Bank Holiday that threw me!  We even had a lovely sunny day for it too!  If you invite friends over for a barbecue you might as well tell them to bring their umbrellas in this country!!!  Not this time though.  We sat out all afternoon and into the evening and I think the sun may actually be trying to break through the cloud today too!


I am sharing a different view of my desk this week. This is my 'Today's to do Q!'  From the right:

1.   Write up lesson tutorials and pack up all the card packs.
2.   Make this weeks Tag Tuesday tag (little bit of green, bottom right corner).
3.   Think about what I want to do for the 3 catch up tags I want to make for Tim's 12 Tags of 2013.  I posted the two you can see on my previous post if you want a closer look.
3.   Stick embellishments on layout, cut title and journal to get it out of the UFO pile.
4.  You can't see this one but just past that green folder on the middle right is my Mac .......post this and desk hop, hop, hop!

At the end of the Q of things to do is a pile of UFOs and if you look bottom left you can see into the black hole that has stuff in it that goes in and never seems to come out again!!!!  It may end up in another universe for all I know!!!!

Hope you are having a fun WOYWW.  If you are unfamiliar with the term then you really need to follow this link to the greatest blog desk hop in the world!!!

Mmmmmmm what shall I tackle first I wonder? ;-)

Thanks for popping by x

Monday 6 May 2013

Tim Holtz 12 Tags of 2013 - May Tag and Playing Catch Up!

I couldn't resist playing along after all.  I kept popping in on bloggers who where having such fun creating beautiful tags inspired by Tim's 12 Tags of 2013 that I just had to!!!!

Here is my tag for May.....


Although I didn't have Tim's rub-ons to try the resist technique he shows us this month, I did have some in my stash which worked a treat (eventually, as you will see in my video!).  I think the problem was one of size in relation to my tag.  I got there in the end though and I really love how this technique looks and will try it again (after a bit of rub-on shopping!)


I have decided to make a how I got from A to B video for each of my tags this year.  'A' being Tim's original tag and 'B' being my version of it. 


I think it should be quite interesting (I hope!).  I think May's video shows how each decision you make in the design process impacts on the next decision you take.  I think it illustrates what I love about this challenge and any other I have taken part in.  Whatever the challenge is no two crafters will end up at exactly the same point.


So here is the link to my May video.  Don't let this 12 minute video fool you this tag took me over 4 hours to make!!!.....and I enjoyed every single inky minute!  Thanks Tim.


I am a couple of months behind so this month I am also posting my February catch up tag.  I didn't have the stamp nor a Queen of Hearts card nor even an Ace of Hearts Card but I didn't let that stop me playing along as you can see!........


Might try this laced up detail again on something else........it looks so pretty.


 If my Ace had be Hearts and not Diamonds I may never have thought to do this pop up heart!


If you like my tag and want to see how I did it I made another A to B video.  Hope you find it interesting.


Inspiration from Tim and Interpretation from Me!

Thank you for popping by and a big thank you to Tim Holtz and his 12 Tags of 2013 X

Sunday 5 May 2013

Two more ideas for The Surprise Package Template

Hope everyone is having a fab Bank Holiday weekend.  I am just waiting for a video to upload and I thought I would post some more ideas for anyone that has bought or buys my Surprise Package Template and Video Tutorials.

Here is a wedding version.  There is a little pocket on the inside of the envelope for that gift card wedding present so popular these days.


I think it would be fab to load the inside up with confetti so when the envelope is opened and the box jumps out........you get the picture!


Here is a great version for a little boy.  My friend Barbara made this one.  So cute and I love the colour scheme.


Barbara altered the size of the envelope slightly so she could use the fab chipboard robot and Chipboard embellishments to decorate the pop up box.


I think Benjamin is going to love it!


My friend Deb sent me these photos of her Disney version of the Surprise Package.  How cool does Mickey look?


Micky and the birthday greeting fold down and pop up when the box springs open - clever!

If you fancy trying my template out and making your own Surprise Package design then please follow this link to my Etsy Shop to buy yours with full video instructions as well as step by step photo instructions to show you how.

I was so excited to see what Deb and Barbara made that I asked them if I could share their creativity with you.  There are also other design ideas on my You Tube Channel if you want to check them out then follow this link and watch the videos marked The Surprise Package!

Wishing you all a wonderful Bank Holiday Monday - May Day.  We are having a barbecue......oh no did I say that out loud?????  That is sure to tempt the rain clouds over ;-(

Thanks for popping by and watch out for another post tomorrow when my video uploads!!!
x

Wednesday 1 May 2013

My Buttons Aren't Finished Yet! This is a Sticky Post Please Scroll Down to see the Latest

Please do not try to buy my patterns from my Blog yet as I haven't quite finished setting it up!  I need to test that they work - sorry for the delay.

If you do happen by this way and want to buy a template then click on this link and go to my ETSY shop where all is working like clockwork!!!!

Thank you for your patience  x
Related Posts Plugin for WordPress, Blogger...