Tuesday 31 December 2013

12 Tags of 2013 - January!!!!!

Yippeee!  I have finished my tags for the 12 tags of 2013 challenge.  I have had a great time and hope that you have enjoyed the videos I have made of each of them.  Showing you how I got from Tim Holtz's inspiration to my interpretation!

Here is my January tag which although very late seems appropriate as we are about to head into January 2014!


I finished the tag at 3 this afternoon and have since waited for the movie file to upload to my Mac (went shopping whilst that happened)  At 5 I sat down to edit and at 7 ish I pressed the button to finalise the movie.  Apparently there are still 4 hours to go for that so I am not going to get it uploaded before Big Ben heralds in 2014 so it will be the very first movie I post for 2014.


I just wanted to take a moment as I share this tag with you to say a great big THANK YOU for your support and kindness throughout the year.  I hope that I have provided some inspiration along the way and I look forward to sharing more creativity and friendship with you in 2014.


I am not making my usual resolution to loose weight this year as it never works!  I am trying a little reverse psychology for that one ;-)  But I am resolving to do all I can to turn my passion for crafting into a healthy online workshop business and have lots and lots of designs in the pipeline to share with you all.

Wishing you a Healthy and Happy New Year with plenty of time to enjoy your creativity in 2014………..oh and a few 'new' items of stash just incase your supplies are getting low ;-) !!!

Have a wonderful New Years Eve and I will see you in the New Year.

……And for the last time this year………

THANK YOU FOR POPPING BY X

12 Tags of 2013 - October

Following Tim's lead I kept the Halloween theme for my October tag as you can see.  I had lots of glittery fun and even had a go at colouring my own Distress glitter as you can see in the video.  It worked a treat so I will definitely be trying that technique again.


This tag definitely has the fun factor.  Even the scary spiders look cute all dressed in glitter!!!  Here is the link to the video that shows you how I got from Tim's inspiration to my interpretation.


Today will be filled with creating my final tag of the year which just happens to be the one I missed right at the beginning of it. It is a great way to mark the ending of 2013 and the beginning of 2014.  Watch this space to see if I manage to get it in on time.  It is going to be tight.

Thank you for popping by X

Monday 30 December 2013

12 Tags of 2013 - December Tag!

I posted November's tag and video yesterday, December tag is now complete - October tag is made and filmed and is waiting to be downloaded so I can edit it…….so that leaves January.  I need to sit and muse a while before I start the tag that I missed right at the beginning of this year.  It doesn't seem two minutes ago that I decided not to play along with 12 tags of 2013 and then within a couple of months I could not resist the fun and even decided to make videos for each of my tags!

I have to admit I have really enjoyed it though truth be told I really should concentrate more on my online workshops and to try to start earning some money from my passion!!!  May be that should be the  New Year's resolution I make this year rather than the usual 'must try and loose a few pounds'!!!

December's tag was all about using two products one which I had and one which my lovely Mum gave me for Christmas!  Tim used them to great effect to produce translucent and delicate poinsettia and holly embellishments.  I loved the look and decided (mainly due to my limited die collection) to make frosty snowflakes.  So without further ado here is my December tag.


I thought my snowflakes needed some focus so I also took inspiration from a recent art journal page I shared.  I really love this cute snowman catching snowflakes on his carrot nose.

Here is the video that shows you how I got from Tim Holtz's inspiration to my interpretation.  Hope you like it.


I'm off to link up to Tim Holtz 12 tags of 2013 and if you are new to this challenge and if Tim launches a 12 tags of 2014 I would recommend playing along.  Always something new to try and of course to buy!!!!  But best of all it is a challenge you can always take with whatever you have in your stash.  It's all about the interpretation……

See you again soon with October's tag.  January is going to be a real race against that New Year Clock. Wish me luck and thank you for popping by!!!! x

Sunday 29 December 2013

Three Tags to Go!

Here is my November tag for 12 tags of 2013!  A bit late I know.  I seem to have been playing catch up all year with this one!  I have 3 tags left and 2 days left of the year!!!!!  Will I make it in time to fulfil the challenge?????


Tim's tag featured a lovely chalkboard technique but I had absolutely none of the supplies he used!!!! Unusual not to have any.  I obviously haven't been shopping enough this year ;-) Tee Hee.  Note to self ……Must try harder in 2014.

As you may know I have been making a video of each of my tags so I can share the journey I took each month from Tim's inspiration to my interpretation.  I have really enjoyed playing along again this year so I really hope to finish this one in time to feel virtuous!!!!


So here is the link to my video.  Hope you enjoy it and that you are having a lovely time after the crazy run up to Christmas.

See you again soon.  Thank you for popping by X

Sunday 22 December 2013

Yule Logs

I cannot lay claim to this idea and I made them that long ago that I can't remember where I first saw these cute logs.  I do know it was pre any hint of Pinterest!!!!  It is a fun idea and something you can get the kids involved with so here are mine to give you some inspiration.


The fab Santa at the back of the group was a gift cleverly painted by my Sister-in-law (also called Helen!).  She likes crafting too as you can see!  In the front are the log characters I painted 11 years ago now! Family heirlooms now that are part of our home decor each Christmas.


I think the close ups of the faces are all you need in the way of  instructions as they really are simple.  You need dry logs with a flat base and an angled top that creates the perfect place to paint Santa's face.  For Santa use acrylic paint and paint one third of the log red for the hat - one third skin tone and one third white as a base of the beard.  Add a strip of white for the fur on the hat and you are ready to add the details.  The nose is a painted glass drop and the beard and fur are snowtex and glitter and finally the pom pom is a small polystyrene ball with a wedge cut out of it and more snowtex and glitter.  They are great fun and the kids can get involved too.


This elf was painted by my youngest Callum when he was 4!  He did the main part of the painting and I helped with the details and he enjoyed dabbing on the snowtex and sprinkling on the glitter.  Then he spotted Santa's footprint!


He painted it black and we have ended up with a lovely reminder of Christmas crafting together.  I hope this gives you some festive inspiration.  What decorations have you made with your kids that have become treasures you carefully unwrap each year when it is time to getting festive once more?

Not long now so before the festivities get underway in earnest so I just want to wish you and those you love a wonderful Christmas wherever you are in the world.  Thank you all so much for your support and encouragement over the year.  Your kind words always make me smile.  I hope Santa puts lots of crafting goodies in your stocking and that you get a little me time to try them out!  I am making my final lists in the hope that all is ready for the big day and we are looking forward to spending time with my Brother and Helen tomorrow.

WISHING YOU ALL A VERY MERRY CHRISTMAS AND A HEALTHY AND HAPPY NEW YEAR.  SENDING YOU A GREAT BIG VIRTUAL HUG.

See you again soon and Thank You for popping by X

Friday 20 December 2013

Stockings are hung by the fire with care...........

I love to see a festive fireplace even if it does have our TV sitting on the mantlepiece until we get our screen mounted on the wall!!!!  One day………..

Here is what it looks like most of the year.  Yes.....I do still have my halloween potion bottles on display!!!!  They have been wrapped and put away now I promise!!!!


So with a wave of my decorating wand and some greenery out of the garden we are ready for Santa's visit!


Hmmmmm better not leave the candle in the middle lit …….poor Santa ;-)

Check out the stockings hung with care....actually they are felt and magically stick to the brickwork!  I made these from kits.  They took me a while as I am not a natural needle woman but I got there in the end and love unwrapping them to display them as much as my children have loved checking out their contents on Christmas morning.

I always leave my fireplace until the end of my decorating so that the greenery lasts.  It is crispy by the time I clear it all away and boy does the holly get prickly....note to self.....get your gardening gloves on this year!!!!

Hope your preparations are going well Ho Ho Ho!

Thank you for popping by X

Wednesday 18 December 2013

Paper Baubles - a tutorial!

I know this may be a little late as you will no doubt already have your tree up and decorated but it is never too early to start again for next year right!!!!! ;-)  Mind you if you need a few extra baubles to hang from garlands or your tree this is a fun and inexpensive bauble to make.

You can decorate them however you like and coordinate them perfectly to your existing decorations.  Here is the snowflake design that hangs on my tree.


....and here is a tutorial that shows you how to make a cute polka dot Poinsettia version.


Hope you are getting all your Christmas preparations completed on time.  I am running late again this year but somehow we all seem to get there on the day don't we?!!!!  My son gifted me a horrible cough and cold so I am dosing up with Lemsip at the moment and trying hard not to pass it on as I go about my merry Christmas way!!!!  Tonight I am helping friends get some Surprise Packages completed.  It was fun using my design for something that will promote their business.  I hope the fact that the box jumps out of the envelope surprises their customers enough to ensure they remember to call them lots and lots next year!

Hope you like the tutorial.  Don't forget to let me know if you give this a try.  I'd love to see what designs you come up with.

Thanks for popping by X

Thursday 12 December 2013

Christmas Pudding Gift Box Tutorial and free Template

Hi everyone

Just a quick post.  I managed to get that video uploaded and shared so I am posting the link here for you guys too.

Here is a cute Christmas Pudding that definitely won't make you fat!!!  It is a little gift box (you could easily turn it into a cupcake too)  I originally made this project to teach at a Christmas Card class and the idea was that you could use them on your Christmas dinner table to mark the places of each of your guests.  Add a little gift and they really do add a touch of whimsy to your Christmas table.

If you want to make some of these cute little gift boxes then here is the video link:


You will need to email me so that I can send you the template.  You just open it and print it on the thickest card your printer will allow and then you are ready to craft along with me.

This project is a big thank you to you all for your support over the year I really do appreciate the time you take to see what I have been up to and I hope that you have enjoyed the inspiration I have shared.  The link with my email address is on my right hand side bar.

See you again soon with some more Christmas inspiration.

Merry Christmas and thank you for popping by X

Tuesday 10 December 2013

Here's one I made Earlier!

Ho Ho Ho everyone!  I am feeling festive today.  Finally finished off the decorations and putting up the tree.  Only the rest of the house to sort out now.  As I decorate I take the opportunity to have a good old clean so as things get moved around to make one part of the house all pretty and festive the rest becomes neglected!!!!  Oh well I better keep on Santa's good list and get on with the housework.......later ;-)


Thought I would share a Festive Layout with you this morning.  I know it doesn't use what are considered traditional Christmas Papers but I think the Candy Cane stripe gives it a festive kick!  I love this photo of Callum and Mariah posing next to some giant fairy lights in New York.  I hope that you agree it has stayed the focus of the page. I think fussier Christmas patterns might have distracted.  Sometimes less is definitely more.  A big thank you to my friend Julie for cutting out my title on her brand new Silhouette!  Love that rounded font.  (Don't look at the Sihouette Helen.....Don't look....Dear Santa!)

I am tidying the part of my craft room where I film stuff so I can get a video I started last week finished off and shared.  I need to put my Mac in the workshop to be looked at so if I am not around for a while they have kept it :-(  I am hoping it is a small thing as I think one of the lights in the screen has gone off.  Surely that can't take too long........I am keeping my fingers crossed!  What will I do without it?  Pinch Hubbies laptop!!!!  Oh no.........back on the Naughty list it is then ;-)

Hope your preparations are running smoothly and that you get a chance to sit down and enjoy them with a hot cup of chocolate topped with cream and marshmallows - purely for the energy you understand!!!!

Thank you for popping by X

Thursday 5 December 2013

The Silly Season is Upon Us!

Hi Everyone

Just a quick post from me as I rush about getting things ready for Christmas.  Taking a time out to say hello and to let you know what I am up to.

I have been setting up for a class I am teaching tomorrow evening in between trying to get a head start on the decorating.  I got in the way of myself a bit by deciding to paint the kitchen ceiling!  Half way through the second coat I was wishing I hadn't had that bright idea!  But it really needed it and it looks so much better - don't need the light on it is so bright and white ;-)

Just thought I would show you some of the decorations that I have put up so far.  I don't know about you but I sometimes want to hang stuff that is Christmassy but I don't want to put another hole in the wall so I have come up with a couple of things that work for me.

On my wall I have a set of pictures I made:


But at Christmas time I put them safely in a cupboard and replace them with this:


I also have a clock:


Which I replace with my Christmas Time version!


No extra holes!  Get the picture ;-)  I will be back again soon with more updates on my decorating progress.  You will see it takes me a while - hence the early start so I don't feel quite so frazzled!

Hope you are having lots of Holiday fun.  See you again soon - Thank you for popping by X

Friday 29 November 2013

Christmas is Coming....Let it Snow, Let it Snow, LET IT SNOW!!!!

I love Christmas and it is the icing on the cake when it snows!  I know, I know, it is not everyone's wish but it is mine.  A white Christmas.  Mind you I am fussy about it.  It has to be crispy and white not the melty slushy yukky stuff we so often end up with here in the UK.

I am putting in my request for a blanket of white that makes everywhere beautiful and sparkly and picture postcard perfect.  It has to be a big enough dusting for children to sledge on and make snowmen  and it has to stay long enough for our roads and pavements to be cleared but everywhere else to be glistening and wintery white.  Snow that knows where to stick!  Ha Ha I am not asking for much am I?

I love it when you look out of the window and you see those first fat flakes starting to fall.  At night it is the most perfect of all.  It brings with it a special feel, almost a soft quiet hush as the snowflakes gently flutter out of midnight sky.

As you can tell I am feeling Christmassy today.  The silly season is about to start and I am sharing a Christmas Art Journal video that I hope will spread a little Christmas Spirit.


I think this design would work as a Christmas card too.  Just scale the design down and ho ho ho....another card to add to your pile of cards to be written and sent to those you care about.

Talking of Christmas Cards I am going to do a stock take of my handmade cards as I have been stock piling them in the hope that I will be organised and get them out the door and on their way early this year.......Might need to start writing them early next week.  Might even be my first tag of my Christmas Tag Countdown!!!!!

Hot Chocolate and Christmas songs playing as we write our Christmas cards to remind our family and friends near and far that we love them and are thinking of them.  Perfect start to the holiday preparations.  I may have a date with my craft room this weekend then finishing off cards and matching them to envelopes so they are ready to write.

Hope you like the video.  Wishing you a fun run up to that very special day.  Thank you for popping by X

Tuesday 26 November 2013

Brrrrrr It's Cold Outside!

Evening All ;-)

On Friday I taught an all day workshop for my Christmas Tag Countdown.  It really got me in the Christmas spirit.  It is a project based on my online workshop for the Tag Storage Unit (for sale on my side bar on the left or over at my ETSY shop).  So to tempt you with a Christmas version I have made a tutorial for the Advent Tags that will build into either a countdown of your Christmas preparations or can be used as an unusual photo album for your Christmas photographs this year.


I hope you agree it looks fab and I am sure it will compliment your Christmas Home Decor too.  There is room on the back of each tag for journalling and a photo and the tutorial gives the measurements for a non journal version if you averse to writing!!!!  It also shows you how to increase the photo capacity of the tags too.

The tag tutorial is free (below) and the online workshop for the storage unit is only £8.  You get the links for access to the workshop anytime day or night and you also get the written photo instructions too.

Here is a close up of some of the tags:


I intend to journal each day but I will print the photos out in batches and I am looking forward to seeing the mayhem of my Christmas preparations documented for prosperity!

Here's the video - hope you like it.


Hope your are feeling nice and cozy.  Thank you for popping by X

Monday 18 November 2013

Merry Christmas Card Number Three!!!

Just a quick post to let you know I have a third Christmas Video posted and ready to inspire you!   At least I hope you find it inspiring.  Let me know what you think.

I think it is quick, easy, can be made using any Christmas papers you have in your collection and I think the pop up bauble is soooooo cute and could be used on so many other Christmas card creations.  Don't  forget this design also works with the word SNOW, fun if you have snowy Christmas papers.


Just grab yourself a cuppa and press play!  I am off to have a leisurely breakfast with Pepe and Lourdes once again.....I can hear that diet nagging in my ear.  Hope you are enjoying my Christmas card inspiration series.......now what can I do next I wonder...........

See you soon.  Don't forget to subscribe so you can be first to know when I post.

Thank you for popping by and have a lovely day X

Saturday 16 November 2013

Ho Ho Ho! Christmas Card Number Two

Good morning all.  Well it was when I first started to write!!!!  But I have since been interrupted by a very pleasant and leisurely continental breakfast with our friends who are visiting from Gibraltar.  I had some toasted garlic bread with butter and Serrano ham and it was a tasty change from my usual cereal!  So much chatter and a delicious breakfast later I should now say Good Afternoon ;-)

Today I am sharing another Christmas tutorial.  This card looks elegant and can be made in other combinations of patterned papers and ribbons.  I love the black and cream together with the small splash of colour introduced by the ribbon.


I have tried to ensure that the first lot of Christmas inspiration I am sharing could be made by any crafter with the stash they have in their possession.  Most folk I know own card, patterned papers and ribbon.  Just add a stamped or printed greeting and a snowflake embellishment and ........Voila!

I really love the ribbon detail of this card and it could be used on other cards for other occasions.  For example you could have a pearl cream embossed card base with all cream ribbons and suddenly it becomes suitable for a wedding and I am sure you will find it useful and it is very pretty as you can see in more detail here.


So last but not least here is video number two in my Christmas Inspiration series.  I have added Christmas music to get you in the mood.


Wishing you a wonderful weekend......we are popping out to have coffee and cake this afternoon in a lovely little cafe and gift shop.  I may have to treat myself to a Christmas ornament or two!!!  Watch this space ;-)   Shhhhhhh don't tell Ivan ;-)

Thank you for popping by X

Monday 11 November 2013

First Christmas Card Video on YouTube!

Hi everyone!  Hope you had a great weekend.  Yesterday was lovely here and that was good as we were standing on the sidelines watching our youngest playing Rugby on Sunday morning.  I am not sure Rugby and Gymnastics are going to be compatible as Callum keeps bashing his shoulder which is not good.  I am going to investigate padding as I have seen them wearing it on the TV!

I am sharing the link to a Christmas tutorial today and hope you like it.


Even if you are one of the super organised ones and have all your cards ready to post this is worth a watch as it shows you how to make a pop up slider card.  It can feature any stamp combinations for any occasions.  I love this card format as it has that interactive element and folds completely flat for posting!

Hope you find it a useful tutorial with a touch of Christmas inspiration.  Be back soon with another Christmas Card idea featuring a Creative Expressions stamp set.

I love using Creative Expressions stamps for my card classes because there is always such variety on each stamp set as you will see this week!

I am hoping with a series of Christmas videos to give you all a taste of my up coming stamp club where I will be offering stamps and a whole lot of video tutorial inspiration.  We all spend a lot of money on stamps so my club will be all about making the most of your investment exploring lots of different techniques along the way.

I wish I had a technique for stretching time about now!!!!

Have a great week and thank you for popping by X

PS please subscribe if you like my tutorials - thank you X

Saturday 9 November 2013

Halloween Tutorial - Is this late or incredibly early????

Morning everyone.  It is a misty, damp autumnal morning outside my window today.  I am sharing a video I didn't quite get finished in time for Halloween!  Proceedings were interrupted by a family break in Cornwall and because I didn't have any corks to finish off my spooky creations!  I had to buy them with no wine attached......who would believe that!!!!!? ;-) Actually hubby went out an bought them for me so big kiss to him X


I had such fun making these I am going to be collecting a few more unusual shaped bottles this year to make another little display for the other side of my fireplace.  They look fab when the fire is lit.  Here is the tutorial to get you thinking of spooky potion looks of your own.


I am off to have my breakfast before I leave for my crop with friends.  We will be cozy and warm surrounded by our stash.  How much of it will be used I am not sure.  But I know for sure calories will be consumed, coffee will be drunk and there will be laughter ;-) ........layouts mmmmmm......can't guarantee it ha ha!

I will post again tonight and move on to Christmas with my next tutorial.  See you later and thank you for popping by X

Thursday 7 November 2013

A layout from the Past

Every now and again I like to share a layout that I made when I first started scrapbooking.  It is fun to look back at what we got up to prior to having a Cricut or Cuttlebug.  Before we had a myriad of card stock patterned and plain.

This layout uses 3 pieces of card stock and I remember taking the photos to my local scrapbook shop and matching the colours to the sunset in the photos!  It might be better to still do that as I never seem to have quite the right shade of Bazil do you ;-) !


No lettering cut out by a gadget just little old me stamping and stitching - I definitely had never heard of a Distress Ink when I made this.  I remember buying the pretty sequins though!  They came in little containers that looked like eyeshadow pots and called to me and too most of my pals 'buy me.....buy me!!!! - look how pretty I am packaged you really do need me!!!!!'

This layout didn't take long for the matting and layering but the hand sewing and stitching of all the sequins took me from sunrise until Gibraltar Sunset!!!!

Hope you enjoyed this little snapshot of Scrapbooking from the Scrapbooking Past!

Thank you for popping by X

PS don't forget to subscribe if you like my blog - thank you X

Sunday 3 November 2013

I love Cornwall.....

....even if it has rubbish internet connection!!!!!  Callum, Ivan and I have just returned from spending half term in Cornwall.  It is the first time we have been there and we loved it.

We stayed in a mobile home which Callum thinks would make a fab party pad!  Our second night was the night of the storm and I have to say after being a little uneasy about our home from home blowing away in a gale we spent the day walking by a fabulously stormy sea and the night sleeping soundly as the wind blew straight past and on up the country.  We have had a lovely time exploring the Cornish Coast and its many tiny coves and finding great spots to eat well earned cream teas!!!


We found a fabulous cafe at Lizards Point perched on a cliff and we sat outside with our Cornish Cream tea (in my case coffee).  A lovely spot to enjoy the rugged Cornish coast and a few yummy calories!!!

We were not put off by the changeable weather one bit as we love to be by the sea whatever mood it is in.  I will share a few more photos of some lovely spots we found last week as I get back to more regular blogging.   I did intend to blog from Cornwall but I just couldn't get online.  I even prepared a couple of posts so I could share them whilst we were away so I just shared one of them a moment ago!

I hope to catch up with a few craft things now I am back.  I almost finished a halloween video before I left for Cornwall so even though it is late I think I will finish that off tomorrow and get that up.  It will be inspiration for next year ;-)  I saved some unusual bottles throughout 2013 and had fun turning them into spooky potions to add to my Halloween home decor.

I also need to catch up with my Tim Holtz 12 tags as I missed the October deadline and Tim will post November tomorrow.......and I have class prep this week so I really know I am back from my restful holiday!!!!  Might need another cream tea or three to sustain me through the busy crafty week ahead.


One more photo of Cornwall before I go to peel potatoes for Sunday Lunch!!!  We visited Lands End and the day was blustery and the weather changeable as you can see!  I managed to capture the beautiful blue skies and a raincloud passing over and the end of the rainbow!!!!

I think there will be a pot of clotted cream at the end of this Cornish Rainbow ;-)

Hope you have a wonderful week.  Thank you for popping by X

Mini Machine Stitches a Large Layout!

Quite some time ago I shared a couple of photos of cards I made using a teeny tiny sewing machine I found when tidying up my shelves and cupboards.  I had forgotten I had bought it and it had never been used and this layout is actually the first project I tried my mini sewing machine on and its colour scheme inspired the two cards I went on to make.  The ones I actually finished and shared!!! Here is a link to the first card and here is a link to the second!  I took a while to do the journalling so it has ended up being posted last and very much later indeed.  I am definitely a slow journaller!

This is my first ever attempt at paint splattering on my layouts as well as trying out my long forgotten sewing machine from Lilliput.  It was a bit scary and I probably should have done it before I put it all together!  I think I like it though.  The white dots and spots are completely random splatter - I got it everywhere. Then I wanted to add another colour and wanted a bit more control so I just dotted that on with the end of the paint brush - a much more calming experience!


Here is something strange that will make you chuckle.  When I was sewing this layout I found myself wiggling my foot around under my desk to find the foot control of my sewing machine!!  How bazaar is that :-)

Here is my eldest son Damian with his prize catch - a very tasty sea bass.  Damian still likes fishing he was 17 then and 30 now.  He has gone back to live in Gibraltar so those Sea Bass had better be on their guard!!!

Wishing you inspiration and the time to create!  Thank you for popping by X

PS If you like my stuff please subscribe - Thank You X

Tuesday 22 October 2013

Review of Spooky Tags

Halloween is fast approaching and I am working on a couple of home decor projects to share.  It occurred to me as I was unwrapping something I made last year it might be fun to share a couple of spooky tags I made and that a quick video was in order to see all the 3D details.

Some of you may remember these two tags.......yes they both definitely started out lives as tags!


Here is the link to a video where I give you the grand 3D spook-tagular tour (see what I did there!!!?)


I wonder if my inky fingers give anything away!!!  They should remind me to wear gloves when using spray paint!!!

If you just want to see the actual posts that I shared last year with photo tutorials then click on the links for more spooky inspiration.....


To learn how I made this 3D tombstone tag follow this link.


For all the tips on the latest in des res coffins for the best dressed skeleton in town please click on this link!

I have a halloween category in the labels section (left hand side bar) if you want to see a few more hauntingly fabulous creations ;-)

If you like me love all the fun of Halloween I hope you are having ghoulish fun making things ready for the witching hour.  If you are not a fan then I hope you are enjoying a fabulous Autumn (or Spring....) with leaves as lovely as the ones I have dried and laid out before you for my photo shoot.  Ignore the skulls and focus on the leaves!!!!!

Thank you for popping by X

Thursday 17 October 2013

I'm Falling for You!

It is a lovely morning here in Derbyshire.  A complete contrast to the drab, damp and grey day we had yesterday.  A great day to go out for a walk and to collect Autumn leaves!!!!

.......and that leads neatly into my post today.  A little while ago, as I mentioned yesterday, I watched a YouTube video by Lindsay the Frugal Crafter about using your microwave to dry flowers and leaves.  It worked a treat and is so fast.  I have a pile of lovely leaves and I wanted to do something with them.

I had an idea for a card but the problem was my leaves are crispy and would not stand up to the envelope or the post.  I had an idea to coat the leaves to make them less fragile and I tried glossy accents and clear embossing powder and as you will see in my tutorial the glossy accents won!  It was easy to apply and had enough flexibility once dry to help make the leaves more durable.  They still need to be handled gently but they would definitely go into an envelope for hand delivery but I would suggest a box if you decided to post them.  I am going to try to find some more leaves today as I want to make a home decor project with them - I am not sure what yet but the first step is having enough leaves!!!

So here is my romantic card with an Autumnal twist.


This is a better shot of the leaves and the real colours as I seem to be a bit in shadow when I took the photo above.


In my YouTube tutorial I only give a quick explanation of how to dry the leaves so I have shared Lindsay's link so you can watch the full tutorial so you too can dry flowers and leaves for fun projects like my card.  Hope you like it and give it a go.  The colours of the Autumn leaves are fab at this time of year and it is great to be able to preserve them in this way.


I am not sure who I have made this card for as I have already 'fallen' for my hubby but maybe Callum will want to use it one day!!!  I am sure though that this design would look fab with lots of other greetings or quotes stamped in place of my Autumnal romantic one.  I might try changing the colours and add frosty elements to the leaves whilst the glossy accents is wet to achieve a Christmassy look - perhaps with dried ivy leaves!!!!  Don't you just love it when one inspiration leads to another!?

Thank you to everyone for their kind comments both here and on my YouTube channel.  Don't forget to subscribe if you like my work.  I really appreciate your support.

Hope you have an inspirational day and thank you for popping by X

Wednesday 16 October 2013

Spooky Art Journal Page

After quite a long time spent uploading to YouTube here is my third Art Journal page video.  I love making these and this one was particularly fab to do as it started life as a lovely autumnal scene and ended as..........


......something altogether more sinister and spooky!  I had great fun trying to make the music build to a spooky climax and I hope I managed it.  I also learnt a new trick of linking a video to the end of the tutorial.  So I have linked a Halloween Mummy Wreath tutorial I uploaded last year for even more Halloween crafting viewing.


Hope you like the video.  I am off to edit another one which is a card with an autumnal feel and a romantic message.  I learnt how to dry leaves and flowers after watching a fab tutorial by Lindsay the Frugal Crafter and I just knew I wanted to try it out.  It really is quick and easy and preserved the gorgeous autumnal colours of the leaves.  I want to create a home decor piece with my leaves so that is something mulling away in my brain at the moment!

See you soon with the next video tutorial.  Hope you are having a fab day.

Thank you for popping by X

Monday 14 October 2013

Spooky Tags

Is it Monday afternoon already?!!!!  I thought I would post this before I get videoing - it has been a while since I posted on You Tube so I thought I might warm up with a spooky art journal page........or maybe a card......or maybe a spooktacular home decor item........I guess you will have to tune in to find out what I eventually get up too!!!!

I have had a lovely weekend with my crafting friends and I actually did some work.  But don't worry I did fit in plenty of chat and coffee and cake too!!!!  So today I am sharing three Halloween tags that I made with some of my Lost and Found Halloween papers (My Minds Eye).


All the tags have been made with elements from the papers and die cut sheets so they were quick to make and fun to put together.  Today I have added a little glossy accents to the bottles which is still drying as you can see from this photo.  I have added ribbon and some cute halloween pumpkin buttons from my stash.  


This one also has glossy accents drying!  I love all the yummy orange glitter elements in this paper collection.

....and last but not least.....


I think this is my favourite from my trio of tags.  I fussy cut the pumpkins from one of the papers and layered them up for this 3D look.  I painted the images with my Distress Inks.  I am thinking of incorporating my tags in Halloween layouts as I have lots of lovely papers still left to work with.

Hope your Monday is a little brighter than the one we are having here today - it is wet and grey out there......crafting weather ;-)  'Every cloud has a crafty lining!!!!!'

Thank you for popping by X

Wednesday 9 October 2013

WOYWW 227 and It's Been a While!!!

I have been having a bit of a busy couple of weeks and I haven't posted for a while so what better way to catch up with you all than a spot of WOYWW desk hopping.  If you don't know what that means then you really should follow this link (when you have read my post of course ;-)  There you will find Julia who has all the magic links to craft desks all over the world ready for you to explore.  I recommend a cup of coffee and a cookie or three!!!

So what is on my desk this week????


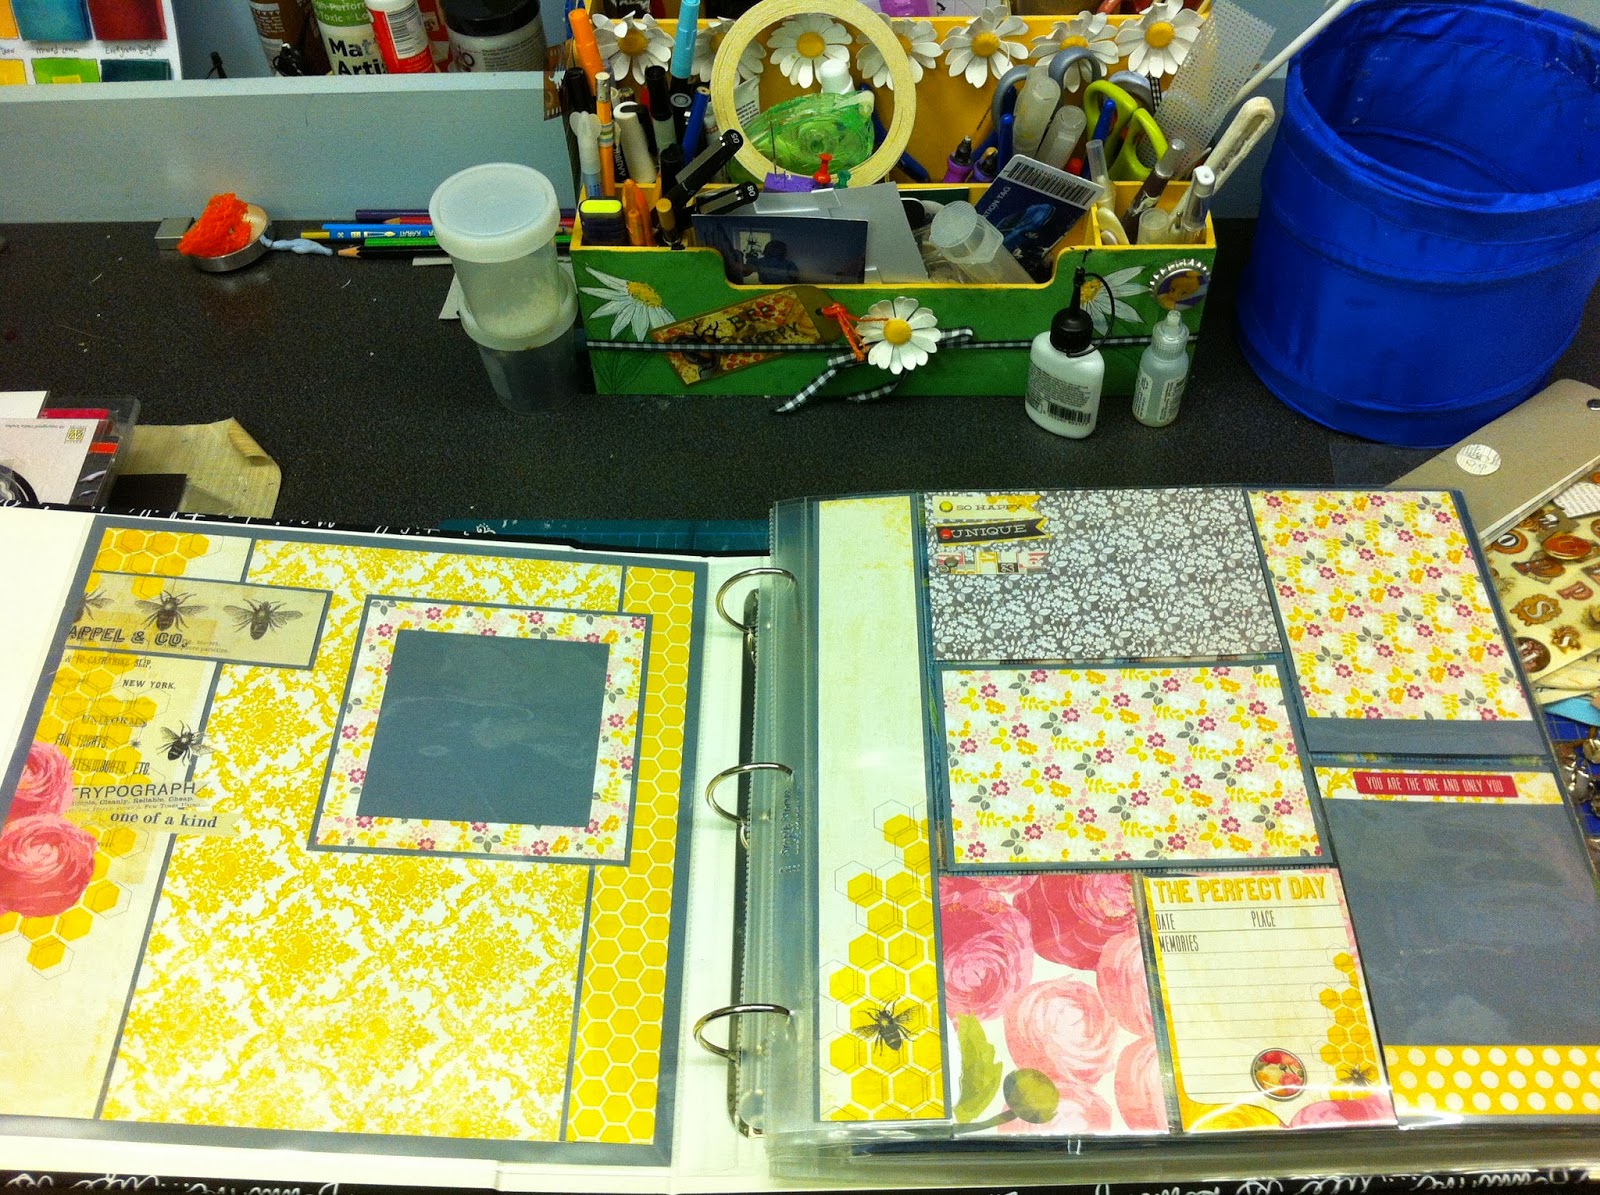
Here is a new photo album I treated myself too and it is already full!!! Next to it are some remnants left over from a big sort out I am having and they are waiting for my next task to be undertaken which is to take down and wash all my Ikea jars which are looking like they are ready for Halloween they are that dusty!!!  So all these little brads will find new homes in sparkly clean jars......soon ish!!!


The album is waiting to find a home too as it is already full!  I had a pile of layouts waiting to be put away and most of them were quite bulky with embellishments so I am loving these new ring binder albums as I they self level and you don't need to undo posts and add spacers!  Here is a layout I made with some pretty MME papers - I am going to put Black and White Photos on the pages and then embellish some more.  I wanted to try out combining a 12 x 12 layout with Project Life style pages and I like the result.  You can have a pretty and arty layout featuring one great photo and then do all your journalling and add lots of other photos on the accompanying page.

My hubby has been busy putting up a few extra bits of storage for me so I have been happily sorting through and rearranging my possessions!!!  Here is a before shot.......


One extra CD rack and a rearrangement of my little drawers.......plus a fair bit of tidying and sorting......


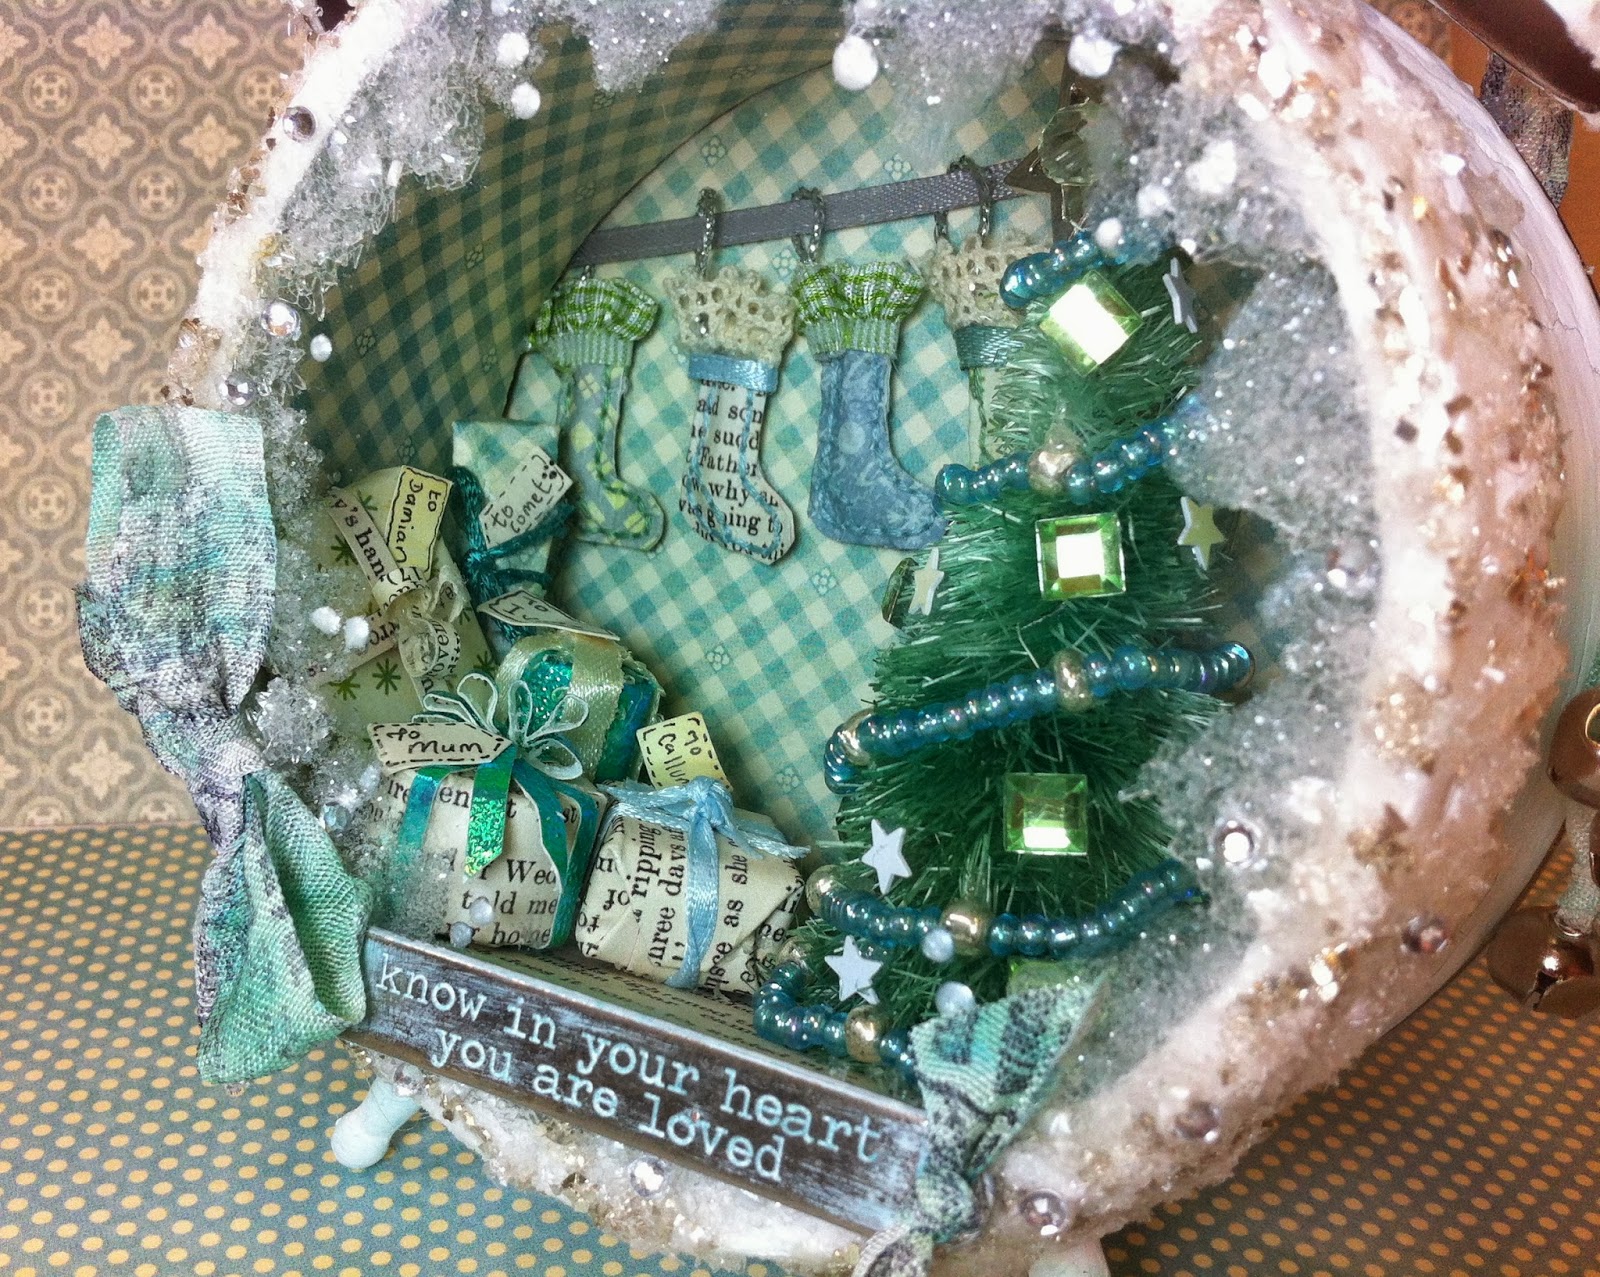
I even have some empty space!!!!!  I am going to sort out the CD rack that runs up the side and that is that area sorted.  You can see I even have room to display some of my projects.

Next up Ivan added a rail to the back of my door and a few curtain clips later and..........


I always forget to look through my many packets of stickers and embellishments when I am working on a project and now I have the perfect place to make them easy to sort through when looking for a matching pretty or two!  I like the way this works a lot so I am thinking of adding another bar below to make even more room for storage.

Another before shot........


I felt that this area where I store my most used items could do with another shelf and so one handyman later........


The extra shelf means I now have room for that growing collection of Distress Paints and Distress Stains..........


....Oh and my Distress Glitters......I am not sure Ivan realised he was making room for more shopping...........:-) !!

That's it from me except to say I have lots of plans for Halloween project videos and Christmas Project Workshops coming soon - another reason why I have been so busy.  I will post about them over the coming days so please pop back to see what has kept me away from my blog.

Looking forward to a little desk hopping and catching up with you all today.  Happy WOYWW to you and thank you for popping by X

Sunday 22 September 2013

It's Christmas!!!!


Well at least it is Christmas in my Ideology Assemblage Clock!!!!  I have had such a lovely time making this over the past couple of days.  It took me back to my childhood days of playing with the dolls house my Mum and Dad made and gave to me one Christmas.

That particular run up to Christmas my little brother Paul had been hunting for evidence of Christmas presents (as he did every year!) and he showed me that he had found my present (I couldn't resist a little look when he told me what it was!) so we spent a fun (and naughty) time peeking under the blanket at the progress my Mum and Dad made making me a beautiful dolls house.  It was huge as they made it using a packing crate and I remember seeing little quilts and pillows for the beds appearing courtesy of my Mum and little lights that worked courtesy of my Dad.  Much as I am not a peeker even to this day, I like to keep the surprise for the day, I did enjoy the build up of seeing my dolls house take shape.  When I think about it now my Mum and Dad must have spent many hours long into the night making this for me while I slept.

Now here is the funny thing.  All the time we peeked at the magical progress of the dolls house we never once lifted the blanket up far enough to see that on top of the dolls house a fort was taking shape!!!!  So on Christmas morning my brother had the biggest surprise of all when he received a fort so large that he could sit in it and play with his army of little cowboys and indians!!!  Happy Days ;-)


Here is a view of the inside of my clock.  I have used one of the Idea-ology Christmas trees and I dyed it (and my hands!) using Evergreen Bough Distress Ink and then decorated it with a beaded garland and jewels and sequins.  I found the perfect silver star charm for the topper!  It was fab to play with miniatures like this and I am already planning an Autumn, Summer and Spring clock too!!!!

I have made a video of this project so you can better see some of the fun I had wrapping miniature presents and sewing tiny stockings.


Here is a close up of the frosting I put on the clock using a whole host of sparkly product.  I used Silver Glass Glitter which I think was a Stampendous product, Iced Diamond from Pinflair, Cosmic Shimmer Pearl PVA and the sugary Ranger Rock Candy Distress Glitter with the odd gem thrown into the mix.    Lots of product there to produce a lovely icy frame to my Christmas scene.  I had a hard time photographing this project because of the glass in the clock and the photo does not do the frostiness justice at all.


Here is a closer look at the Christmas Tree.  You can see the silver charm that was the perfect tree topper and you can see the details of one of the Christmas stockings I patiently stitched.  I have decided to buy the Christmas Idea-ology word bands as although the one I have used here is a nice sentiment I want something a little more Christmassy.  This project taught me that I can reposition things I have hot glued into position by melting the glue with my heat gun.  That is how I will change the word band but my second lesson was that the glass on the Assemblage clock does not like the heat gun and I did crack the glass of one clock in the making of this project!!!  I was trying to heat emboss some snow flakes on to the glass - bad idea - don't do it!!!  I am glad I did it early on before I started to get into the details of the clock.  So it was a lesson learnt and I now have a clock without glass to dream up another project for!

The sun is shining here in the UK this Sunday morning and we are having a bit of an Indian Summer.  I have a few plans to increase my storage in my craft room.  A hubby job!!!!

Here is the before photo.


I am hoping to increase my storage and to have a good sort out of what is currently dumped here!!!! A me job!!!

So I am off to clear the shelves ready for hubby and then to edit the video I made of this project which I will share later. Hope you are all having a lovely Sunday.  We are planning probably the last BBQ of the year instead of Sunday Lunch later and I think I have to give up the computer to Callum for his Math homework shortly too so I had better get a wiggle on with this post!!

Have a great rest of the weekend and thank you for your patience with the Word Verification whilst I hopefully sort out the annoying spam!

Thank you for popping by X

Friday 20 September 2013

Spam!

Just a quick post to let you know that I have had to turn my word verification on again as I am having problem with anonymous spam.  It is a pain but I hope it doesn't put you off commenting as I do love it when you say hi.  I will turn it off as soon as I can and hopefully that will deal with it.  I wondered why my Birthday Giveaway post from last year kept being my most popular item!!!!  Mr Anonymous seems to like that post so hopefully the word verification will sort him out :-(

On a brighter note I just wanted to say a big thank you to everyone for all your kind words of encouragement.  I really do love it when you take the time to say hi.  Thank you also to my new subscribers both here and on my You Tube Channel.  Don't forget to let me know if you want me to send you my Thank you tutorial as I need an email to be able to send the link.  Just a small token of my appreciation. x

It is late here in the UK and I am off to bed but I thought you might like a sneak peek of my next project.  I will be drifting off figuring out how I can achieve what is pictured in my head!!!


Can you guess the season???!!!!!!

Thanks for popping by ....night night X
Related Posts Plugin for WordPress, Blogger...