Friday 29 June 2012

Tutorial, Thinking, Light Box and Small Bites!

What a strange combination my title is for this post!

The workshop and template to show you how to make this waterlily and dragon fly to embellish a tag and a card will soon be available to purchase from my Etsy shop.


I have made several paper flower canvases in the past and I think that this waterlily would make a fab addition.

Next up on the title ' Thinking' I just had to share this photo with you.  Taken in the garden - in between the showers!  Comet is definitely thinking deep thoughts!  'I love this view of the garden, how peaceful it is without the humans (not counting the photographer sat next to me)' or 'I think that apple tree has got a bug problem this year but the cherry tree seems fine for once'.  Whatever it is he is definitely taking a moment......Of course it could be 'When I jump off this swing I must remember to run or it will hit me on the derrière - very undignified!'  What do you think he is thinking.


Light Box is next up.  I have just completed the frame for my light box that will, I hope, let me take more professional shots of my paper crafting projects.  I was researching on the fabulous facility which is the world wide web and I found a brilliant tutorial and thought that is exactly what I want to make.  I was looking at professional cubes for about £300 which quite frankly is not in my budget until I am rich and famous one day!!

This is the frame and it took less than half an hour mainly because I used a hacksaw to cut the pipe.  If I had a proper tool to do the job - 10 minutes max!


Here is a link to the clever Pam Sparks who shared there fab idea and tutorial on her Blog Expressions With Heart.  The really nice thing about it is that it folds flat!  I am going to leave mine up and I am just trying to decide if  I should make it a fraction smaller.  Once that decision is made all I need to do is make a cover from a sheet and buy lights with daylight bulbs and a couple of large sheets of paper in different colours and I am ready to make like a professional photographer.

Last but not least is a saying I heard recently that I have repeated often lately.  As some of you might know I am setting up my own on line business and it is a bit of a mammoth task.  Particularly as I see to have to learn something new each job I complete towards my goal.  The light box is a case in point.  Some days you just think it is just too huge and it is then when these words come into my head.  'How do you eat an elephant?  One small bite at a time!'  I think I heard Laura Dennison of Following the Paper Trail use it recently on one of her videos.  So another 'Small Bite' on my journey munched today! 

There is one small thought that niggles in the back of my mind....what if another elephant wants to sit on my plate?  And on that thought I will wish you goodnight :-)

Thursday 28 June 2012

Riverbank - Tag Tuesday

Hi everyone, thank you so much for the wonderful comments last week.  I am enjoying these challenges immensely!  A chance to make mini works of art and a theme to send you spinning in different directions every week!

This week it had to be the dragonfly for me.  I just love their iridescence and to see them flitting above the water.  Hearing the hum of their delicate wings as they skim the sparkly surface of the river.


I am making a set of workshop videos for this tag as I wanted to share how I made the Lily (no punches required) and my dragonfly.  The first one I made was too big so I am going to pop him somewhere in my craft room.  The tutorial will appear in my Etsy Shop soon so pop back if you are interested.

My dragonflies wings are made from some kind of spongy foam sheet that they put between crockery when they pack it.  It was perfect for the gossamer wings.  I want to try to make flowers with it next.


Another view to show the dimension of the tag.  I found these cute little beads in my stash that add great texture to my watery tag.  The sprayed background tag was one I discarded from last week as it was lighter than I wanted - this week it was perfect!  How's that for being green!  Off now to have a leisurely look at what you have all been making for this weeks Tag Tuesday.  Follow this link for more tag art inspiration.

Wednesday 27 June 2012

WOYWW 160


Hello and thanks for popping in to peruse!  First off for your delectation and admiration I am showing off my newly tidies shelves!  Yay me :-)  I get a sense of satisfaction from seeing everything neat and orderly so I really can't explain (and my husband often asks me) why I can't keep them like that?  I guess because then I wouldn't be able to sort it all out again and renew my acquaintance with treasured stash long forgotten.  On the desk in front is a Laura Dennison mini book and the mini book I showed you last week just hanging about waiting for something to go in them and two frames from my bedroom that I need to print photos out for.


On my desk this week is the finished treasure chest storage for my WOYWW Anniversary ATCs!  I was really pleased with how it turned out and I have plenty of room for more ATCs in the future as you can see!  Next up is the remaining pile of layouts (from my shelves).  They all need a little something to finish them off so I have put them on my desk so I will get the job done (maybe).  There is also a lace die I want to try out, a wooden house still waiting for inspiration to strike, zentangle practice patterns and right at the end (if you get your binoculars out) is a sketch to make a light box for my studio next door and a sketch idea for a tag I want to make for the Tag Tuesday challenge this week.  I think you can just about see them.  I forgot to mention the hours of fun I had doing the grown up colouring in of a Prima Paintables the 12 x 12 on top of my layouts.  To quote Madness - 'Oh what fun I had!


This is another view of my cute little treasure chest (if I say so myself!)  I have up loaded a photo tutorial of how to make this if you follow this link or look on my side bar on the left.


To all my esteemed visitors thanks for popping in to visit.  WOYWW Hugs to you x

Thursday 21 June 2012

Surfs Up Tutorial - One for the Boys (and cool girls!)

Just a quick post to let you know I have uploaded a tutorial for a card we made at my last class.  Hope you like it.


Click on the link to try it for yourself.  Email me for a copy pdf of the print you will need to make it.

Thanks for popping by.  More tutorials soon.

......And The WINNER is.........

Firstly thank you so much to everyone that took part in my first ever Blog Candy Giveaway that I ran to mark my 50th Birthday.  Thank you for all the birthday wishes too. 

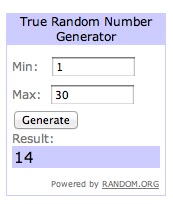
I was going to put everyones name in a hat when I noticed that others running Giveaways used this method of picking a winner.  I was quite excited to press the button and pick a winner and then to scroll down the comments and find out what lucky person had won.
Imagine a drumroll please.....The winner of all the lovely goodies is.........EMILY!

I have checked this and double checked this as I got a little paranoid I would post the wrong name by mistake!!

I am off now to email Emily to let her know the good news.

Thank you again to everyone that joined in and of course to those who also pressed the follow button.  It is very encouraging indeed.  It is great to get your lovely feedback on my posts and you inspire me to try to come up with projects to hopefully inspire you too.

Am loving sharing the inspiration!

Wednesday 20 June 2012

WOYWW - 159 (I am soooooo Late!)

Best laid plans!  I was up early but haven't stopped!  Making packed lunches, dealing with a bloody nose, nipping to the shop for sun cream as ours is...goodness knows how old!  Cal is packed off for the School district sports day and it looks like they will be having a fab day in the sunshine (hence the suncream).

Take a breath. make a cup of coffee and share!


I started tidying in my craft room this week and I think when I finish the first set of shelves this little lot should be next!  Scrapbooks on top left and top middle shelves need layouts actually putting in them, they are somewhere in the carnage that is on the middle lower shelves.  The end shelves houses my A4 card and paper stash and tucked in the corner is my tool bag and embellishment bags that I take to crop.  Speaking of cropping I had a fab time at ours on Saturday.  Barbara had made this really great mini book that had a piano hinge binding and I just had make one (it would be rude not to really).  Pause while a take photo to show you.


How fab is that binding method.  I knew right away I wanted to use my new Bo bunny papers as the binding looks so oriental.  Its all done with wooden kebab sticks.  Barbara made 2, I made this one and Deb made one also.  We had a lovely time.  Will mine ever get photos in though.....that is the million dollar question!  I love making minis but I seem to fail at filling them up!!


Back to the desk.....Yipeeee!  Have you spotted my newly acquired item?  Thanks Julia I will wear it with pride and hope to bump in to other WOYWW folk next time I am anywhere crafty!  If you have absolutely no idea what I am talking about then follow this link to meet Julia and the WOYWW gang!

Don't go yet as I haven't quite finished rabbiting on....Front of the photo is a work in progress to keep my ATC swaps safe - Will finish by next week I am sure.  I am going to make a tutorial if it turns out nice.  Move along a bit and you see the beginnings of the storage card for my 'all over the place' bits of blending foam.


And I was about to finish and this happened.  Hubby bought in toast and suddenly I had a new best friend!


Should I share? :-D

Have a great week everyone - finishing short post now (if you are a quick reader) trying not to get jam on the keyboard!!

Tuesday 19 June 2012

Tag Tuesday - Green


Green is my favourite colour and I was racking my brains what to do (this opens the design doors so wide it is quite difficult to pick a topic)  I started to think about doing something sea orientated and mermaid just popped (swam) into my head and everything when sparkly from then on.  I now have mermaid scales on my fingers (ok then, stickles!)

My tag is sprayed liberally with Dylusions ink sprays Lime, Sky Blue Pearl and Vanilla Custard.  My kitchen towel that I used to catch overspray looks just as stunning as my tag (saving that!).  I added seaweed to the bottom of the tag by scribbling on Turquoise, Green and Lime Green Stickles.  No great skill required so far!

I printed out a mermaid image as a base to decorate and then set to with a hole punch.  I punched out pretty scales from glitter and shimmery card in shades of green and turquoise.  I really enjoyed layering up the scales on the tail and adding more stickles and gems to make my mermaid shimmer.


Here is a close up of the scales and seaweed.  I can almost hear the ocean in the distance.


A fitting quote from the most famous little mermaid of all was added next and some seaweed style fibres with stickles liberally applied were tied to the top of the tag.  I wanted to add shells but they just didn't fit in with this fantasy image of life under the sea so I opted for these copper star embellishments that were hiding in my stash and I think that they look a bit like ethereal jelly fish or maybe fabulous squid floating by.  I have loved getting all glittery and girly for this green themed tag.  


I can't wait to see what green inspired tags are created by the fabulous Tag Tuesday crew.  Why not follow this link and take a look.

Thanks for popping by and thank you to everyone that left such lovely comments last week.

Monday 18 June 2012

Tidy Up Time

My Darling Hubby commented that my craft room was looking a bit of a heap this morning and I looked around and he was right!  I have higgledy piggledy piles of stuff stuffed everywhere!  So I am going to do a bit of sorting and tidying everyday until it is all ship-shape once more...... or (and much more likely) until I get fed up!

So I started with the bottom shelves of an open set of shelves as they are visibly untidy whereas my cupboards have doors to hide their shame!


I have tidied and sorted the bottom 4 shelves and I found things I had forgotten from long long ago.  Look at this little sewing machine.  I remember buying this when I first started seriously paper crafting and I obviously really needed it!  Can't you see the wear and tear of constant use?.....Oh of course you can't because it is still in its bag - Instructions never read!  It was at this point I started filling a bag with 'will never use stuff' that might be useful to someone else.  I couldn't quite put this in it so I have left it on the side to shame me into giving it a try!


Next up were sewing and ribbon boxes to sort.  Look at this tangled mess of bobbles and black fibres!


An hour and a bit later and with only a little winding fatigue all tidy and in bags so things can't get so tangled again....fingers crossed!


Tomorrow I will work my way up the rest of the shelves.  I wonder what other treasures I will discover in the mess.


Work done and it's time to play so I made this card with one of my tidy up finds (a lovely strip of lace).  Hope you like it and that if you, like me, have let things slide (not quite off the shelf), may you feel motivated to tidy up to see what treasures you can unearth to play with.


No tidied shelf was left untidy during the making of this card!  Should I confess that I have just noticed looking at this photo that I have stuck the lace flower on the wrong way round......or should I say 'notice how pretty the lace is on the back as well as the front!' :-)

Thanks for popping by and if you want to please click on this link to put your name into my virtual hat for my Birthday Blog Candy Giveaway.    Only two days left to join in the fun!

Sunday 17 June 2012

TIm's 12 Tags of 2012 - June


Trying out Tim's June tag has been on the back burner for a couple of weeks as I have been busy, busy, busy!  Sometimes there just aren't enough hours in the day are there?  I loved making this tag as I love the look of vintage tinted photos and am actually lucky enough to have couple of family photos with this colouring added.  Also as today is Father's day when I was selecting a photo to work with I was drawn to this one of me and my little brother sitting on my Dad's knee which must have been taken about 45-ish years ago now.  Making it has bought back many happy memories of my Dad who was always full of fun and loved life.  I don't remember posing for this one and I've just asked my Mum why she wasn't on it and she seems to remember that it was a Dad's photo shoot arranged by the Sgt's Mess (my Dad was in the Army).  So quite possibly it could have been a Father's Day event which is cool.  My brothers face makes me chuckle he never did like posing for a photo and still isn't keen!  Hi Paul x


I chose to colour my photo using Stormy Sky and Dusty concord and coloured our very cute home knitted and matching cardigans (maybe that is why Paul is so grumpy!)  I wanted a bit of each colour on my tag.  I didn't have them in the stains so I improvised.  I loved the effect that using the Picket Fence gave to the background and will definitely do this again.


I coloured my ribbon with Stormy Sky distress ink and a touch of vintage photo.  I dried the ribbon and then stamped it with a floral Tim stamp (sorry I didn't write down the name of the stamp set).


In this photo I am starting to look at what Tim has done and am thinking about how I will interpret the design.  This, as I am sure all of you will agree, is somewhat dictated by the materials you have and have not in your stash of crafting goodies.  For instance I did not have a file tab nor did I have the cute film strip ribbon but I did have an old negative that did not have any photos on and I though I could make that into a tab of sorts.  Things are starting to take shape.


Then all goes haywire and I have pulled out all sorts of things as I get the design straight (you wouldn't believe there was anything other than turmoil in my head looking at this mess!)


Now to stick stuff down!  I have stamped the flower stamp with Vintage Photo on the side of the tag and then attached the negative to form the tab.


Matted up the photo next and added my bit of tissue tape to pretty up the tab.  Punched a hole for my ribbon after adding another snippet of the negative.


I coloured my roses with the Dusty Concord and attached them with pearl brads (I only bought them yesterday and they are the perfect colour don't you think?)  I added leaves punched from more negative and I am definitely keeping the resulting remnant.  Saving the negative if you will pardon the pun!


Final steps - my versions of the bling paper clip Tim used I added bits of old earrings to mine and then some gem stars to the tops.  I added my metal word strip which I recoloured with brown acrylic paint and then I rubbed it back to reveal the word and added a teeny tiny blue gem, tied on a bow and job done!

Thank you to Tim all the way over there in Australia!  I am loving joining in with your 12 Tags of 2012 challenge.  Anyone popping in wanting to see more fab tags inspired by Tim please click on the link.


Thanks for popping by and I hope your week is full of opportunities to craft x

Wednesday 13 June 2012

WOYWW 158

Hello my fellow WOYWW folk out there in Blogland.  Thank you for popping in to see what I am up to. If you are new to this and want to find out what all the WOYWW folk are up to then follow this link to Julia's to find out more.  Beware there a hundreds of us and we are all equally nosey...........I mean inquisitive! :-D


I thought I would try a different view this week.  All my cutting machines and baskets filling up with class materials are on the top of my cupboard.  A bag of scrap I really must make sure I remember to take with me for Wendy's art group.  Clear drawers full of more class stuff and way up high dies and embossing folders and projects completed and to be started at the very top.  The photo frame is a chistmas present from my son.  The photos are of murals I painted for him on his bedroom wall.  He has out grown them now and to ease the pain I will feel when I paint over them to give him a more grown up bedroom he took photos and gave me this.  What a lovely thought - what a lucky Mum I am.

Who put the circuit boxes in my photo and the roll of paper are the old drawings and plans for my house.  Not sure why they are there really (the plans not the circuit boxes)!

Forgot to mention that this cupboard hides a secret - my ironing pile.  When it busts open the doors I know it is time.......


Trying to keep it short as I do have a tendency to rabbit on but could not go without saying a BIG BIG THANK YOU to everyone for swapping with me.  Here is my fabulous ATC bounty - and I even got pretty stamps too!

The bits on the left are the final 2 cards for my classes on Friday piled up with cut card waiting to be put into packs - only instructions to type.  That is a today job - but not until I spend a happy hour virtually visiting my WOYWW pals.

PS Only 7 days left of my Blog Candy Giveaway if you are interested in being put into the virtual hat.
http://acraftproject.blogspot.co.uk/2012/05/my-birthday-blog-candy-giveaway.html

Tuesday 12 June 2012

Tag Tuesday - Picnic

Lots of choice in this weeks category over at the Tag Tuesday Challenge and as I had fabric remnants on my desk left over from making bunting with it was a scrap of blue gingham and that set me on my way to designing my picnic tag.  As I was fraying the edges of my now picnic cloth an old song by Elvis came into my head and you will be glad you can't hear me singing it right now!....

We're on a Sunday picnic
When it starts to pour
Run through poison ivy
Scratch until you are sore
Ants come dancing and carry of the bread
Did you ever have one of those days when you should have stayed in bed?!

I hope my picnic tag looks more inviting than that picnic was!


My favourite picnic memory has to be when we carried a cool box and cushions to sit on and went to Curium amphitheatre.  We sat listening to classical music as the heat of the day gave way to a balmy evening.  We watched for the first star to make a wish on and dined on plump prawns, fresh crusty bread and a cold glass of Pantelimon (affectionately known as Pandemonium!).  Juicy red watermelon and sticky sweet Turkish I mean Cypriot Delight for afters.....hmmmmmm!  One those perfect moments life sends you every now and then.  No one even minded that the classical orchestra was only two huge speakers in the middle of the stage!

Don't forget you can follow this link to my Birthday Blog Candy Giveaway.  Just leave a comment to enter.


Monday 11 June 2012

Acrylic Paint Backgrounds - One for the Boys!


Four down two to go!  I am on a roll.  Here is a sneak peek of the flavour of my card classes this month!  I decided to explore card designs using a style based on the way many Art Journalists work.

First create a background to work on.  Time to play with paints and inks and sprays and stamps and oh what a happy mess!  This card uses acrylic paint, kitchen roll and sandpaper to get this beachy distressed look.  Second step is to find a quote I want to design the card around.  I kept in mind two things - we always want designs for the boys and the fact that this weekend is time to celebrate a very special boy in everyones lives, their Dad!  And third following the beachy theme I looked for some images that I could cut out and make part of the card design - love the cute VW!... and last but definitely not least the doodling that makes all these things into a coherent design (well I hope it does anyway :-))

So in a nutshell I employed these steps for all my card designs this month.  So I hope to give my class another way to design a card that they perhaps might not have tried before.  I wonder what creative path I will walk down next month!

I have a couple of tutorials in the pipeline but you will have to pop back later for those!

I just nipped out in the garden for some fresh air before embarking on card design number 5 and I very quickly nipped back in again!  It is really cold out there and drizzling with rain - anyone seen Summer anywhere?

Here are a couple of photos I took that I thought I would share with you.


 Look at this fabulous Peony just waiting for a bit of sun to reveal its full beauty.


 Here is a work in progress.  A water feature waiting for the water to stop so I can get the waterproof liner fitted and then we might have a pretty water feature instead of a muddy hole!


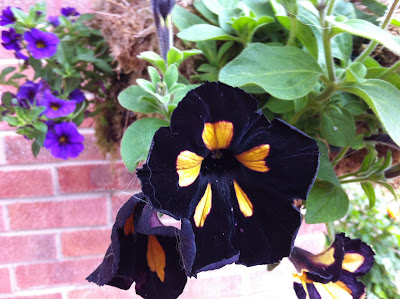
I was admiring this velvety ......petunia - I think that's what it is called!  Then I wondered what the hairs where that had stuck to the flower.  I looked down and here's what I saw looking back at me like butter wouldn't melt!


Feeling how cold it is today I bet Comet is wondering why he started shedding his summer coat!  What a cutie pie.  We are back in the warm now and it is time to crack on.  Don't forget to leave me a comment to join in my Blog Canday Giveaway - click on the link - Remember you gotta be in it to win it!

Thanks for popping by to visit me and last but definately not least a BIG BIG THANK YOU to everyone that is following my blog and for all the lovely comments.  I really appreciate knowing that you are liking what I am doing as I am thoroughly enjoying sharing my crafting exploits with you.  It is nice to know I am not alone rambling on!  Talking of rambling I hear you cry.........See you soon X

Sunday 10 June 2012

Tag Tuesday - Diamond Jubilee

Who's bright idea was it to have the Jubilee celebrations on a Bank Holiday I wonder?  Everyone who is anyone knows that Bank Holiday and rubbish weather are joined at the hip in this country.

Our poor Queen must have been frozen on that boat.  Did you see those heroic singers, soaked to the skin, frozen and to add insult to injury how must they have felt knowing their make up was running down their faces on national TV for all the world to see?  Still they managed to sound wonderful and make the hairs stand up on the back of my neck.  A real proud to be British moment atrocious weather and all!

Still when it is raining outside the craft room is cozy and warm and so I made a patriotic tag to play along again with the Tag Tuesday challenge.

My starting point was some lovely royal purple acetate that came on a bunch of flowers that I knew was perfect for the tag I had in mind.  I crumpled the acetate up a few times and glued it to the top part of my tag that I had coloured with Dusty Concord distress ink.  The bottom section had to be diamond encrusted to pay homage to the glittering crown the queen was wearing at her coronation 60 years ago and of course her Diamond Jubilee.


My image of the queen is a substantially shrunken version of the cover of the Picture Post (as you can see above) that had golden glimmer in honour of the auspicious occasion.  I got my gold leaf pen out for this as my copier wasn't up to it!


I made the image of our young queen into a little stamp and added a spray of heather coloured roses and a golden coin (strangely cut from a piece of trim I bought in America!) at one corner.  Then I went to town adding a ribbon sash, metal filagree corners and I had a perfect little broken bit of golden jewellery that I blinged up with purple jewels to finish my spin on the Queens fabulous crown.  Hope you like it.

Follow this link to be inspired by lots of wonderful tags with a Jubilee theme.  Thanks for popping by.

Wednesday 6 June 2012

WOYWW 157 - Is it Wednesday Already?!

What with a busy week and with the Jubilee extended holiday weekend thrown in I really cannot believe it is that time again already.  In fact if with wasn't for BJ emailing me this morning I would have missed it!  So thank you to her for the friendly nudge and for swapping with me.

So here is my desk this week - the calm before the storm I think.....


I have been having a lovely time with the ATC swap and am excitedly watching the post.  As you can see on my desk I already have a pretty ATC and a yummy dumfling (My computer insists it is a dumpling!).  Big thank you to Ann and Jo.  As you can see on my desk I have 4 more envelopes to send out that I didn't manage to get off before the Jubilee weekend so they will be posted today.  Thank you to everyone who is swapping with me and thank you to Julia for hosting the anniversary fun.

Let me see what else can you see on my desk this afternoon? - Stampin up stuff still not played with.  Remnants from the ATCs I made last week and some purple wrap from a bunch of flowers that I am going to save and I have already used some on my Royal themed tag for the Tag Tuesday challenge (next to the envelopes).  The gingham tag is a work in progress for a picnic themed tag.  Oh and in amongst it all is an empty ink cartridge that is waiting for me to find a recycling envelope for it!

I know this week is going to whizz by too as I have classes next week and I notice Tim's June tag is up and I know I won't be able to resist making my version and I really want to finish painting next door (one and a half walls to go).  But first things first.... cup of coffee and a peek at what everyone is up to in WOYWW Land.  If you have never visited WOYWW Land before then follow this link to find out more.

If you want to join in my Birthday Blog Candy giveaway then please follow this link and leave me a comment to go into my virtual hat.

Monday 4 June 2012

A Show of Hands Please!

I hope you can help me with a little market research.  As you know I am in the process of setting up my own crafting business.  On my recent birthday my hubby treated me to a few surprises one of which was having my nails done.  I thought this would be the perfect opportunity to trial a new product called Gellish which I believe is a hardwearing nail polish which has the added bonus of adding strength to your nails.  Something I badly need as every time my nails start to look glamourous and I decide to paint them they break!  Not little chips off here and there but right down to nothing start all over again breaks!

As it happens there was a miss communication and I now have a coat of Gel (similar to acrylic) on my own nails (no tips)!  So much for that experiment.  As all you crafters out there know we need to be able to pick up small gems and to peel the back off the double-sided tape and you need normal thickness nails to accomplish this (or I do anyway).  Actually what I have at the moment is working ok because it is a thin coat on my own nails but I am still going to try the Gellish when I have had my moneys worth from this manicure.

I have to say as a crafter and gardener and houseworker I am not very kind to either my nails or my hands for that matter.  So why am I blogging about this at all...now I finally get to the point of this post.

This is an on-line poll of sorts and I would value your opinion.  When watching a crafting video tutorial do you care if the nails of the tutor are perfectly manicured or if they look like they have been dragged through a Distress Ink pad backwards? :-)  Please leave me your views by way of a comment I would really appreciate it.

This poll gives a really big clue about what I will be up to over the coming months.  I am about to pop next door to put a second coat of paint on to the walls of what will become my tutorial studio giving you an even bigger clue!


This manicure has so far survived a dig in the garden as I planted a couple of new additions to my border. I was too lazy to fetch my gardening gloves and I hate wearing them anyway!   You can see the splatter from the first coat of paint I put on next door and a chip on my thumb where I miss judged the distance of a tap - Gel and varnish came off but not my nail thankfully!

Professional crafter or lady that lunches I wonder!  Let me know your views.  I need to test drive the Gellish stuff and put it through its crafting assault course to see if it is something I can use or not when my hands make their video tutorial debut!

Friday 1 June 2012

Tag Tuesday - Bunting and Flags

This is my take on the Tag Tuesday Bunting and Flags Challenge.  I am playing along and one day hope to be a fully paid up member!!

I didn't realise how time has flown and I missed the Found Objects Tag so I may do that next as I am having fun.

I made ATCs for a swap on Wednesday and my tag is a bigger version of the same design.


I used acrylic paint to transfer my Big Ben image to my tag and then roughly sketched over the image.  (There is a tutorial that talks you through how to do the a acrylic paint transfer technique on my Blog so follow the link if you want to know how.)  I added a touch of royal gold to the edges of my tag and its red tag frame with embossing powder.
I have been having fun making baby bunting.  I printed out some pennant flags and then cut them out and strung them together with red embroidery thread.  I just had to include and English Red rose on my design and I recently bought the 'Made in Britain' ribbon so that was a must to embellish this patriotic tag.

I added a quote that I have seen in a few places now but I cannot tell you who had the idea to alter the original war time quote.  Fab idea though who ever came up with it.

To top it all off a gold embossed crown with patriotic crown jewels.  A little glossy accents and more patriotic jewels to embellish the London Eye.

I photographed my tag on the cover of a Coronation Scrap Book - You wouldn't believe its age looking at it.  It is full of cuttings from the newspapers of the day.  I only wish the person who made it had thought to write their name on it.  I managed to pick up two of these scrap books and some fab commemorative magazines for the bargain price of 50p each.

I know my tag is slightly Jubilee too which is next weeks theme but I think I will be making another tag.  I might be able to use some images from my fab find on this one!

If you want to see more fabulous tags then follow this link to Tag Tuesday.

Anyone popping by to see me please click on this link if you want to put your name in to my virtual hat for my Birthday Blog Candy Giveaway or click on the photo on my side bar.
Related Posts Plugin for WordPress, Blogger...