
This project could be competed using 12 sheets of rainbow coloured light card stock but I used my fabulous Distress Inks to make my Clock.

Step 1: This project uses a 16" x 12" x 1" canvas. I cut 1 of 12" x 12" and 1 of 12" x 4" pieces of Kraft Resist paper. I marked an 8" diameter circle on the 12" x 12" sheet roughly 1 1/2" from the right hand edge withe even margins top and bottom. I marked the centre of the circle with a pencil. I used Frayed Burlap Distress ink to shade the edges of the circle and also to stamp foliage along the bottom edge of the clock face. I used Ranger Black Archival ink to stamp the dandelion clocks and the greeting and bird. (Bird and Greeting are Tim Holtz Visual Artistry and the foliage is Inkylicious Meadow Breeze). Attach the two sheets of card to the front of the canvas with wide Double Sided Tape (DST).


Step 3: I coloured both sides of 12 sheets of card with the direct to paper method. Rub the ink pad all over the surface of the card until you have an even covering of colour. Dry with a heat gun and repeat on the reverse. Here are all my cards drying before their second coat.

Step 4: With the sheets of coloured card in the landscape position cut approximately 6 strips of each colour (1/2" x 8"). Run a 1" wide strip of DST around the bottom edge of the canvas and attach the coloured strips of card.

Step 5: Cut 10 1/2" x 12" wide strips of Kraft Resist card stock. Glue the ends of 2 strips together to allow you to weave across the width of the canvas. Weave the craft strips along the rainbow strips. Keep the weave as tight as possible. Position the join in the two strips to fall underneath a coloured strip to hide the join. Allow a length of strip at each end to attach down each end of the canvas later.

Step 6: As you weave secure each strip in place with a dot of PVA glue.

Step 7: Weave three strips across the whole width of the canvas. Mark a centre point on the left hand edge of the canvas (6") and then draw a pencil line from this point to the bottom of the clock face with a pencil. You will have to lift up the rainbow strips to accomplish this. This gives you a guide to create the woven shape of the clock face.

Step 8: Weave a further 8 strips of Kraft Resist paper to form the shape of the clock face. Follow the shape you have traced effectively weaving up the left and right hand sides of the eye shape of the clock. As shown above mark and then trim the end of the paper strip before commencing the weaving process. Remember to keep the weave tight and to glue as you work.

You should end up with the shape above.

Step 9: Trim all the loose ends of the rainbow strips to measure 1 1/2"
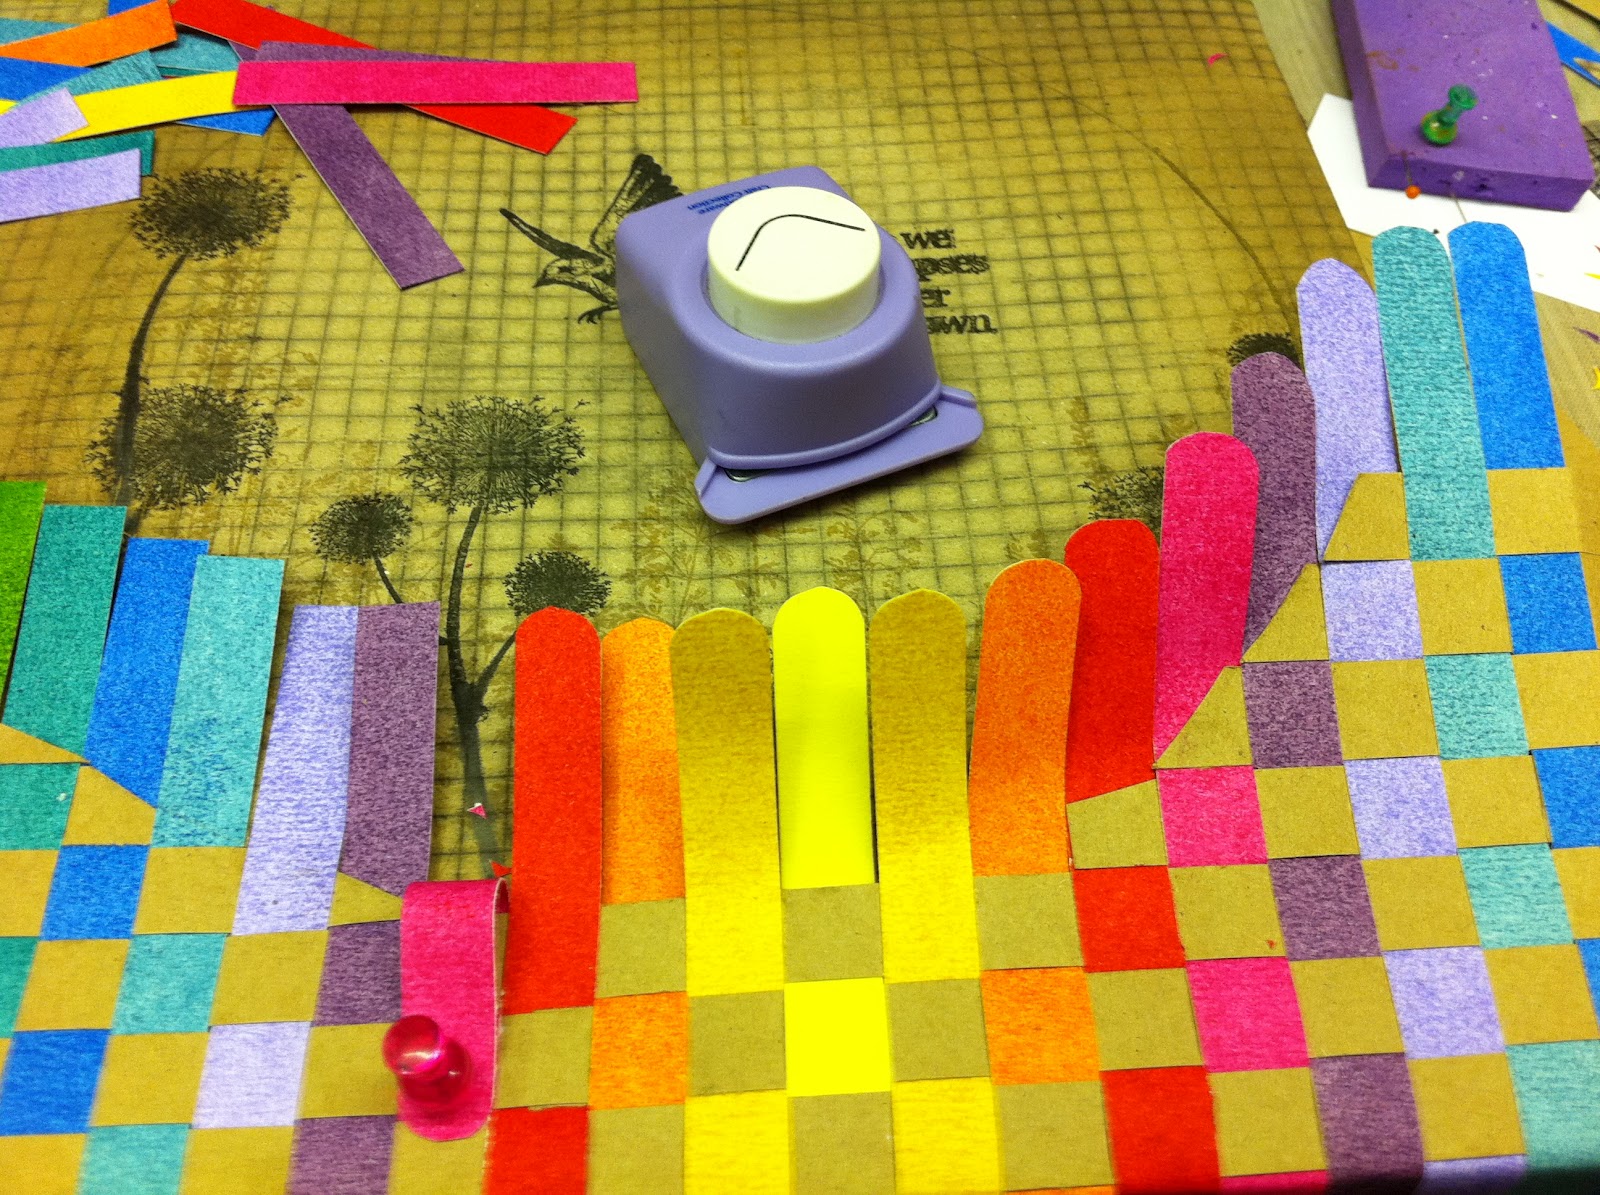
Step 10: Round all the ends of the paper strips. I tried using a corner punch but had to resort to scissors in the end!

Step 11: Loop each of the paper strips to the front of the woven paper and secure with a rainbow coloured brad. I punched a hole with a paper piercer and then opened the brad at the back of the canvas. I secured each strip with a brad the colour of the strip previous to it. The last two strips fall on the wood frame of the canvas so I secured the brad to the back of the woven paper.

Step 12: Repeat Steps 4 - 11 on the opposite side of the canvas.


I did think I wanted to fill this shape to the left of my clock circle with paper loops.

I got this far and decided I didn't like the effect and so I went back to the drawing board!

Step 13: I decided instead to fill this shape with paper pom pom flowers. These are easy to make if a little time consuming. I cut a strip of paper 12" x 3/4" and fringed it with a pair of scissors leaving a 1/4" of paper strip in tact. I fringed as neatly and finely as I could.


Step 15: Fluff out the top of the pom pom flower - how cute! Looks like a Dandelion.

Step 16: I secured the flower in position with a little hot glue.

Step 17: Repeat Steps 13 to 15 for each colour of strip along your shape to create a fluffy edge.

Step 18: At this point I was getting fed up with the edges of my Kraft strips being loose so I glued a strip of Kraft resist paper 1" x 12' to each end of my canvas and wrapped and glued the woven strips into position.

Step 19: Trim the end of each strip to neaten with scissors.

Back to the flowers!


Step 22: I used a Stampin Up Punch to make the rainbow numbers. Glue them into position with PVA.

Step 23: Add 4 black gems to each of the number strips and then cover with glossy accents and allow to dry.
Step 4: One I had attached my clock mechanism I decided I wanted a little bit of black on the left of my clock. I added 5 3/8" wide strips of black card secured with brads to finish my Distress Ink Clock.
I really hope you want to give this a try. It could be made in pastel colours or in Black and White or maybe in lots of shades of one colour or even in colours to match the colour scheme of a room. Don't forget to let me know how you get on!
Fabulous and easy to follow. Thank you Helen :0)
ReplyDeleteAll I can say is WOW!!!!!
ReplyDelete