Hi everyone
Just popping in to give you a sneak peek of my first post as a Faber-Castell Design Memory Craft® Guest Design Team Member. I had such fun with this one and there are two videos included!
As you know I am already a lover of my PITT® Big Brush Artist Pens so it was lovely to mix and match them with even more lovely Faber-Castell Design Memory Craft ® products that were new to me. In the first video you can see how you can work with them on a fabric panel and then on the second how to turn that into a gorgeous project for the holiday season.
Follow this link over to the Faber-Castell Design Memory Craft ® Blog and don't forget to say hi and let me know what you think of my first share and of course please explore all the wonderful mixed media creativity going on over there too.
I am already working on my next project in between looking after Callum who has had his knee operation and is in a full leg splint. My fitness levels are improving as I 'frequently' travel up and down stairs to help him! He is recovering well and is looking forward to getting on with the physio so he can get more mobile.
Thank you for popping by and hope to see you over at my Guest Design Team Post! x
This blog is a record of my creative journey. I love to share my passion for paper crafting so I design projects and then create tutorials and workshops to show you how to make them. Please feel free to wander around to check out all the things I share both here, in my ETSY shop and over on my You Tube channel. Thank you for popping by!
Tuesday, 24 November 2015
Thursday, 5 November 2015
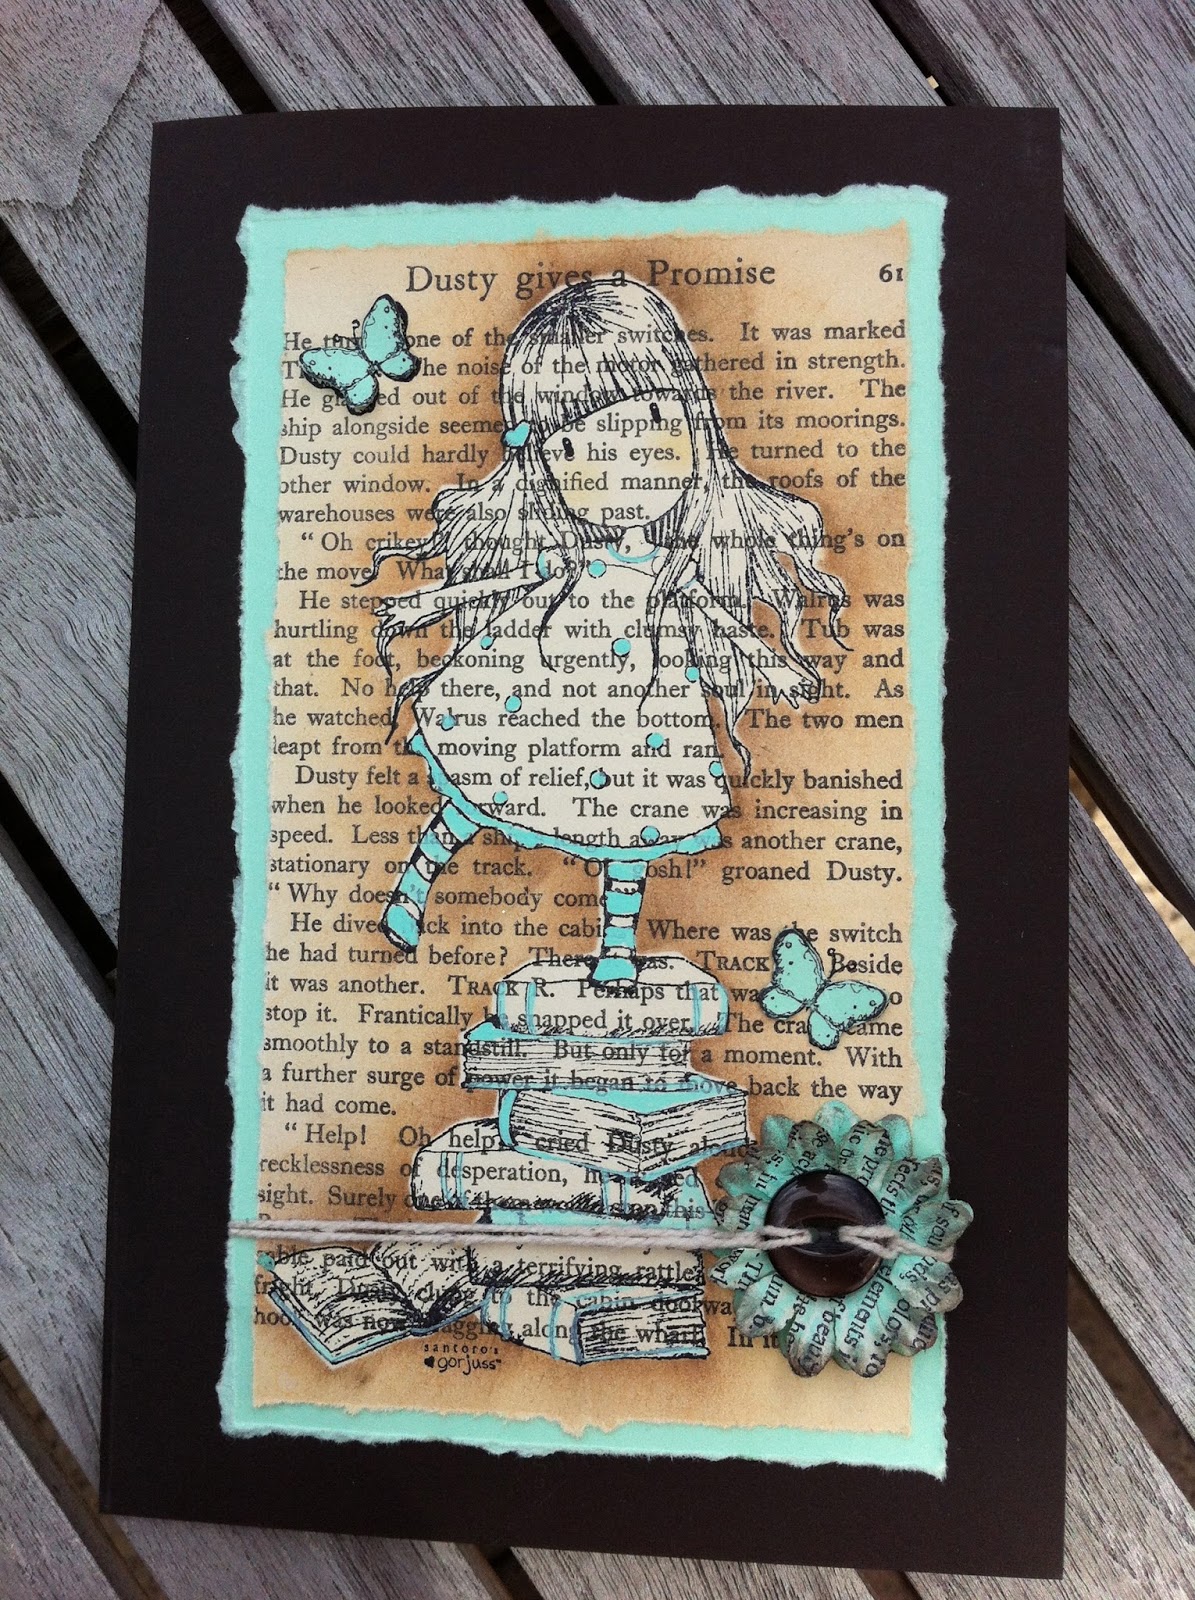
A Gorjuss Card!
Hi Everyone
As well as lots of UFOs on my desk (UnFinished Objects) I also have amassed some on my computer. Videos I have filmed but have yet to edit. It seems about time I set to and got some of them posted.
Here is the first one! I loved this technique and I know that it has a lot more ways in which I could used it but for now I wanted to share this tutorial for a lovely way to highlight your stamped images when you print them on to book pages.
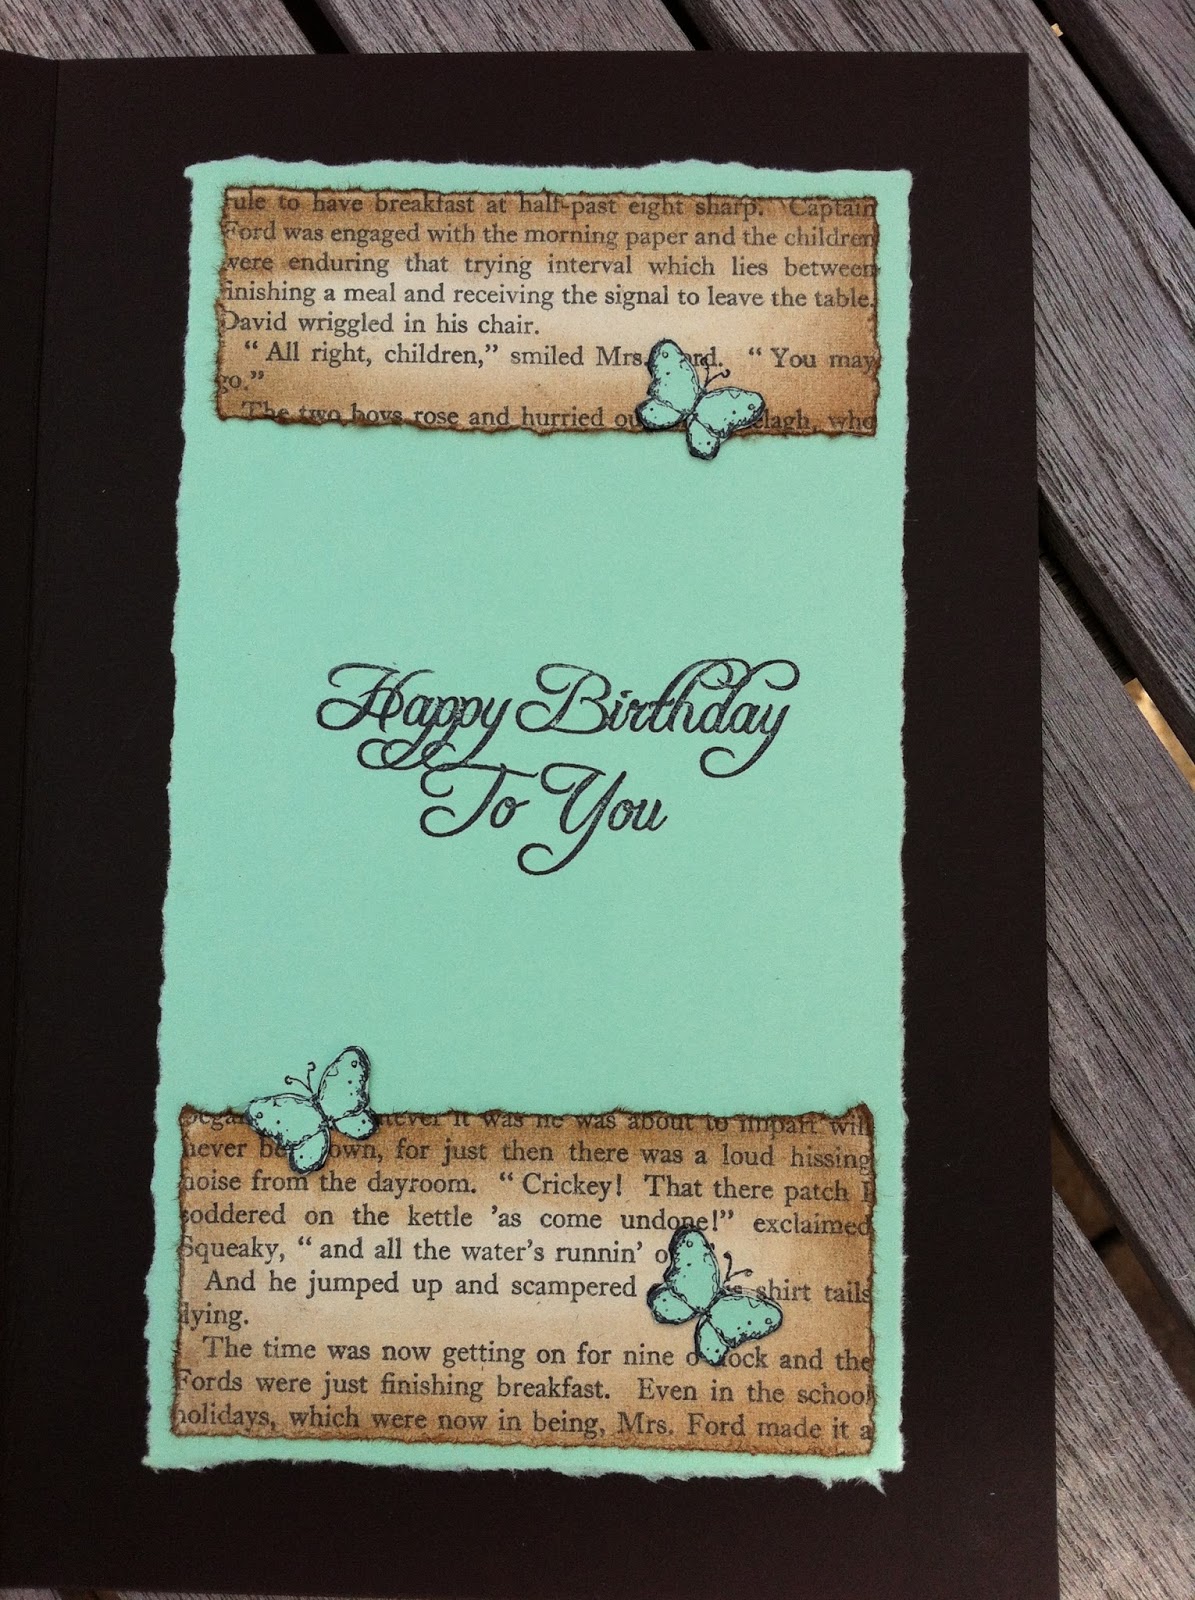
In the tutorial I show you exactly how it is done and you can use this technique with any of the stamps you have in your collection. Don't forget to make the inside of the card look as fabulous as the front!
Cutting Guide:
Brown Card Base - 8" x 10 1/2" scored at 5 1/4"
Book Page Front - 3 1/2" x 6 1/4"
2 x Green Cards - 4" x 6 3/4"
Book Page Strip Top - 3 1/2" x 1 1/4"
Book Page Strip Bottom - 3 1/2" x 1 1/2"
I just realised I forgot to let you know that I had some very good news recently! Sometimes my social media outlets get the better of me LOL! I have been selected to be part of the Guest Design Team for the Fall/Winter season for Faber-Castell Design Memory Craft ®. I am super excited and can't wait to share my first project with you over on their blog on the 24th November. I will give you a sneak peek here to remind you to pop over on the day! Thank you to everyone for their kind comments over on my Facebook page. It is so lovely to have your support and I really do appreciate it.
Here is the tutorial I promised to deliver!!! Hope you like it.
See you again soon - off to find another UFO!!! Thank you for popping by X
As well as lots of UFOs on my desk (UnFinished Objects) I also have amassed some on my computer. Videos I have filmed but have yet to edit. It seems about time I set to and got some of them posted.
Here is the first one! I loved this technique and I know that it has a lot more ways in which I could used it but for now I wanted to share this tutorial for a lovely way to highlight your stamped images when you print them on to book pages.
In the tutorial I show you exactly how it is done and you can use this technique with any of the stamps you have in your collection. Don't forget to make the inside of the card look as fabulous as the front!
Cutting Guide:
Brown Card Base - 8" x 10 1/2" scored at 5 1/4"
Book Page Front - 3 1/2" x 6 1/4"
2 x Green Cards - 4" x 6 3/4"
Book Page Strip Top - 3 1/2" x 1 1/4"
Book Page Strip Bottom - 3 1/2" x 1 1/2"
I just realised I forgot to let you know that I had some very good news recently! Sometimes my social media outlets get the better of me LOL! I have been selected to be part of the Guest Design Team for the Fall/Winter season for Faber-Castell Design Memory Craft ®. I am super excited and can't wait to share my first project with you over on their blog on the 24th November. I will give you a sneak peek here to remind you to pop over on the day! Thank you to everyone for their kind comments over on my Facebook page. It is so lovely to have your support and I really do appreciate it.
Here is the tutorial I promised to deliver!!! Hope you like it.
See you again soon - off to find another UFO!!! Thank you for popping by X
Thursday, 22 October 2015
More Spookiness…..
Hi Everyone
Is more spookiness a word? I have another video tutorial for you today and this time I show you how to create a ghoulish scene inside a Tim Holtz Assemblage Clock!
I do love these clocks and I have been meaning to do this one for some time. I managed to break the glass of the first clock I bought when I was making the Christmas Clock (see below) I made a couple of years ago. I kept it as I knew I could still use it but I had to use a new one for the Christmas version. Today, as you can see, I have finally used it!!!
So if you want to turn a clock to stone - make mini grave stones, make glittery blood trails or glue cobwebs then this is the tutorial for you!
I hope to get at least one more halloween project up before the witching hour is upon us but we will see….I seem to need all my time management skills lately :-)
Here is the link to the Christmas Clock if you like creating worlds in miniature then these clocks are the perfect frame for them. Just let your imagination take over and make it small!
Have fun creating in miniature. Thank you for popping by x
Is more spookiness a word? I have another video tutorial for you today and this time I show you how to create a ghoulish scene inside a Tim Holtz Assemblage Clock!
I do love these clocks and I have been meaning to do this one for some time. I managed to break the glass of the first clock I bought when I was making the Christmas Clock (see below) I made a couple of years ago. I kept it as I knew I could still use it but I had to use a new one for the Christmas version. Today, as you can see, I have finally used it!!!
So if you want to turn a clock to stone - make mini grave stones, make glittery blood trails or glue cobwebs then this is the tutorial for you!
I hope to get at least one more halloween project up before the witching hour is upon us but we will see….I seem to need all my time management skills lately :-)
Here is the link to the Christmas Clock if you like creating worlds in miniature then these clocks are the perfect frame for them. Just let your imagination take over and make it small!
Have fun creating in miniature. Thank you for popping by x
Wednesday, 21 October 2015
Something Spooky This Way Comes……..
Hi everyone
I have been a little absent from my Videos and Blog recently. Summer holidays which was a well deserved break after the stress of a teen taking exams!
I have also been busy on a secret project which you will hear all about in November!!!
I am behind with my 12 Tags so I am going to make an effort to get that sorted in November - I don't think there have been many months where I was not down to the wire posting. I am still loving making and sharing my tags but they have taken a bit of a back seat this year.
So that little round up brings me to todays share. Halloween will soon be upon us and if you have been here before you know I love Halloween! Every year I try to make a little something and I do have a Halloween playlist on my YouTube Channel which you might want to take a look at.
I have been a little absent from my Videos and Blog recently. Summer holidays which was a well deserved break after the stress of a teen taking exams!
I have also been busy on a secret project which you will hear all about in November!!!
I am behind with my 12 Tags so I am going to make an effort to get that sorted in November - I don't think there have been many months where I was not down to the wire posting. I am still loving making and sharing my tags but they have taken a bit of a back seat this year.
So that little round up brings me to todays share. Halloween will soon be upon us and if you have been here before you know I love Halloween! Every year I try to make a little something and I do have a Halloween playlist on my YouTube Channel which you might want to take a look at.
Do you remember this little cutie! It has my Mummies eyes LOL! This was such a fun make and was one of the first video tutorial that I ever made - it will make you giggle!
Today I am sharing the first of a couple of Halloween projects and I am going to show you how to turn glass to stone for this skull potion bottle.
This is quite easy to do. Just take an unusual shaped bottle and a little tissue and glue and a lot of imagination! I really hope you like this tutorial if you are looking for a Halloween project that you give it a go.
Wishing you lots of spooky creativity this week! I will be back very soon with another ghostly offering! Thank you for popping by x
Tuesday, 22 September 2015
Finished!
Hi Everyone
A little later than planned but as promised here is the finished upcycled set of drawers which are now being used in Callum's Room! I am really happy with how they turned out and now I have got the bug!
This project was a really large use of my mixed media and scrapbooking skills! I smudged white paint into the corners and edges of the piece to highlight them and to add to the old dusty chalkboard look - a similar technique to inking the edges of our layouts or cards.
I cut the stencils for my words with my Cricket from vinyl and it worked a treat. Mixed and matched the fonts and sizes of fonts to achieve this look that we have seen on many a background stamp. They are all words associated with our New York Holiday so this has turned into a real memory piece.
I thought at first I would get new drawer knobs but a little scrub of the original handles and the silver circles came off and the colour matched the off white chalk paint beautifully.
I have been on to ebay already and have a cute Lloyd loom style chair, a bedside table and another dressing table waiting for me to get creative!
One more thing before I go off to cook tea…..
I think Comet is pretending to be a cat! He looks so cute all cuddled up!
Until next time have fun crafting and thank you for popping by X
A little later than planned but as promised here is the finished upcycled set of drawers which are now being used in Callum's Room! I am really happy with how they turned out and now I have got the bug!
This project was a really large use of my mixed media and scrapbooking skills! I smudged white paint into the corners and edges of the piece to highlight them and to add to the old dusty chalkboard look - a similar technique to inking the edges of our layouts or cards.
I cut the stencils for my words with my Cricket from vinyl and it worked a treat. Mixed and matched the fonts and sizes of fonts to achieve this look that we have seen on many a background stamp. They are all words associated with our New York Holiday so this has turned into a real memory piece.
I thought at first I would get new drawer knobs but a little scrub of the original handles and the silver circles came off and the colour matched the off white chalk paint beautifully.
I have been on to ebay already and have a cute Lloyd loom style chair, a bedside table and another dressing table waiting for me to get creative!
One more thing before I go off to cook tea…..
I think Comet is pretending to be a cat! He looks so cute all cuddled up!
Until next time have fun crafting and thank you for popping by X
Thursday, 10 September 2015
I'm Back and Painting LARGE!
Hi Everyone
Hope you all had a wonderful summer. You may already know that I went with my family to Florida and had a fab time. The weather was scorching but I must confess to wearing a cardigan in any restaurant we went too!!! Boy the air-conditioning is turned up to the max!
Once I get my photos off my iPad I will share some with you but 'till then back to the crafting with a vengeance. I have just finished prepping for my Monthly card class tomorrow. If anyone lives in the Derby Nottingham area and wants to join us just email me and let me know. We meet once a month at Elvaston Village hall and have a fab time getting inky!
This week I finally got round to a bit of up cycling! You may remember that I revamped Callum's room now he is grown! He wanted a New York vibe and although we got the major jobs done as often happens things stalled a little (money and time!!!) Here is where we got too:
I bought an old Lebus Dressing table intending to up cycle it into a TV and game consul stand but it has been naked for a while!
I took the mirror off and the handles and I am ready to paint. I am going for a chalkboard look and of course I am using Annie Sloan Graphite chalk paint. I was thrilled not to have to sand. I just gave the piece a quick wipe down and then on with the paint.
I put on two coats of the graphite. It was very quick drying so it is easy to get two coats on in a day. I loved how quickly it covered the wood. The paint is very thick so if you want a smoother finish I would opt to water it down a little and perhaps use a roller to apply. I am going for a distressed finish so I don't mind the brush strokes at all.
Now you can see the chalkboard look coming together. I used a tester pot of Old White to add the chalky edges. I used a combination of my finger and a piece of sponge to brush the white on to the edges of the piece. I smudged things out with a wet wipe if I was a bit heavy handed. Be careful though as this is a water based paint and if you are not careful you can wipe all the paint off! I think it looks like it has been made of old chalk board pieces - what do you think?
I haven't decided what colour to paint the legs yet. The next job is the drawers. I am going to use words that remind us of the lovely holiday we had in New York 2009/2010. So I am getting out the Cricut to cut stencils from vinyl. I want to use lots of different fonts so my Cricut cartridges are going to get a work out.
I will post more pictures as the project progresses. It is my card class and crop weekend so I will probably get back to this on Sunday.
This has definitely given me the urge to do more up cycling so I am keeping an eye on ebay for more potential pieces to cover in paint.
Wishing you all a fab weekend. Welcome to all my new subscribers. Hope you have fun exploring all the many projects on my blog. Don't forget to pop along and subscribe to my You Tube Channel too X
Thank you for popping by X
Hope you all had a wonderful summer. You may already know that I went with my family to Florida and had a fab time. The weather was scorching but I must confess to wearing a cardigan in any restaurant we went too!!! Boy the air-conditioning is turned up to the max!
Once I get my photos off my iPad I will share some with you but 'till then back to the crafting with a vengeance. I have just finished prepping for my Monthly card class tomorrow. If anyone lives in the Derby Nottingham area and wants to join us just email me and let me know. We meet once a month at Elvaston Village hall and have a fab time getting inky!
This week I finally got round to a bit of up cycling! You may remember that I revamped Callum's room now he is grown! He wanted a New York vibe and although we got the major jobs done as often happens things stalled a little (money and time!!!) Here is where we got too:
I bought an old Lebus Dressing table intending to up cycle it into a TV and game consul stand but it has been naked for a while!
I took the mirror off and the handles and I am ready to paint. I am going for a chalkboard look and of course I am using Annie Sloan Graphite chalk paint. I was thrilled not to have to sand. I just gave the piece a quick wipe down and then on with the paint.
I put on two coats of the graphite. It was very quick drying so it is easy to get two coats on in a day. I loved how quickly it covered the wood. The paint is very thick so if you want a smoother finish I would opt to water it down a little and perhaps use a roller to apply. I am going for a distressed finish so I don't mind the brush strokes at all.
Now you can see the chalkboard look coming together. I used a tester pot of Old White to add the chalky edges. I used a combination of my finger and a piece of sponge to brush the white on to the edges of the piece. I smudged things out with a wet wipe if I was a bit heavy handed. Be careful though as this is a water based paint and if you are not careful you can wipe all the paint off! I think it looks like it has been made of old chalk board pieces - what do you think?
I haven't decided what colour to paint the legs yet. The next job is the drawers. I am going to use words that remind us of the lovely holiday we had in New York 2009/2010. So I am getting out the Cricut to cut stencils from vinyl. I want to use lots of different fonts so my Cricut cartridges are going to get a work out.
I will post more pictures as the project progresses. It is my card class and crop weekend so I will probably get back to this on Sunday.
This has definitely given me the urge to do more up cycling so I am keeping an eye on ebay for more potential pieces to cover in paint.
Wishing you all a fab weekend. Welcome to all my new subscribers. Hope you have fun exploring all the many projects on my blog. Don't forget to pop along and subscribe to my You Tube Channel too X
Thank you for popping by X
Monday, 31 August 2015
Blog Shop Closed for the month of August 2015
Hi everyone
Just a quick sticky note to let you know if you want to buy any of the workshops featured on the right hand sidebar please DO NOT buy them using the Paypal buttons on my blog.
Instead please click on the link below and visit my ETSY shop to make your purchase and you will get the workshops automatically once Paypal confirms payment.
Using the blog method relies on me sending the files and I will be here and there in August! Normal service will be resumed in September.
Actually buying from my ETSY shop is always the quickest way to receive your workshop files!
Just a quick sticky note to let you know if you want to buy any of the workshops featured on the right hand sidebar please DO NOT buy them using the Paypal buttons on my blog.
Instead please click on the link below and visit my ETSY shop to make your purchase and you will get the workshops automatically once Paypal confirms payment.
Using the blog method relies on me sending the files and I will be here and there in August! Normal service will be resumed in September.
Actually buying from my ETSY shop is always the quickest way to receive your workshop files!
TO VISIT MY ETSY SHOP TO MAKE YOUR PURCHASE PLEASE CLICK HERE.
Subscribe to:
Posts (Atom)