Showing posts with label Simon Says Stamp and Show. Show all posts

Wednesday, 18 June 2014

Blog Posts are Like Busses…...

……...Nothing for two weeks and then two come along at once!!!!!

Just popping in to join in with the  fun over at the Simon Says Stamp Challenge this week.  It seems ages since I played along.  This week was fun as the theme is anything goes!

So here is my entry.  Lots of paint, Paper and a few pretty flowers……


I decided to also challenge myself to keep it simple-ish and to limit my use of products as I wanted to make a video tutorial to encourage newbies to give Mixed Media a go.  I wanted to break the process of creation into easy to follow steps as I am sure at first glance any Canvas or Art Journal Page looks quite  complicated.


So thank you to the Team at Simon Says Stamp for this fun theme and I am sure there is going to be a huge variety of wonderful art shared as a result.  I really enjoyed putting my canvas together and hope that the video tutorial …..though lengthy!………encourages more people to get painty and in my case gluey too!

Here is the tutorial……definitely a cup of coffee and a slice of cake as you watch this one!


Thank you for popping by X

Sunday, 23 June 2013

Simon Says Stamp and Show - Kraft

I am posting this in the moonlight as the clock tick tocks into the early hours of Sunday!  I have been waiting for hours for a tutorial I made for this layout to upload!

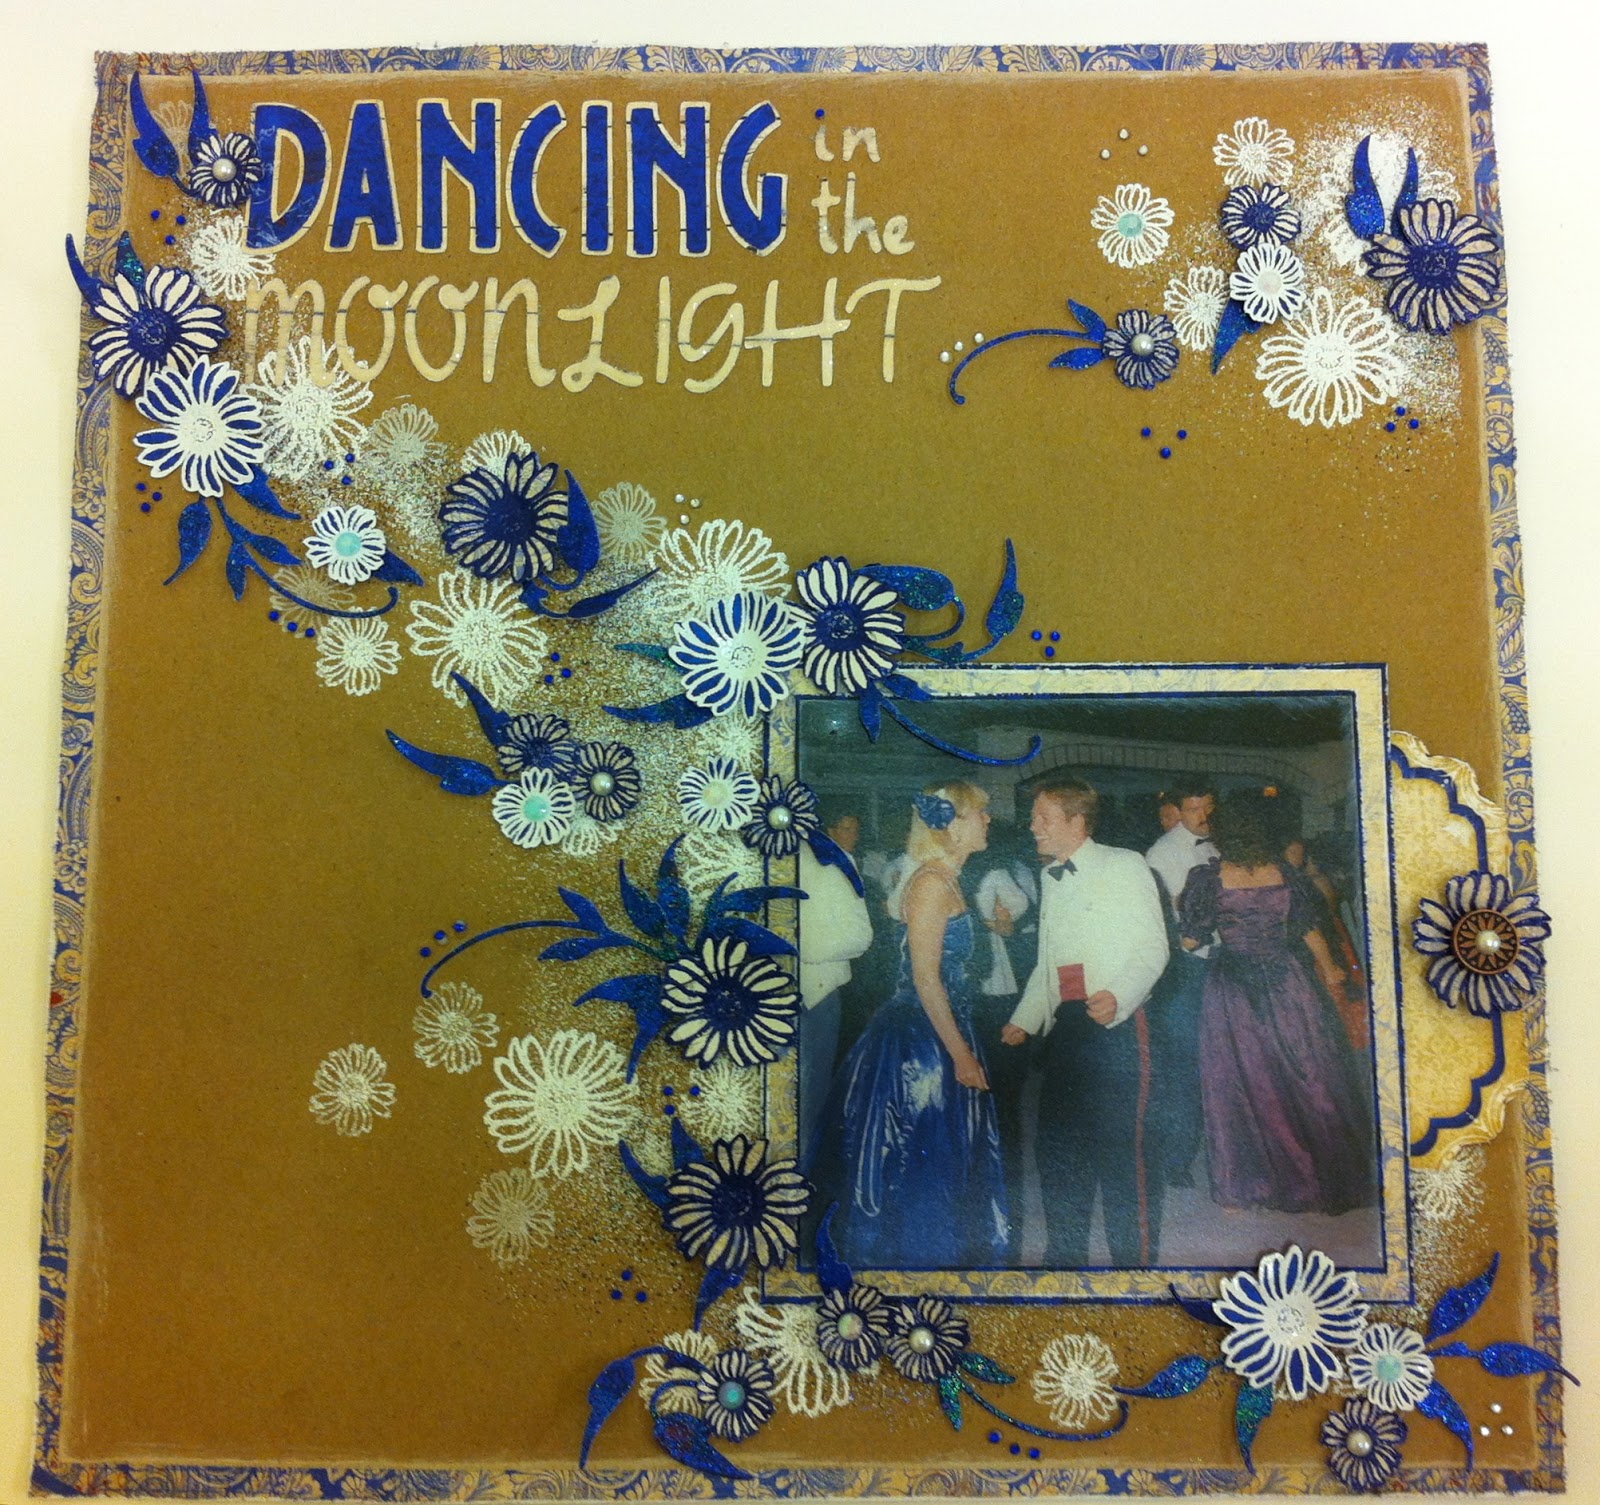
I made this layout to take part in the Simon Says Stamp and Show Challenge and this weeks theme is anything Kraft.  As I looked through all lovely Design Team projects it was Anita's creative layout that caught my eye and really made me think that I don't tend to do anything inky on my layouts other than the odd inked edge or two!  So here is where her inspiration led me!


I really liked creating the misty effect by sprinkling on embossing powders - free styling!  You have to be careful not to blow them all over your craft room but it adds great texture and is the perfect background for my Daisy Trail!


How perfectly does that Bo Bunny blue match my dress!!!  I designed it and made it myself many moons ago (1990 ish!)  I even made fabric flowers for my hair slide - if only I knew then what I know now!!!!  I could have started my own company.........;-)


Looking at this photograph I remember that my hubby always used to moan on those hot summer's evenings (in Cyprus) that the ladies had the best deal because we could wear sleeveless dresses and sandals when the men all had to wear full mess kit.  I pointed out that his shoes were at least flat so he didn't suffer with sore feet from too much dancing the night away - mind you those long dresses did cover up the fact that many of us kicked off our glamourous heels half way through the ball!!!

As you can see I have yet to journal on my tag so I think I may add this little memory of the nights we could dance until dawn and not need a week to recover!!

If you would like to see how to make this layout then please watch my video tutorial.  If you like my tutorials and want to know when I next upload don't forget to subscribe to my You Tube channel.


I think I should go to bed now before the sun comes up!  I have almost finished editing my Tim Holtz 12 Tags of 2013 June tag video and I have a catch up one for March too which I hope to post tomorrow - You Tube willing!

Have a fab rest of the weekend and thank you for popping by X

Sunday, 9 June 2013

Shadows and Scissors

Six hours and 48 minutes left in the Simon Says Stamp and Show Challenge this week!  I don't know where the time has gone????  I seem to be saying that a lot lately.  Did someone fast forward time? ;-)

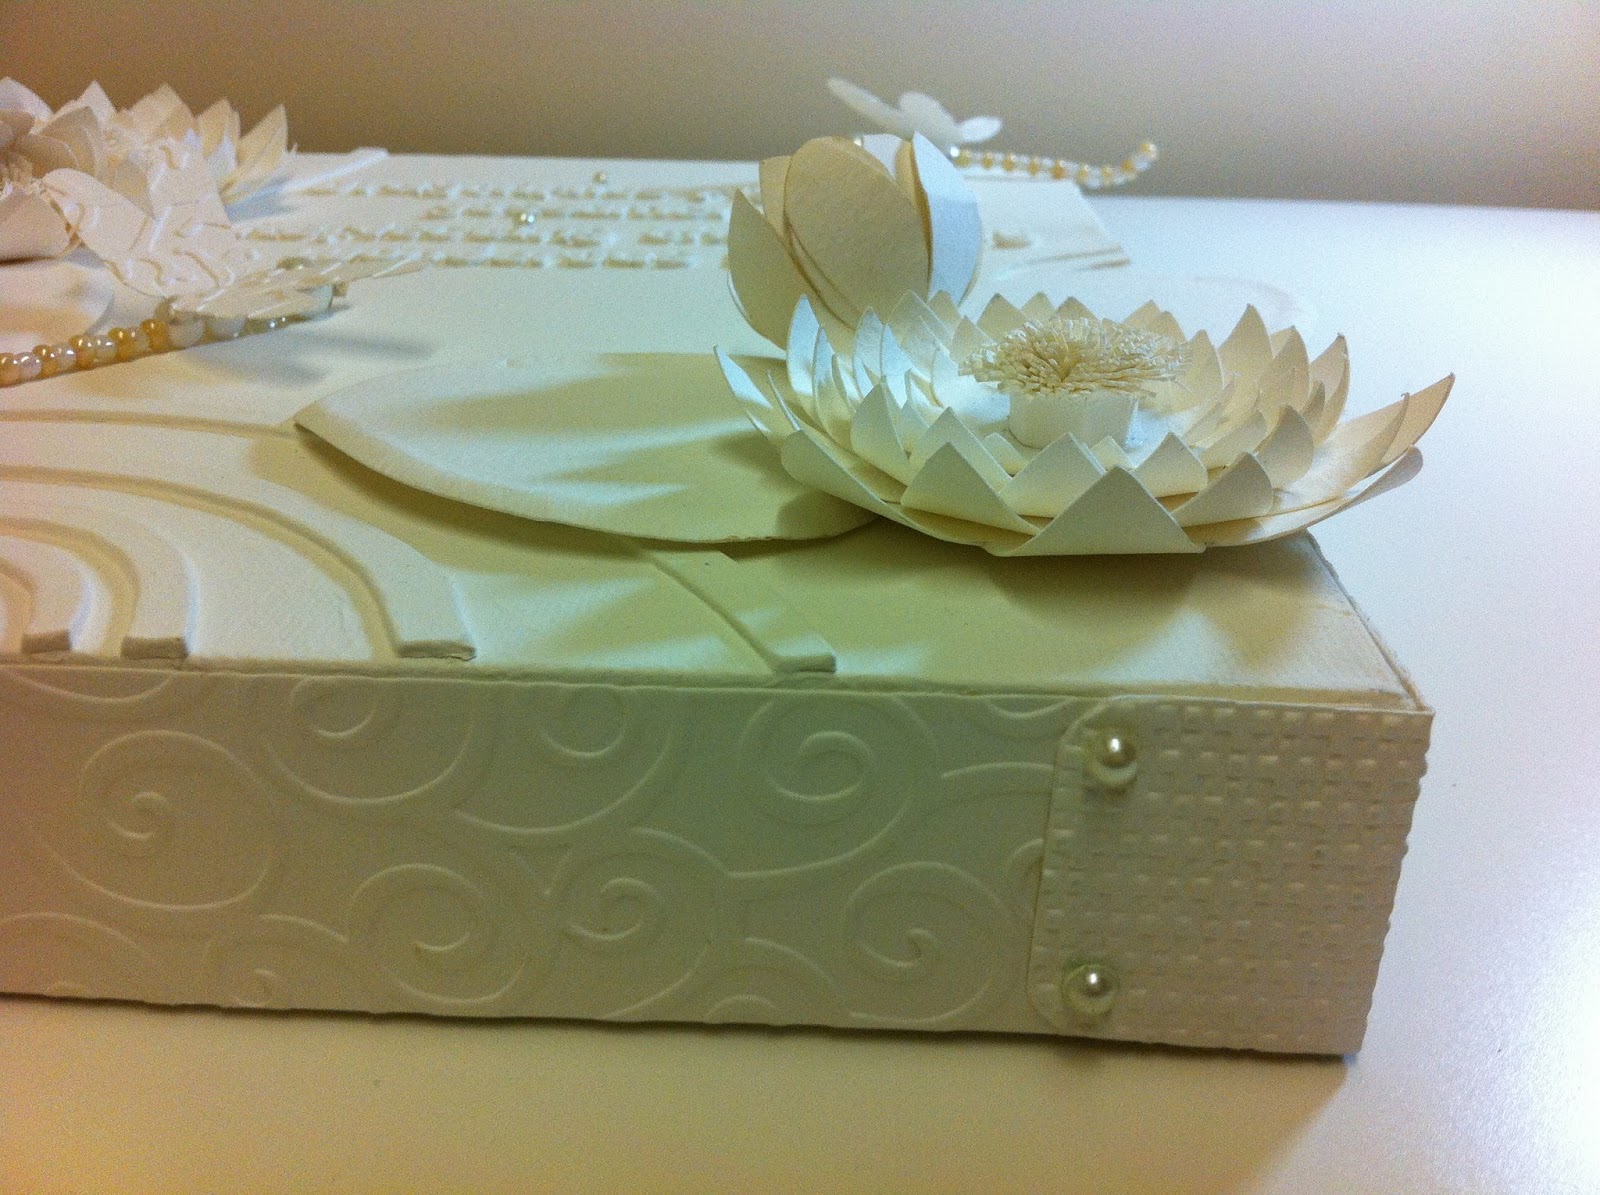
The first 'S' word that inspired me this week was Shadows and as I have made a canvas entirely out of cream card stock and cram paint it is the Shadows that play an important role in how the finished piece looks.    It made me think of all the elements we all include in our work that add texture and layers and even if we are not fully aware of it it is the shadows that we create that add the interest and drama to our creations.  Working entirely in one colour lets you see all the shadows and I think they definitely add the drama to my Water Lilly Pond.

The other 'S' word was Scissors and they were the most used tool as I put together my canvas I used them to cut out my Waterlilies and Leaves and believe it or not all the lettering.  I would rather not have had to cut out the letters but I did not have a chipboard alphabet small enough to use so I hand cut all the letters for my verse.  It took me quite a while as you can imagine and there were a few points when I thought.....'What am I doing?!'  But I got there and I am quite pleased that as they are hand cut they have the same charm as using your own handwriting does on a layout........However, I will be keeping my eye open for a very small chipboard alphabet all the same ;-)


As you can see my Scissors certainly got a work out.  Each of the Water Lilies have 7 Layers and a finely fringed centre.....and as I mentioned before those hand-cut letters.


Look at all that fringing.  It takes a while but I really love the fluffy finish it gives to the Lily centre.


I wrapped my box canvas with embossed strips and corners (more shadows!) and added a few creamy pearls to look like brads.


I also used pearls to make the bodies of the Dancing Dragonflies.

Dragonflies flying on gossamer wings.
Reflecting the beauty of wonderous things.
                                                                            Helen Allen

So with 6 hours and 22 minutes to spare I am pressing the post button and am off to link with the Simon Says Stamp and Show challenge.  I wonder what challenge tomorrow will bring!

Thank you for popping by X


Sunday, 2 June 2013

Into the Woods

I am posting this with hardly any time to spare!  I am blaming You Tube ;-)  Why oh why does it take so long to upload videos?  I wish I were clever enough to patent a solution to this one!!!!  Just think of all the craft stuff I could treat myself too!!!!!!

This week challenge over at Simon Says Stamp and Show set me thinking of the many photos of wonderful walks in the woods my family has enjoyed over the years so I knew it was the perfect excuse to actually scrapbook some of them.

So the photos I have used are taken in a wonderful wooded hollow and I wanted to use trees to decorate the pages. I love Silver Birch trees and as they are relatively easy to draw I went for it!

Here is the layout:


I am really happy with how elegant this turned out - or is it minimal .......or is it clean?.......I confess I did have a few little smudges on my white card but I managed to cover them up by growing trees over them ;-)


Here is a close up of one of my pretty leaf charms - they are not birch leaves but they are silver!!!


And then zooming in on the leafy tops of my trees....well middle of the trees to be precise but they are at the tops of the pages!!

I set up my camera as I worked so here is a video of how I made this layout.  I am pretty sure even if you don't have the Tim Holtz Autumn Gatherings Die or the same Woodware leaf punch you will have something similar on another die or punch that you could use instead.  I think they could make a pretty card too...Might have to use younger trees though ha ha!


Wishing you a wonderful rest of the weekend and thank you so much for popping by X


Saturday, 27 April 2013

Homage to My Distress Inks

Hope everyone is having a fun weekend.  For the past couple of days I have been working on a project inspired by the challenge over on the Simon Says Stamp and Show Challenge Blog.  The theme this week is colour and I was worried for a while there I was going to miss the posting deadline!

Colour made me immediately think of my Distress Inks as they are my go to item when I want to add colour to a project.  I can paint with them, stamp with them, make inky gorgeous backgrounds with them,  dye ribbon with them and do this with them!


I had a wonderful inky time putting this together.  As you can see I was quite a while making all these teen tiny paper bows.  I learnt how to make them last week and now I think I am a bit bowed out!!


I loved the dimension of this piece and I think that the liberal use of cream highlights the Distress ink colour pallet.  It makes a great reference point when I want to create Distress Ink colour combinations too.


If you want to try something like this I made a video of how I put it together.  I like making these videos as it shows the design process and how fluid it is.  You may start out with a firm idea in your head but the practicalities of creating that vision may take you in a completely different direction.


There is also a video on my You Tube Channel to show you how to make the origami paper bows.  I would suggest starting with a larger bow first though!!


This project reminded me of another piece I made inspired by my treasured Distress Inks.  Another celebration of the gorgeous rainbow of colour at your fingertips.  This piece has hung in my open plan Kitchen Diner next to the Conservatory window and there is no hint of any fade at all......Might be a bit of dust though!


A big thank you to everyone over at Simon Says Stamp and Show for the inspiration.  I do love a challenge.  Be sure to pop over and check out all the colour inspired pieces.

Wishing you all a colourful weekend.....I am hoping for sun to get out in the garden as it needs a bit of a tidy before nature gets to spreading its beautiful colours all around.

Thank you for popping by X

Thursday, 14 February 2013

Happy Valentines Day!

Happy Valentines Day to you all.

I spent yesterday making a romantic present for my hubby and I am going to share it with you as I want to enter it in the Simon Says Stamp and Show Challenge.  This weeks theme is Messy!  Well I think I could have entered anything that I have ever made into this one as I always make a mess and always end up creating in that last postage stamp of space left on my desk.  If I paint or ink I get it everywhere but somehow it all seems to turn out right in the end.  I hope Ivan likes this - I know it is a bit romantic looking but I have been making him little heart love tokens for quite a few years now and I thought I would give him somewhere to hang them up!!  And I made him a new heart to add to his collection.  I am so happy he is my Valentine and has been for 30 years!!!!  Ooooo can I really be old enough ;-)


I decorated a clipboard to match a Valentine tag I made last year (too late for Valentines so I have been keeping it safe!)


 I used some hitch posts that I have been saving as I they were out of production for a while and I am so glad that Tim announced they were back as I find them so useful.  Hanging from one is the cute little love token I was talking about.


I have used the same image transfer technique on my tag and on my clip board.  I love doing this even if it is messy messy messy!


Lots of lovely romantic embellishing going on - I am not sure Ivan will be showing this to the lads!!!

I decided to show you just how messy I am and I have posted a video fast forward of how I made a Valentine for my Valentine.


One confession to make before I post this and link to Simon Says Stamp and Show.......I haven't tidied up yet!!!!  That won't surprise my Valentine at all ;-)

Have a lovely day and thank you for popping by x

Saturday, 9 February 2013

Ever After Challenge

Tinkerbell Card - Make a Wish!
Guess what I was doing yesterday!!!???  When I saw this weeks Simon Says Stamp and Show challenge I knew immediately which fairytale character I wanted to put on my card.  I love the idea of fairies and there is one fairy in particular who is cute and sassy and here she is!  Bonus point that she wears green which is my favourite colour.  I made my challenge piece at our crop and I was asked a few times who my card is for and I said .......well actually I think it is for me!  I am going to put it on my wall ;-)  I thought you might like to see how I put this one together.


I made a card 5 3/4" square with black card stock.  Quite a heavy weight card stock as my intended embellishments are heavy.  I cut some Tinkerbell green card stock at 5" square and then stamped it with flowers using Tinkerbell green Ink.....are you sensing a theme here :-)  Ok it was Peeled Paint distress ink and the stamp was a flowery background stamp from Hampton Arts.


I inked the edges of my card and then mounted it on my card front and then got to work with this little pearl maker.  I have had this for a while in my stash and it was the first time I tried it.  I have to say it was quite easy to use and the pearls looked just like the real thing when they had dried.


Next I cut a square of white card at 4" followed by a square of black 4 1/4" which I layered on to my card.  That's not a white square I hear you say!  I cut an inch strip off the side of the square and here is what I did with the rest of it after I trimmed an 1/8 off the long edge....


I have a very lovely book that I treated myself to that teaches you step by step how to draw fairies!


Here is my step 1


Step 2


 Step 3


I then added the colour with my Peeled Paint distress ink and outlined her with a black pen (forgot to photo this bit)....too busy chatting!


Then I took 3 little bottles - Why are tiny things so darn cute??  I filled them with fairy dust (glitter to us mere mortals) and added labels and ribbon.  I stuck the wishes to my card with Pinflair glue gel, made a 'Make a Wish' label and added a Making Memories enamel charm in that fabulous green colour!!!  A couple of touches of glitter in Tink's hair and here is the finished result

Tinkerbell!

I am off to my crop again now - how lucky am I two days to ....well...... mostly chat, drink coffee and eat cake with my pals but now and again we do do a bit of crafting as you can see.  I am going to work on a layout today.

But before I head out I would like to say a really big thank you to everyone for their lovely comments on my last last weeks Simon Says Stamp and Show Challenge.  I  was bowled over especially this morning when I logged on to make this post and found lots more lovely emails and the fab news of making the top three!!!!!  So cool  -  a big big thank you everyone.

If you are just happening by this way and want to see what wonderful things a good challenge inspires then follow this link to see more Ever After inspired works of art at the Simon Says Stamp Show Challenge Blog.

Hmmmm I suppose I had better get dressed before I head out to my crop ;-)

Thank you for popping by X

Saturday, 2 February 2013

For My Little Star!

I wanted to take part in a challenge this week and I spotted the Simon Says Stamp and Show when I was reading at a great blog that I follow The Artful Maven Haven and Anita mentioned the challenge as she is now part of the Simon Says Stamp design team (I am not surprised as she is a very talented lady) so I followed her link to see what it was all about.

The theme this week is Seeing Stars and here is what I made.


It was really difficult to take a photo of the stars in my Challenge piece!  But I think you can see them here (put your glasses on and get closer to the screen!!) but the biggest star in this piece is who I made it for.  My youngest son turns 14 this month and this is his card come keepsake.  I know he is not going to see it as he is too busy chatting to his pals on his phone to think about checking out Mum's Blog!!!


As you can see, and those that know my work will not be surprised, I got a little carried away with the construction again!!  I really loved making this and it did come together relatively quickly ....that means not to many technical  design hiccups.  I loved being able to use my Graphic 45 papers for this as they have so many great mix and match designs and these ones were perfect for a boy....sorry young man!!


The first pyramid opens up exploding box style to reveal a smaller pyramid inside.  Callum plays guitar so these stamps are perfect.


 Which in turn opens up to reveal a birthday surprise!!!


Confession Time!! I didn't plan for the small pyramid to stay partially up like this but because I used the bottle tops to decorate they propped the sides up a bit and it was a happy accident as it looks rather good....if I say so myself...and at this time in the morning I am definitely the only one awake to say it in my house ;-)


Another view of the centrepiece.  I think I have managed to get all the bits of hot glue strings off it!


The faux drawer at the bottom pulls out to reveal it is actually a hidden mini.


Last photo.....and now I am off to link this to the Simon Says Stamp Challenge before I hide it somewhere safe until the 12th and then to go to bed.  Night all and thank you for popping by.
Related Posts Plugin for WordPress, Blogger...