Showing posts with label Layout. Show all posts

Monday, 9 March 2015

Easy Mixed Media with treasured Graphic 45 scraps!!!

Hi everyone

Hope you are settling down for a fun evening or a fun day depending on where you are in the world!  I have just posted a tutorial on my You Tube channel.

I wanted to create an introduction to Mixed Media and scrapbooking video.  If you like the look of combining the two but don't quite know where to start then this is the tutorial for you.


Easy to follow steps and what a great way to make use of the teeny tiny scraps you have squirrelled away - of course mine are Graphic 45!  The aptly named Good Ol' Sport were perfect for these fun run photos.

If you need more practice then just repeat using different photos and different scraps - perfect for the busy scrapbooker.


These are completely mixed and matched scraps and washi tape and I have been a little more delicate in my application ….oh and of course there are flower brads too.  You can see how you can make this look fit your photos - these are of me and my Mum and Dad.  Dad had a passion for photo booths and we have lots of these cool photo strips - check out my hoodie!


That is it from me - hope you watch the video and give it a try.  It would also work in a smaller scale on a card with a stamped image as the focal point.

Thank you for popping by X

Tuesday, 3 March 2015

Little Darlings Layout and Giveaway Reminder!

Hi everyone

Well I have just been outside to take photos of the layout I want to share with you today and let me tell you do not let the sunshine fool you!!!!   Brrrrrrrr it is cold out there and windy too!  I was thinking I might do a spot of garden tidying today but NO!!!!!  I am staying in my craft room cozy and warm ;-)

I know that normally there would be a video to share but this layout began life at a crop that I go to once a month with all my crafting friends and I came home and I wasn't happy with it.  So this is my second attempt.  I decided the background was too pale and I had jumped about the page a bit too much with my elements - I wish I had taken a photo before I pulled it all apart!  So here is my second attempt at a background using some lovely Little Darlings papers from Graphic 45.  As you can see I am going a little mixed media for this one.  I have fussy cut the border from one 12 x 12 sheet and decoupaged it on to the pretty pink background.  I have scuffed the edges of the paper and add dry brushed on some off white acrylic as I am going for the shabby chic look for this layout.  I have added some stamping in grey with a script and pretty butterfly stamp.

Now I know in this photo you are probably saying….what is that grey outline all about!!!!!  This photo has emphasised the grey and you will see in the photo I took outside it is a little more subtle than it looks here ;-)  I coated the whole layout with mat multi medium and then outlined the placement of key page elements with a pencil once the medium was dry.  By sealing the paper it allowed me to use a soft grey Faber Castell Pitt pen to shade around my elements.  Working on top of a sealed surface allows you to manipulate the ink before it dries and becomes permanent.


Popping all the elements in place on the layout and adding comes stamped butterflies and I am much happier with this layout now.  All I need to do is add a little journalling - this is a photo of me when I was only 3 weeks old!  Ahhhhhhhh.  Beneath that pretty dress are two little legs in plaster as my feet were slightly twisted over when I was born.  That did not stop me sleeping through my first ever photo shoot ;-) as you can see!


I always think my feet problem happened to my Mum and Dad more than to me as I do not remember the tiny plasters, the special boots nor much of the small operation I had to finally correct my feet once and for all.  My Mum once told me that had I been born in her generation I would not have walked at all.  That is quite a sobering thought as it has really never bothered me.  As this is quite a bit of journalling I think I will add it on a page attached to the back of the layout.  It might make an interesting read for generations to come who I am sure will have the benefit of huge medical advances we can only dream of right now.

Back to the layout!!!  I made spiral paper roses which I liberally dusted with paint and the tiniest amount of distress glitter.  I added the little journalling block for the main details - this is me and I am 3 weeks old!  I love how the pretty tule looks on the layout and I added two pretty pins (which I just learnt how to make!)  If you want to know how to make them then click here to watch a video (managed to get one in after all!)


This is one of the first videos I ever made so it may give you a chuckle or two ;-)


Then I added more fussy cut butterflies, some are flat and some are flying!  I also added some green dots to the blue border with a dimensional paint.


I have layered up the photo on three frames which are the three papers I used in the layout and added a little touch of lace.


I am much happier with my layout now - so don't be afraid to start again if something is saying to you I am not quite right - go with your creative instinct and change it up!  If at first you don't succeed……

I hope you like how it turned out in the end!


Now it is on to the giveaway reminder - I have a couple of lovely Rubber Dance stamps to giveaway and the give-away closes on the 14th of March.  So please click on this link to find out what you need to do to get your name into the hat!  Just a little bit of fun to spread the Rubber Dance stamp love!  Actually the little butterflies on this layout are Rubber Dance stamps!  It only takes a minute to join in so please follow this link!

I'll be back soon with some more creativity - thank you for popping by X

Tuesday, 16 September 2014

What No Video???!

Hi Everyone

It is unusual for me to post without a video these days but I had an idea of a scrapbook page when I was cropping with my friends at the weekend and I thought you might like to see what I did….

…Firstly please let me apologise for the really mucky craft mat!  No posh videoing mat for me ;-)


I had a whole length of ribbon I had coloured with Mustard Seed Distress ink.  I intended to use it on another project but the colour wasn't quite right.  Whilst packing up ready to crop on Saturday I had an idea to use it on a layout.  I started out by cutting 3 circles that were just the right size for the photo's I intended to use.  Then using a pencil I marked out a trail I wanted my ribbon to follow around the appertures.  I then pierced along the line ready for stitching to take place.  As you can see here I also added some splatter using a Black Soot and Mustard Seed Distress Paint and distressed the edges of the grey card stock with more Black Soot Distress Paint.


I gathered up a length of my ribbon along the centre using a running stitch and then added double sided tape around the line of my first apperture.  I used the running stitch to pull the ribbon into gathers as I arranged it around the aperture.  I added more pieces of DST where the ribbon overlapped itself on the way to the next circle.


I used black embroidery thread and the holes (now only visible on the back of the card stock to stitch the ribbon into place.  I worked one aperture at a time and made sure there was no grey card stock visible on the inside of the ribbon frames.


You can see the stitching now follows the line that I drew previously.


Next I drew a looping line with a pencil coming in from the top left of the card stock and pierced the stitching holes along the line.


I added the DST to hold the ribbon in position ready for stitching.


That was the main part of the page layout finished so on to the photos the title and the journalling …….


See how that lovely yellow ribbon draws your eye from one photo to the next.  These are photos of my eldest son in 1985.  I am gradually scrapbooking his photos and I managed to do a couple of layouts at the crop in-between chatting and eating cake of course!  I still need to add titles and journalling to them so I will share them later.

Before I go though I thought this might make you smile.


Do you think Comet is wondering why he doesn't get to join in our TV dinner night?!!!!  I remember three years ago Comet could sit on that stool…..now he leans on it ;-)


Soooo cute!


Still with the same please feed me look in his eye though!

Have a fab week and thank you for popping by X

Monday, 30 June 2014

…….And another Challenge Layout!

…..I told you I loved this mood board by Di Garling from the Scrap Around the World June challenge.


Yesterday I was cropping with my friends and I thought I would have another play with these fun colour and the black and white stripes!


I had a ton of fun creating this.  It is not how I usually scrapbook but I loved it.  I will definitely be trying this style again.  For my first attempt I kept it simple.  But simple takes planning!!!!  Where are you going to put the photos?  Where is the title and what about the journalling?  You can see that the journalling didn't find a home yet!


I used the tiniest scraps of paper and washi tape and mixed and matched letters from an old sticker sheet.  I had to borrow the 'e' in me from my friend Jacqui …..it was brown but I coloured it in!

As I write this I have come up with a plan for that journalling ….I am going to tell you all about my families trips to many photo booths around the UK, usually at days out to the seaside….these days the booths are mostly used to take awful Passport Photos…..I am convinced there is a gremlin in there picking out the worst bits of folk to feature in their Passport Photo that they have to live with for 10 years!!!!!  I can hear him cackling to himself as he takes my money and shows me my faults in quadruplicate!!!!

……I digress oh yes….My Dad in particular loved these booths.  We have lots of little strips of our family posing….one nice one……one silly one!  I have to asks my Mum why on earth she left my hood up!!!!! and where was my little brother???  I think he may have been in a pram looking at the age of me…….talking of the silly ones ……maybe this is why the passport photo gremlin does his thing….he has taken personally all the weird faces that have been pulled in his booth over the years and now it is PAYBACK time…….;-)

And all that journalling I am going to write really small around the outside of the layout to create a written frame.

I am definitely going to make a scrapbook tutorial showing you how I tackled this style and I think it will make a great introduction for anyone thinking of doing something a little more arty on their scrapbook layouts.

A big thank you from me to the team at Scrap Around the World for a great challenge site.  I highly recommend you follow the links to see some fabulous layouts inspired by this months wonderful mood board.

Thank you for popping by X

OMGoodness I have just realised their are only 30 days in June and I haven't completed this months 12 tags of 2014!  Better get  wriggle on!!!!  Watch this space……I'll be back ;-)

Saturday, 28 June 2014

Scrap Around the World June Challenge

Just a quick post to share a layout inspired by the June Challenge over at Scrap Around the World:


I really love the colours of this one and I happened to have a photo that suited the mood board perfectly….So colour and LOVE was my inspiration.  I used a photo that was taken, I thought, by me and the more I think about it, the more I seem to remember a friend might have taken it and it was their printer that ran out of ink…..It was a little while ago now as Callum is 15 so…….maybe the friend will remember if it wasn't me and let me know!!!.  Either way it is true…... I LOVE this photo and the little man in it and part of its charm is that the ink started to run out on the printer!


I had fun with this layout using lots of different techniques.


I got some of my new stencils a little bit painty!!!  I used distress paint instead of ink to define my edges.


As usual I cut a section from my base card stock to create a mat for my photo….waste not want not…...


I covered 2 chipboard arrows with the reverse of the grey paper and added more stencilling with my favourite dot fades.


Trying to break out from my normal scrapbooking habits I heat embossed the pattern on the grey paper with black and pewter embossing powders using a combination of my Perfect Medium pen and my quickie glue pen.  The quickie glue pen worked really well for those fine pewter lines.


The photo was added next…look at that cute little face….don't you just want to pinch his cheeks!!!!  Good job Callum won't read this ;-)


I found some hearts in my little box of chipboard and unused die cuts ( a moth flew out when I opened that tin!!!)  I added pewter embossing to the heart and slightly outlined some of the dots on the arrow.  A couple of found die cut flowers and that made the nice little arrangement top right.


Bottom left was where I placed the title which my friend Jo cut out for me with her lovely new cutting machine.  Look how fine it cut everything.  The big flowers was hand cut from a yummy Heidi Grace paper I have had stashed away carefully since forever!  The top flower has a flock finish to it.  The 100% original brad was painted with Distress Paint as it was cream and didn't stand out enough.  I rubbed it over with sandpaper to reveal the wording once the paint was dry…….One more step…..


….Yes that 'might not be quite true journalling'…….I think I might add PTO and write the full story on the back of the layout….I might even get a call to tell me what the true story truly is ;-)!!!!


So that is how I got to here!  It was fun trying new things and I hope you pop along to Scrap Around the World to check out all the lovely Mixed Media layouts inspired by the gorgeous mood board at the top of this post.

Hope you are all having a fab weekend….I am off to a crop tomorrow so I really must get my bags containing everything but the kitchen sink ready to avoid the early morning rush!!!

Thanks for popping by X

Sunday, 4 May 2014

National Scrapbook Day!

Did you know?  I got to know via Facebook and have had a lovely evening scrapbooking along with Big Picture Classes.  They are trying to get 10000 layout pictures on Instagram and are getting everyone to post photos of their layouts as they finish them.

I have done three tonight which is pretty good for me as I usually would only manage one!  I thought I would share this one before I hop into bed.


First I gutted a 12" x 12" page leaving a 1" border.


Next I trimmed the sun sheet to 11 3/4" and adhered it to the grey frame.


Next I cut a 2" strip of the striped paper and edged it with strips of grey and then attached a strip of washi tape that I thought coordinated with my papers.


I attached the strip down the right hand edge of the layout - straighter than in the photo!! ;-)


Next I popped out a couple of tickets and a journalling tag from the die cut sheet.  I found a fabric brad to match my colour scheme.  I mounted my two 5 1/2" x 3 1/2" photos on orange then grey card stock.  I cut a 1 " strip of the hexagon paper and edged it with an orange die cut boarder strip.


I made the strip into a rosette using the fabric brad as a centre.  I attached a tab to the Journaling tag and joined the two tickets together with a gem brad.  I added journalling and cut out my title using Zooballoo lettering at 1" for the word Breakfast and 1 1/4" for the word BBQ.


And here is my finished layout with everything attached.  I created a pocket for my journalling tickets and tag by leaving the top of the photo mat open.  I did add a line of glue so the tags don't slide down too far behind the photos. A touch of bling around the sun and a couple of photo tabs and that was layout 3 complete.

The papers I used were My Mind's Eye Oh La La which I have had for ages!  You could use this layout as a sketch and substitute your coordinating papers and photos.  Hope you are having a fab National Scrapbooking Day.  I am off to bed….Thank you for Popping By x

Wednesday, 9 April 2014

WOYWW 253

Good Morning Everyone

It is sunny and bright here this morning but I am feeling rubbish!  I think I may be coming down with a cold.  You know the feeling - fuzzy head, scratchy throat and other things I won't mention so as not to put anyone off their breakfast ;-)

So what I am I sharing today?


A desk full of UFOS(UnFinished Objects)!  I have 6 layouts all waiting for titles and journalling!  Oh and 6 eggs that might be decorated for Easter.  I have a habit of making up my scrapbook layouts at the crop I go to and I have stopped taking my Cricut with me…..I carry enough baggage as it is!  Now I just need to get into the habit of getting home and getting on with finishing them off!  So I have laid them out to wait for inspiration to strike today.  Mind you they will have to wait a while as I am off to visit my Mum and there is an Ikea plate of meatballs with my name on this lunch time ;-) Yum!

Then I guess if the sun stays out I may have to do a bit more pruning and tidying in the garden ready for the long hot Summer we are going to have this year!……Dreaming…….


This layout is of my son Callum playing on a Gameboy!  I think it was when he first discovered the delights of electronic entertainment!  We drove back from Gibraltar to the UK and it was a treat for him as he was going to be cooped up in the car and on a boat for quite a while.  As you can see he is hooked!  Cute Leopard PJs - now he wears a onsie and has his nose permanently stuck in his phone or his laptop!


I am thinking I might leave the word on this tag as the title for this layout as it works quite well for this shot of Mariah and Callum with??????  Is it Goofy ……..or is it Goofy's nephew??  This is a lovely sunny layout and a great reminder of a wonderful warm sunny day spent lazing on the beach - PERFECT!

Happy WOYWW to anyone popping over to visit my desk today.  I hope your desk is full of lovely creativity for me to peruse this evening!!!!….and that your day is sunny and warm wherever you may be.  If you have no idea what WOYWW is then please follow this link and join me hopping from desk to desk all over the world.  I know you are going to love it and make lots of new crafting friends along the way.

Thank you for popping by X

Thursday, 27 March 2014

Graphic 45 Design Team 2014 Audition

Welcome to my Graphic 45 Design Team 2014 Audition.

I have loved Graphic 45 papers ever since I bought my first sheet which was 'Bees Knees' it was full of red cherries and polka dots (I still have one piece of it left!).   I love the versatility of the gorgeous mini prints as much as I love the intricate vintage images we all love to fussy cut.  I hope my post showcases my love of designing and that Graphic 45 paper collections fire my imagination.  I am so excited about taking this opportunity again (audition post from last year) to audition once again for the wonderful Graphic 45 Design Team.

I am passionate about designing projects and then teaching others how to make them.  So it is natural for me to run classes and workshops and to share lots of tutorials on my You Tube Channel as well as creating online workshops for larger projects.  I am addicted to creating videos and work hard to make my tutorials and workshops professional and easy to follow.

I have taken this opportunity to create some new projects for this audition and I found it difficult to choose which other projects to include in my audition post as I know I am going to be competing with lots of very talented people out there in Graphic 45 land!  Fingers and toes crossed and here we go……..

Secret Garden Canvas - Lots of fussy cutting with a touch of silver gilding.


This started life as a Scrapbook Layout way back in May last year but I was so pleased with how my flower vines turned out it would have been a shame to squash them in an album so I turned it into a pretty canvas.


Tropical Travelogue Carriage Clock - I loved creating the display of tropical flowers and foliage for this brand new piece.  This project was built from chipboard - This is my favourite kind of designing, from chipboard and paper to carriage clock - I have so many ideas for different versions of this design - I might now have the perfect excuse to get my hands on the By The Sea Collection!!!! ;-)


A close up of all the fussy cutting.


Steampunk Spells Spooky Halloween Mini - A great reminder of Halloweens past and a cute album that can be made with any Graphic 45 paper collection as it uses the cut apart Journalling Card Pages as tags for journalling and more photographs.


This was a little tricky to photograph to capture all the detail so click here to watch the video I filmed to look through this spooky mini.  I am currently editing the tutorial for this.

Ladies Diary - Box of Memories - I wanted try to create faux vintage treasures that may have been left to me by my Great Great Grandmother.


I had lots of fun thinking what might be in my box of treasure.  A valentine given to my Great Grandmother, my Grandma's locket and trinket box, a bobbin of lace and a Christmas pomander from my Great Great Grandmother.


Ladies Diary had all the delicate prints and images I needed to create this set of pretty trinkets.

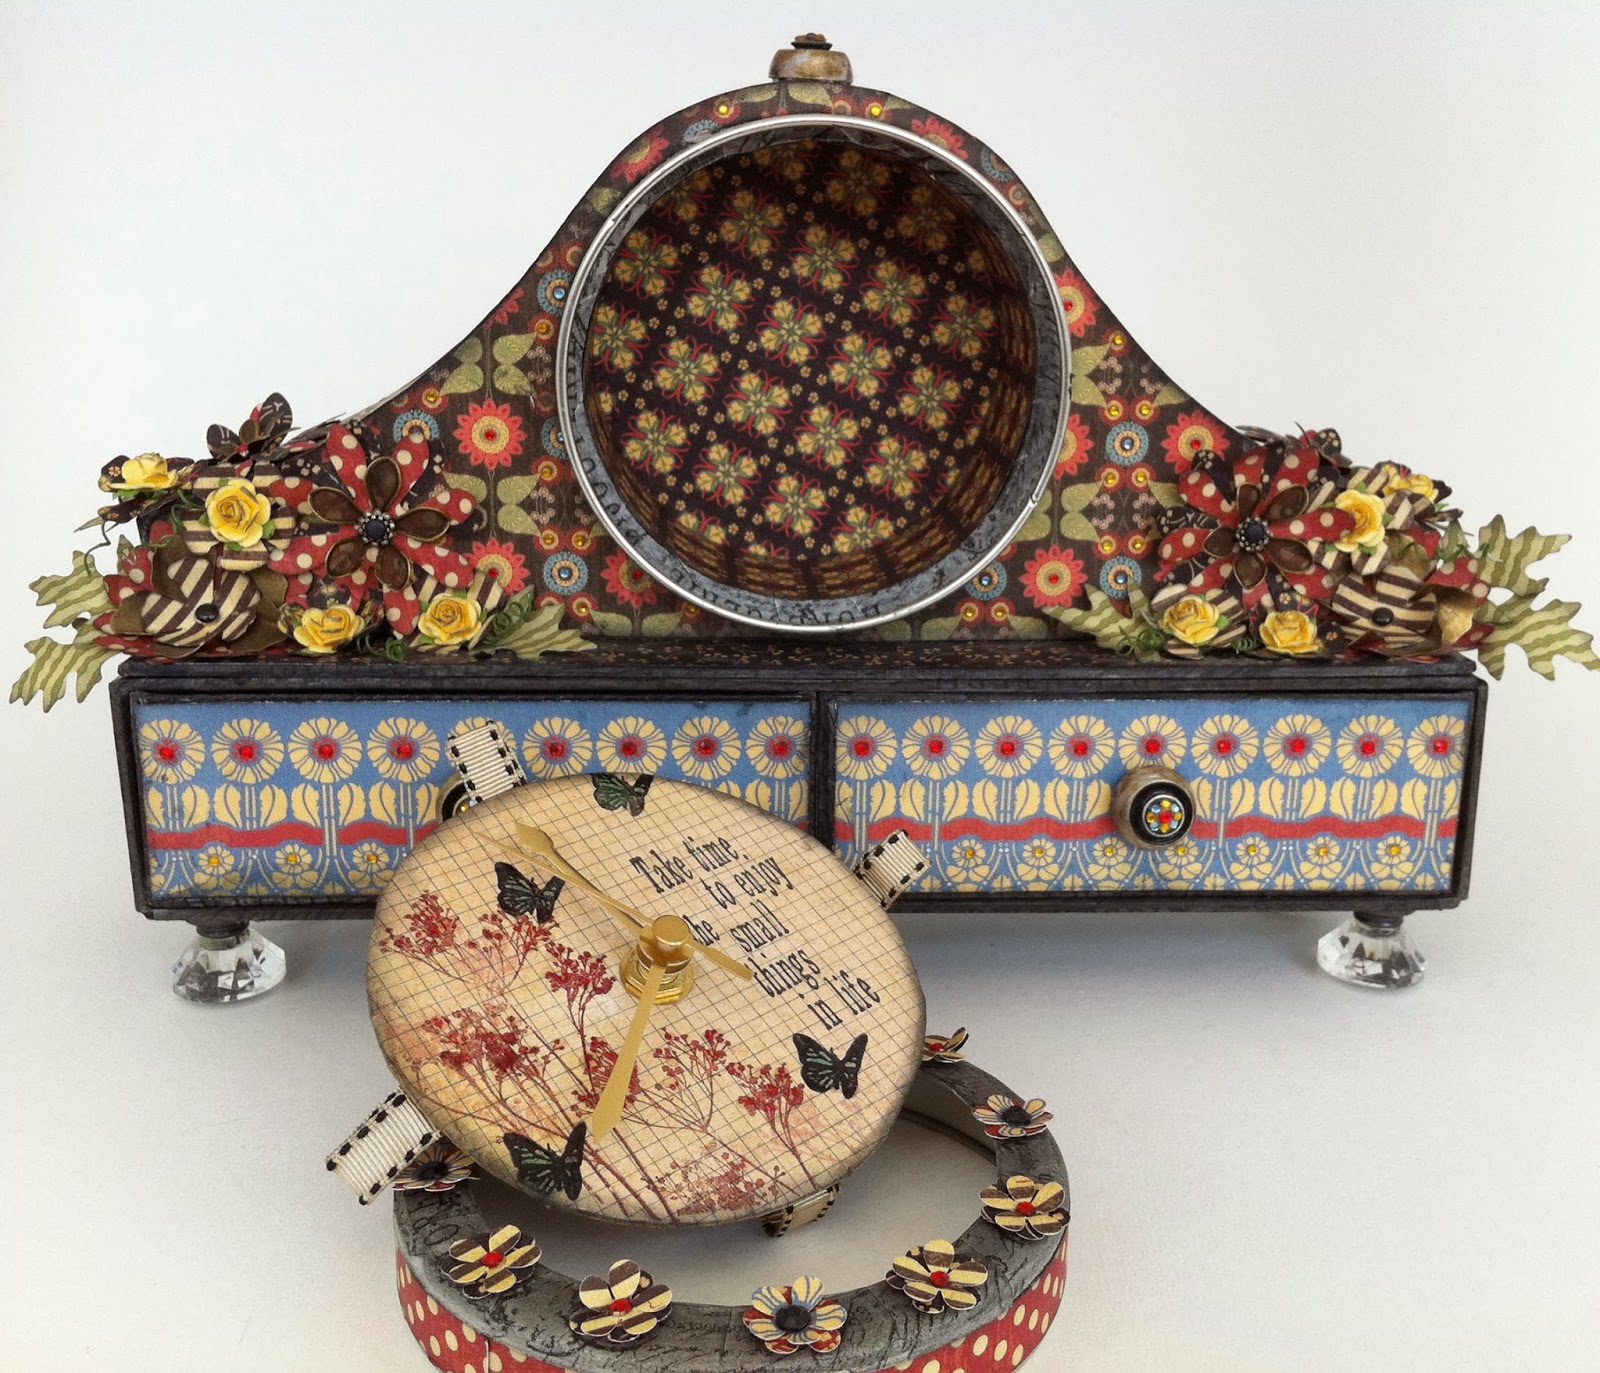
Graphic 45 Mantel Clock - I loved combining Graphic 45 prints for this project.


Drawers for Tags or in my case jewellery as this clock sits on my dresser.


There is even room for a Mini Album behind the clock mechanism or it could be somewhere to store secret treasures!


Pyramid Mini for a Boy or a Girl - One project two very different looks courtesy of two very different Graphic 45 paper collections.


What treasures can you put inside?  This one was originally designed for my son Callum's 14th birthday but I have since taught it in workshops.


Complete with a Mini Album for all those party photos.


This one was just for me as I love the Ladies Diary paper collection.


When I design a large project like this I try to make it as versatile as possible to appeal to as many crafters as possible.

French Country Memory Box and Mini - Made with an altered Matchbook Box.


This is a mini and memory box combined and is a design that could be made for lots of occasions.


I am using it to record happy family memories associated with recipes.  I used the Journaling cards as tags so that I can write down those recipes as well as journal about the memories that are associated with them.


Underneath the mini is a memory box with lots of compartments to store treasures - this would make a great project to record a special holiday too (mmmm By the Sea!!!).


I made a video tour of this project last year so here is the link.  This is another project that is difficult to photograph effectively!

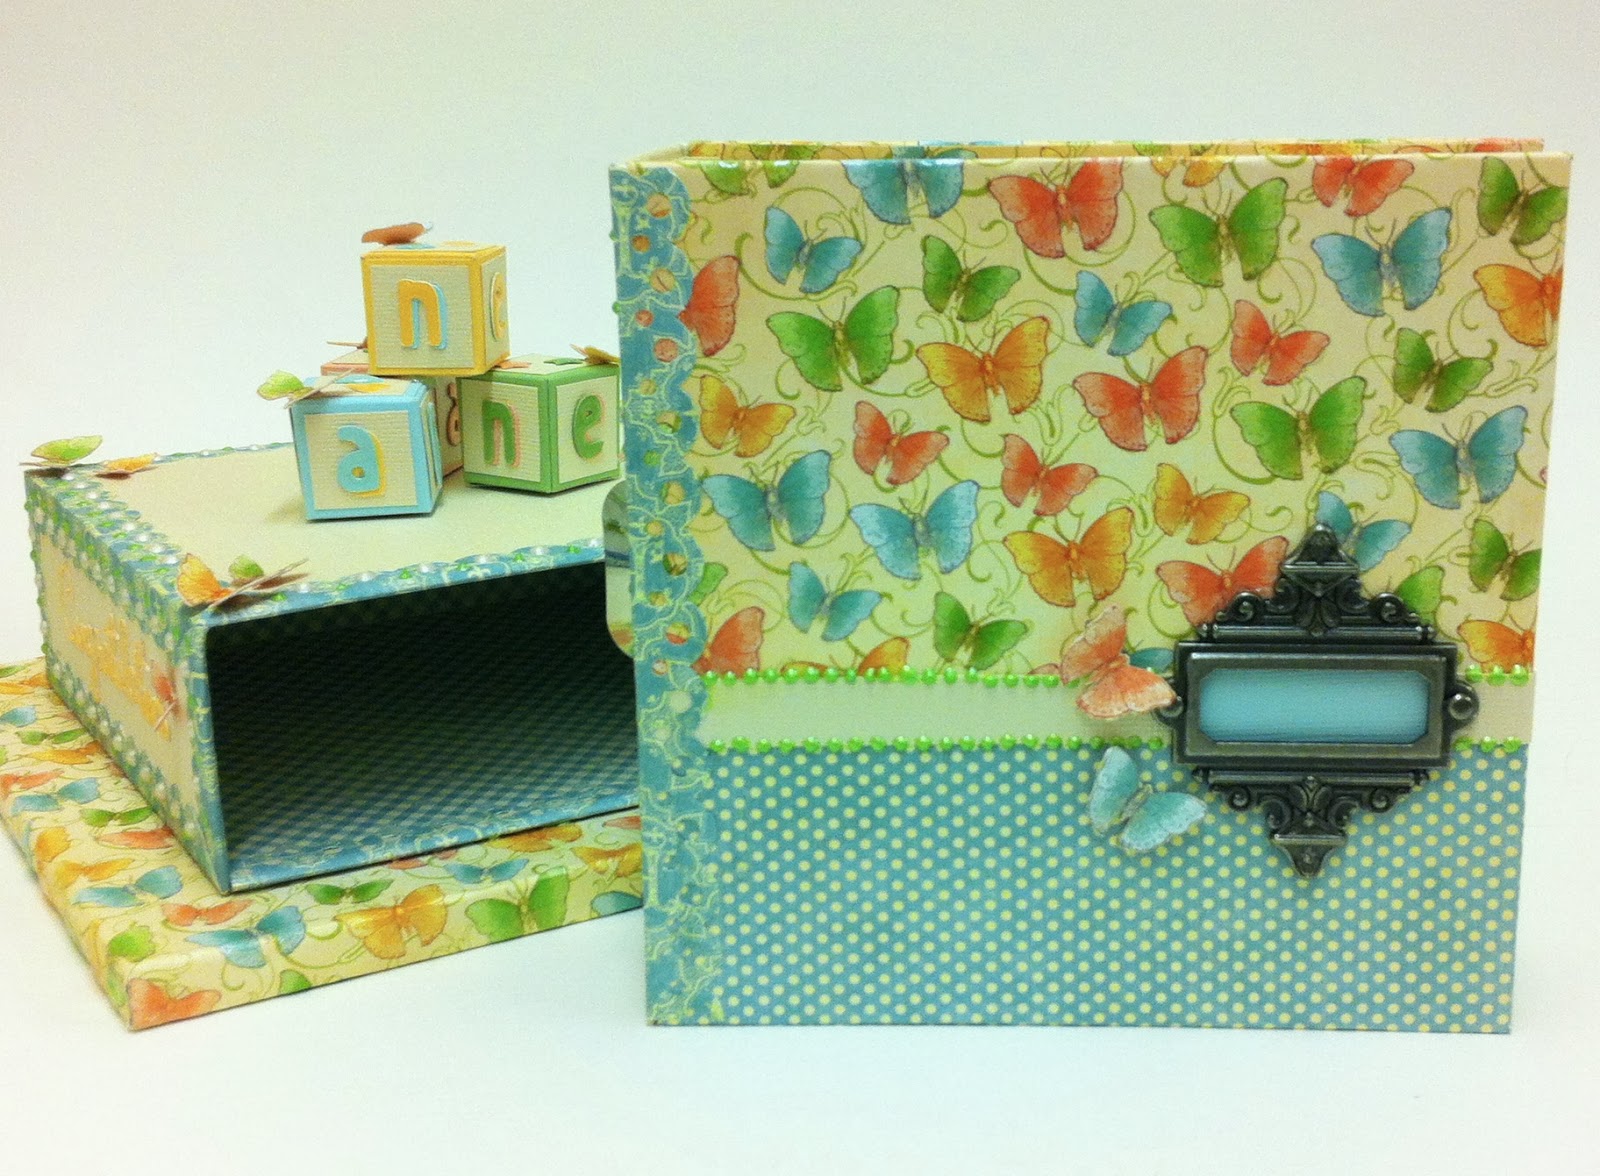
Little Darlings New Baby Cake and Mini Album - I loved making the little stack of cute baby blocks for the cake topper.


As I wrote all the journaling prompts for the Mini Album it bought back happy memories of filling in baby albums of my own.


The online workshop for this is almost complete and there is a Christmas and Birthday cake version as well as a three-tier wedding cake…... (no pressure on my two handsome sons though!!! ;-)

A Few Scrapbook Pages

Scrapbooking and cards was where my passion for paper crafting began.  During my crafting journey I have made many lovely and very talented crafting friends, both in the real world and more recently in the online world, over the years and I am so grateful for their support and kind hearts.

Mother Goose Layout - Gorgeous bright patterns - perfect for the fun fair photograph - a master class on how to make your supplies go a long way!

Olde Curiosity Shoppe meets Magic of Oz


What to do with such pretty leftovers?


I have a tutorial on how to make companion 'Project Life' style pages on my You Tube Channel.

Tropical Travelogue Layout - I love using Graphic 45 images as embellishments on a page.

There is so much detail on every page to inspire your creativity - I was really pleased with how the fish embellishments and fussy cut frame turned out.


A Couple of Cards


Secret Garden Double Slider Card


Steampunk Spells - An alternative Valentine!


I think I should create an envelope with a health warning - 'Open with care!!!' (tutorial awaiting editing)


Sometimes Layouts Inspire Cards - A great way to use up pretty paper scraps.


I made a tutorial for this double easel card.

I love mixing and matching gorgeous Graphic 45 paper lines this time Little Darlings with ABC Primer for a baby to grown up layout that inspired a fun Birthday card for my lovely hubby who has been a real star supporting me this week.


Phew!  As you can see Graphic 45 fires my imagination and I thank you for that and I really hope you like my projects.  I love to design and I love to make tutorials so that others can make them too.  I hope this post and the links capture that passion.  Thank you so much to Graphic 45 for this exciting opportunity and thank you to my blog friends for your support and for giving me the confidence to give it a go!

As always thank you for popping by X
Related Posts Plugin for WordPress, Blogger...