Showing posts with label Mini Album. Show all posts

Tuesday, 24 November 2015

Guest Design Team Member - First Post

Hi everyone

Just popping in to give you a sneak peek of my first post as a Faber-Castell Design Memory Craft® Guest Design Team Member.  I had such fun with this one and there are two videos included!


As you know I am already a lover of my PITT® Big Brush Artist Pens so it was lovely to mix and match them with even more lovely Faber-Castell Design Memory Craft ® products that were new to me.  In the first video you can see how you can work with them on a fabric panel and then on the second how to turn that into a gorgeous project for the holiday season.

Follow this link over to the Faber-Castell Design Memory Craft ® Blog and don't forget to say hi and let me know what you think of my first share and of course please explore all the wonderful mixed media creativity going on over there too.

I am already working on my next project in between looking after Callum who has had his knee operation and is in a full leg splint.  My fitness levels are improving as I 'frequently' travel up and down stairs to help him!  He is recovering well and is looking forward to getting on with the physio so he can get more mobile.

Thank you for popping by and hope to see you over at my Guest Design Team Post! x

Monday, 20 July 2015

#lovesummerart

Hi everyone

Today I am sharing the tutorial I made for the #lovesummerart collaboration.  Until a couple of days ago I didn't know anything about this but thanks to Theresa one of my lovely YouTube subscribers I met a group of creative YouTubers who had got together to bring even more arts and crafts to the wonderful world that is YouTube.

Cinnamon Cooney aka TheArtSherpa and her friends started this movement and it is set to happen on a regular basis.  This month the theme was summer and we were given a posting window of 17 - 20 July which I think I am going to make!!!  I thought I was going to be late but I was running a day ahead of myself ;-)  Usually it is a day late!!!

So if you want to explore this first offering of videos the all you need to do (after you have watched mine of course!!!) is put #lovesummerart in your search engine (google) and you should see a whole host of arty videos appear then off you go.  There are offerings from all kinds of artists and YouTubers from newbies to the more established channels.  Don't forget if you find people you think are inspiring then press the subscribe button, like button and share button  to support them in their efforts.

So enough of the preamble what am I bringing you today?  Summer says beach to me, not that we are having very beachy weather where I live!….and beach brings to mind pretty beach huts all in a row!


In the tutorial you will find out how to turn boxes (mine are the insides of Tim Holtz shadow boxes) into cute little beach huts…..but there is more.  Behind the doors are secret mini albums where you can keep photos of those treasured holidays or days out on the beach…….and of course there is plenty of room to display the beach combing treasures you found there.

Once you can make these it won't be long before you can convert larger boxes to go with you little beach huts!


Hope you agree this is a fun way to keep those treasured memories safe.  Enjoy the tutorial and enjoy exploring #lovesummerart.


Thank you for popping by X

Wednesday, 1 October 2014

Rubber Dance October Colour Challenge

Hi Everyone

Last month saw our very first colour challenge over at Rubber Dance and it was wonderful to see everyone joining in.  That Autumnal colour pallet certainly inspired some wonderful creations.

This month the lovely Katy set us the challenge to use Very vintage, old world tones of brown and sepia.  I have been wanting to make a video tutorial of a mini album of some kind for a while now and this turned out to be the perfect opportunity to do that.  We are off to Cornwall for a break in October so I decided to create a Travel Journal to take with me so I am super organised!

I had the perfect stamps for this project and I used images from the Travel (TR1-L) and the Collage Elements 1 (BK1-7G) to decorate my journal covers as well as some of the pages in the journal.


So as well as decorating the cover with my stamps I also made different interactive pages to slot in between plain pages.  There is a pdf available with the measurements of the whole journal if after watching the video you decide you want to make this journal for yourself.  So just email me and let me know and I will send it out to you - my email link is on the right hand sidebar.


This page style has a flap to allow extra space for photos or journaling…..Oh and a cute Compass Stamp!


This one is a pocket page with room to tuck in tickets and receipts to remind you of your travels.


This time it is a pocket page with a photo or journalling tag inside.


Vertical pocket on both sides to allow you to tuck in extra photos or leaflets.


and finally this page has a double photo mat tucked into a pocket so lots of room for more photos and journalling of your travels.


Here is the link to the video tutorial where I show you step by step how to make a journal like this for your next holiday or simply to record a special event in you life!  Hope you like it.


If you want to check out what else is on those stamp sheets that I used and I only used a fraction of what is on them then please follow this link over to Rubber Dance.

I hope I have given you some inspiration for this months Challenge and that you follow this link to check out all the other projects that the Design Team have been busy working on.  I know you can rock this challenge so I look forward to seeing what you create.  Don't forget there is a prize for one lucky participant so get out all your Vintage Brown inks, paints, papers and stamps and get creating!

Until next time…….thank you for popping by X


Monday, 5 August 2013

On Safari with Bo Bunny Zoology


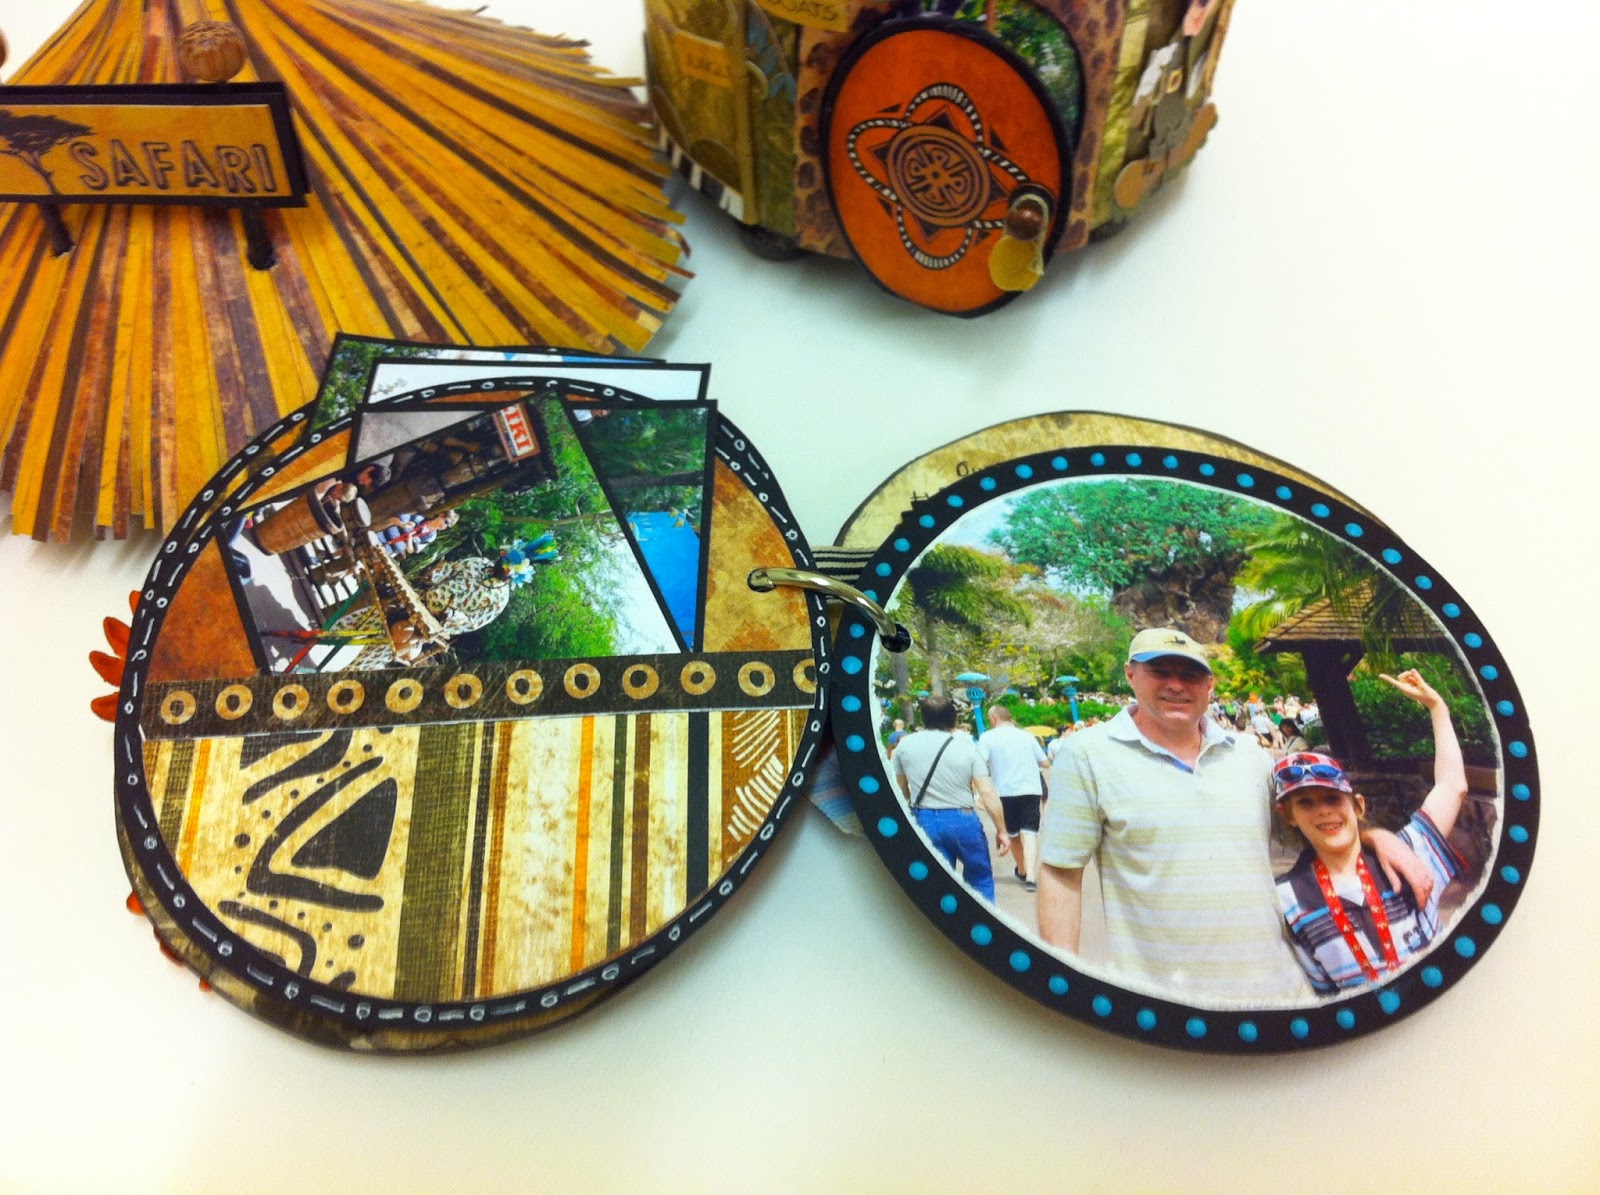
Take one round papermache box and some fab Bo Bunny Zoology papers and this is what I came up with!  One cute safari hut which tuned out to be the perfect place to keep our photos of a wonderful day visiting the Animal Kingdom park in Disney World.


I made a circular mini mixing and matching all the fun animal prints and stickers in the collection.   I think that the paper packs we treat ourselves to (every now and then!!!) are perfect for mini albums like these as they already coordinate so you can concentrate on the elements that make your project fun.


I turned the lid of the box into a straw roof and it took a while!!  I love the effect though - well worth the time spent next to the guillotine covered in multi medium!


I added lots of little hiding places for photographs and journaling.  Inside the lid made a perfect frame.  Here is Callum making friends!


Each of the pages of the mini has a large photo on one side and a pocket to tuck more photographs with journalling so I was able to really document a fun packed and magical family outing.


I will always remember the happy time we had.  Here is Callum High Fiving with a huge Bunny!!!!  I know that Callum will love this memento of our trip and will have fun showing it to his children one day.

Wishing you all a creative week - I am prepping for my class on Friday this week - I have a gorgeous set of stamps from Creative Expressions to play with.

Look out for another scrapbook tutorial (probably tomorrow) on my You Tube Channel which is uploading as I post this.  Don't forget if you like my blog or You Tube Channel I have a fun tutorial to give away to anyone that subscribes already or if you are a new subscriber.  Just drop me an email to let me know as I would like to thank you for joining me on my creative journey(email link on my right hand sidebar).

Thanks for popping by X
Related Posts Plugin for WordPress, Blogger...