Tuesday, 22 October 2013

Review of Spooky Tags

Halloween is fast approaching and I am working on a couple of home decor projects to share.  It occurred to me as I was unwrapping something I made last year it might be fun to share a couple of spooky tags I made and that a quick video was in order to see all the 3D details.

Some of you may remember these two tags.......yes they both definitely started out lives as tags!


Here is the link to a video where I give you the grand 3D spook-tagular tour (see what I did there!!!?)


I wonder if my inky fingers give anything away!!!  They should remind me to wear gloves when using spray paint!!!

If you just want to see the actual posts that I shared last year with photo tutorials then click on the links for more spooky inspiration.....


To learn how I made this 3D tombstone tag follow this link.


For all the tips on the latest in des res coffins for the best dressed skeleton in town please click on this link!

I have a halloween category in the labels section (left hand side bar) if you want to see a few more hauntingly fabulous creations ;-)

If you like me love all the fun of Halloween I hope you are having ghoulish fun making things ready for the witching hour.  If you are not a fan then I hope you are enjoying a fabulous Autumn (or Spring....) with leaves as lovely as the ones I have dried and laid out before you for my photo shoot.  Ignore the skulls and focus on the leaves!!!!!

Thank you for popping by X

Thursday, 17 October 2013

I'm Falling for You!

It is a lovely morning here in Derbyshire.  A complete contrast to the drab, damp and grey day we had yesterday.  A great day to go out for a walk and to collect Autumn leaves!!!!

.......and that leads neatly into my post today.  A little while ago, as I mentioned yesterday, I watched a YouTube video by Lindsay the Frugal Crafter about using your microwave to dry flowers and leaves.  It worked a treat and is so fast.  I have a pile of lovely leaves and I wanted to do something with them.

I had an idea for a card but the problem was my leaves are crispy and would not stand up to the envelope or the post.  I had an idea to coat the leaves to make them less fragile and I tried glossy accents and clear embossing powder and as you will see in my tutorial the glossy accents won!  It was easy to apply and had enough flexibility once dry to help make the leaves more durable.  They still need to be handled gently but they would definitely go into an envelope for hand delivery but I would suggest a box if you decided to post them.  I am going to try to find some more leaves today as I want to make a home decor project with them - I am not sure what yet but the first step is having enough leaves!!!

So here is my romantic card with an Autumnal twist.


This is a better shot of the leaves and the real colours as I seem to be a bit in shadow when I took the photo above.


In my YouTube tutorial I only give a quick explanation of how to dry the leaves so I have shared Lindsay's link so you can watch the full tutorial so you too can dry flowers and leaves for fun projects like my card.  Hope you like it and give it a go.  The colours of the Autumn leaves are fab at this time of year and it is great to be able to preserve them in this way.


I am not sure who I have made this card for as I have already 'fallen' for my hubby but maybe Callum will want to use it one day!!!  I am sure though that this design would look fab with lots of other greetings or quotes stamped in place of my Autumnal romantic one.  I might try changing the colours and add frosty elements to the leaves whilst the glossy accents is wet to achieve a Christmassy look - perhaps with dried ivy leaves!!!!  Don't you just love it when one inspiration leads to another!?

Thank you to everyone for their kind comments both here and on my YouTube channel.  Don't forget to subscribe if you like my work.  I really appreciate your support.

Hope you have an inspirational day and thank you for popping by X

Wednesday, 16 October 2013

Spooky Art Journal Page

After quite a long time spent uploading to YouTube here is my third Art Journal page video.  I love making these and this one was particularly fab to do as it started life as a lovely autumnal scene and ended as..........


......something altogether more sinister and spooky!  I had great fun trying to make the music build to a spooky climax and I hope I managed it.  I also learnt a new trick of linking a video to the end of the tutorial.  So I have linked a Halloween Mummy Wreath tutorial I uploaded last year for even more Halloween crafting viewing.


Hope you like the video.  I am off to edit another one which is a card with an autumnal feel and a romantic message.  I learnt how to dry leaves and flowers after watching a fab tutorial by Lindsay the Frugal Crafter and I just knew I wanted to try it out.  It really is quick and easy and preserved the gorgeous autumnal colours of the leaves.  I want to create a home decor piece with my leaves so that is something mulling away in my brain at the moment!

See you soon with the next video tutorial.  Hope you are having a fab day.

Thank you for popping by X

Monday, 14 October 2013

Spooky Tags

Is it Monday afternoon already?!!!!  I thought I would post this before I get videoing - it has been a while since I posted on You Tube so I thought I might warm up with a spooky art journal page........or maybe a card......or maybe a spooktacular home decor item........I guess you will have to tune in to find out what I eventually get up too!!!!

I have had a lovely weekend with my crafting friends and I actually did some work.  But don't worry I did fit in plenty of chat and coffee and cake too!!!!  So today I am sharing three Halloween tags that I made with some of my Lost and Found Halloween papers (My Minds Eye).


All the tags have been made with elements from the papers and die cut sheets so they were quick to make and fun to put together.  Today I have added a little glossy accents to the bottles which is still drying as you can see from this photo.  I have added ribbon and some cute halloween pumpkin buttons from my stash.  


This one also has glossy accents drying!  I love all the yummy orange glitter elements in this paper collection.

....and last but not least.....


I think this is my favourite from my trio of tags.  I fussy cut the pumpkins from one of the papers and layered them up for this 3D look.  I painted the images with my Distress Inks.  I am thinking of incorporating my tags in Halloween layouts as I have lots of lovely papers still left to work with.

Hope your Monday is a little brighter than the one we are having here today - it is wet and grey out there......crafting weather ;-)  'Every cloud has a crafty lining!!!!!'

Thank you for popping by X

Wednesday, 9 October 2013

WOYWW 227 and It's Been a While!!!

I have been having a bit of a busy couple of weeks and I haven't posted for a while so what better way to catch up with you all than a spot of WOYWW desk hopping.  If you don't know what that means then you really should follow this link (when you have read my post of course ;-)  There you will find Julia who has all the magic links to craft desks all over the world ready for you to explore.  I recommend a cup of coffee and a cookie or three!!!

So what is on my desk this week????


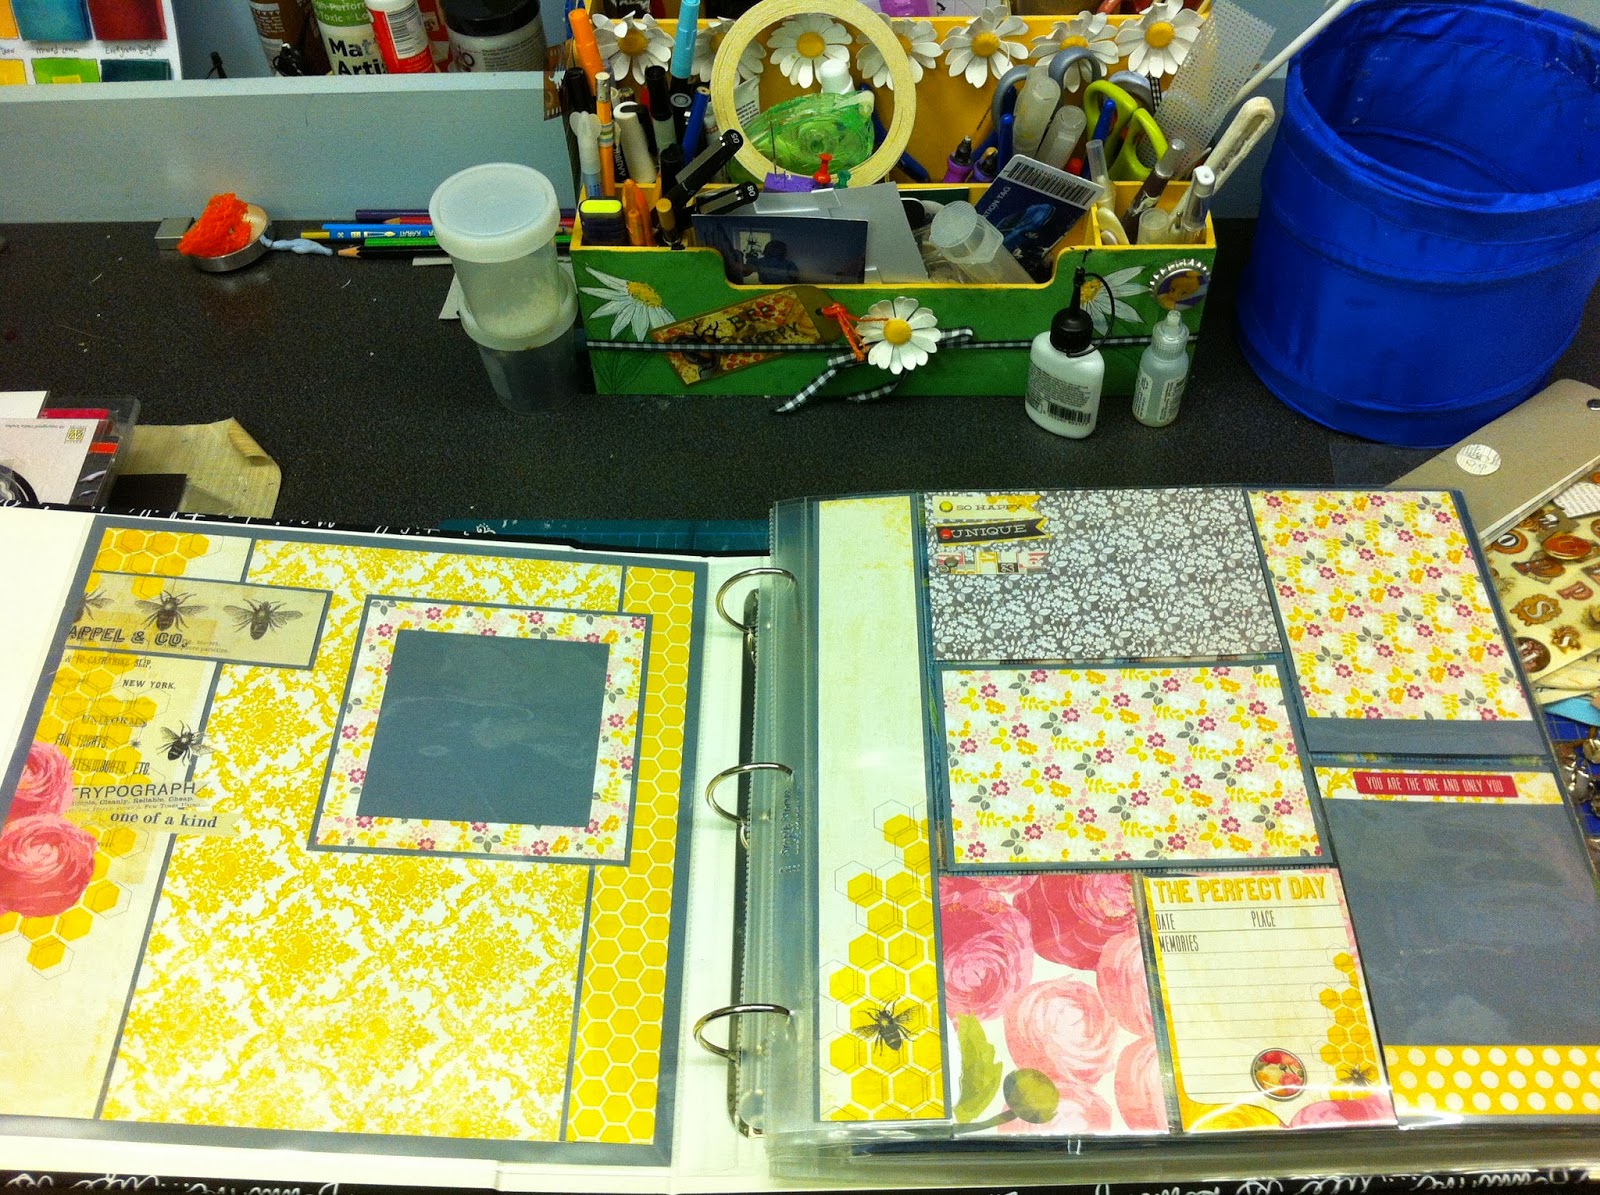
Here is a new photo album I treated myself too and it is already full!!! Next to it are some remnants left over from a big sort out I am having and they are waiting for my next task to be undertaken which is to take down and wash all my Ikea jars which are looking like they are ready for Halloween they are that dusty!!!  So all these little brads will find new homes in sparkly clean jars......soon ish!!!


The album is waiting to find a home too as it is already full!  I had a pile of layouts waiting to be put away and most of them were quite bulky with embellishments so I am loving these new ring binder albums as I they self level and you don't need to undo posts and add spacers!  Here is a layout I made with some pretty MME papers - I am going to put Black and White Photos on the pages and then embellish some more.  I wanted to try out combining a 12 x 12 layout with Project Life style pages and I like the result.  You can have a pretty and arty layout featuring one great photo and then do all your journalling and add lots of other photos on the accompanying page.

My hubby has been busy putting up a few extra bits of storage for me so I have been happily sorting through and rearranging my possessions!!!  Here is a before shot.......


One extra CD rack and a rearrangement of my little drawers.......plus a fair bit of tidying and sorting......


I even have some empty space!!!!!  I am going to sort out the CD rack that runs up the side and that is that area sorted.  You can see I even have room to display some of my projects.

Next up Ivan added a rail to the back of my door and a few curtain clips later and..........


I always forget to look through my many packets of stickers and embellishments when I am working on a project and now I have the perfect place to make them easy to sort through when looking for a matching pretty or two!  I like the way this works a lot so I am thinking of adding another bar below to make even more room for storage.

Another before shot........


I felt that this area where I store my most used items could do with another shelf and so one handyman later........


The extra shelf means I now have room for that growing collection of Distress Paints and Distress Stains..........


....Oh and my Distress Glitters......I am not sure Ivan realised he was making room for more shopping...........:-) !!

That's it from me except to say I have lots of plans for Halloween project videos and Christmas Project Workshops coming soon - another reason why I have been so busy.  I will post about them over the coming days so please pop back to see what has kept me away from my blog.

Looking forward to a little desk hopping and catching up with you all today.  Happy WOYWW to you and thank you for popping by X

Sunday, 22 September 2013

It's Christmas!!!!


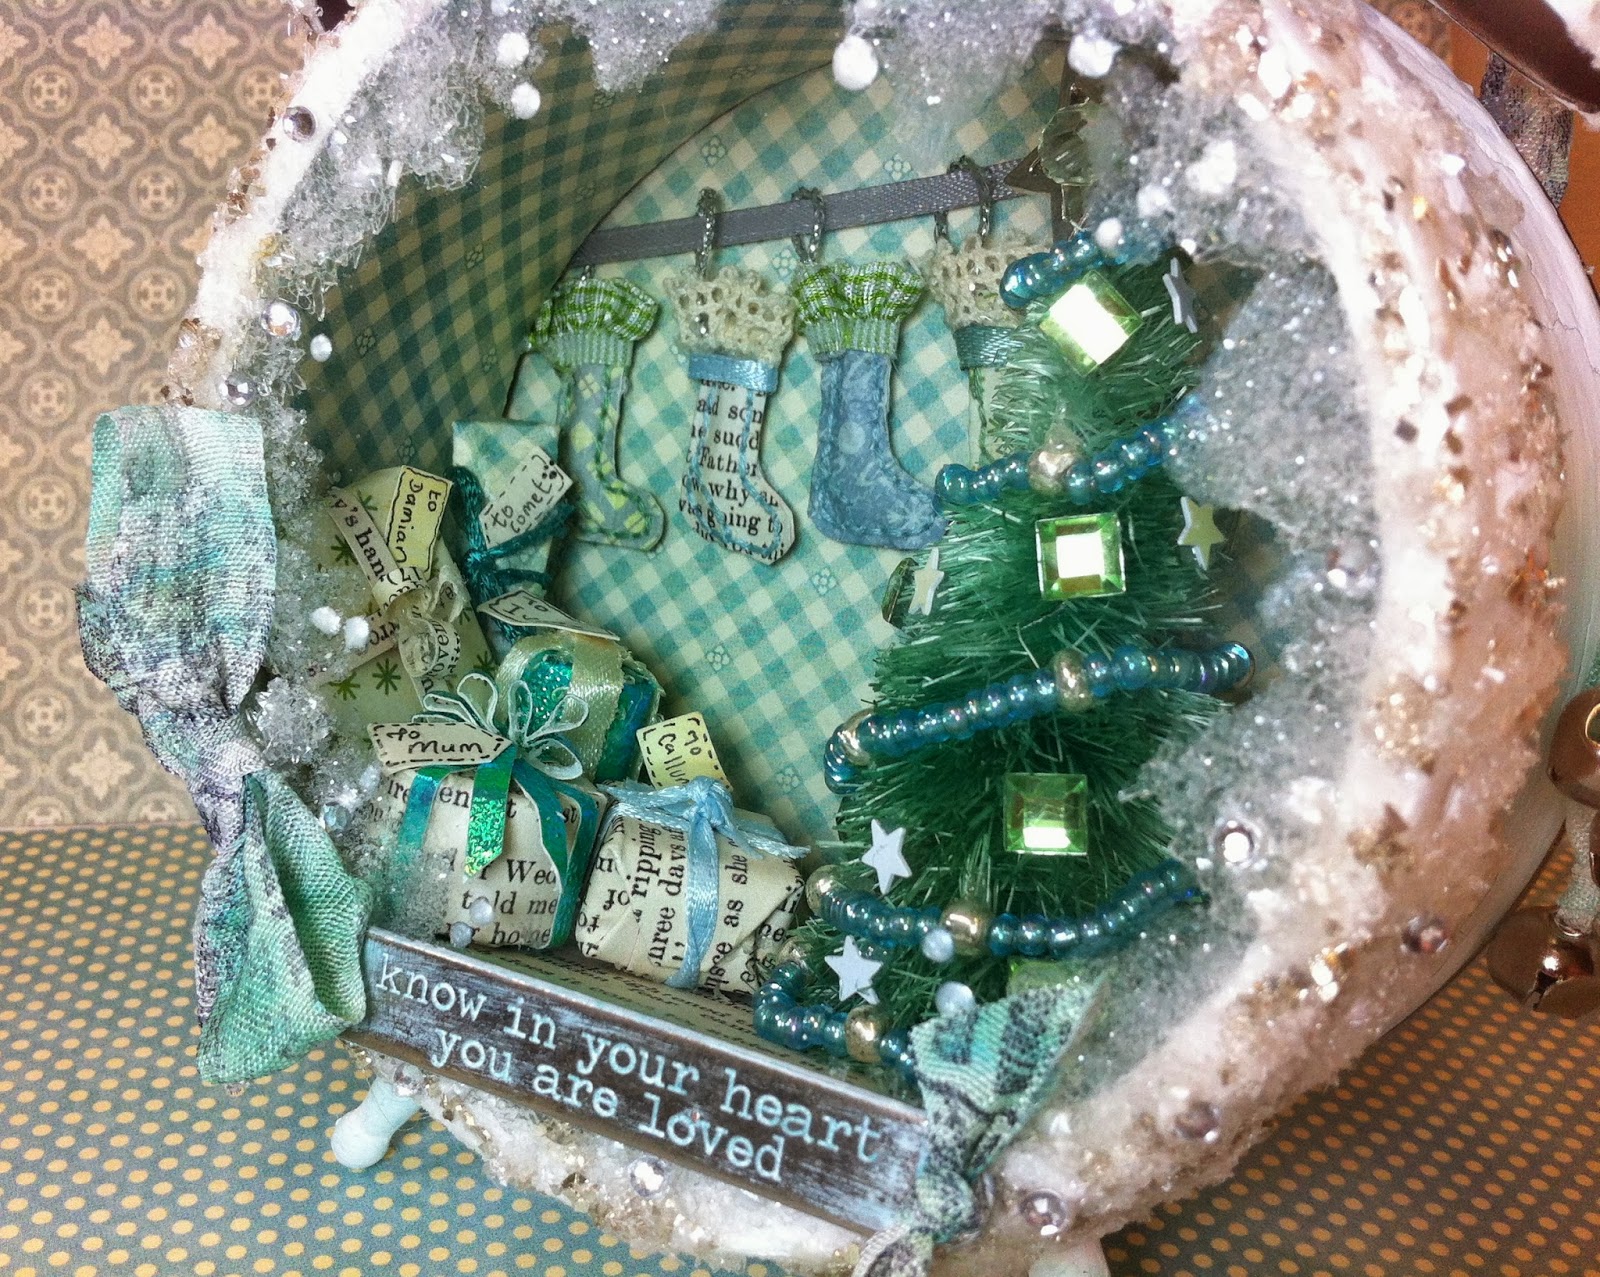
Well at least it is Christmas in my Ideology Assemblage Clock!!!!  I have had such a lovely time making this over the past couple of days.  It took me back to my childhood days of playing with the dolls house my Mum and Dad made and gave to me one Christmas.

That particular run up to Christmas my little brother Paul had been hunting for evidence of Christmas presents (as he did every year!) and he showed me that he had found my present (I couldn't resist a little look when he told me what it was!) so we spent a fun (and naughty) time peeking under the blanket at the progress my Mum and Dad made making me a beautiful dolls house.  It was huge as they made it using a packing crate and I remember seeing little quilts and pillows for the beds appearing courtesy of my Mum and little lights that worked courtesy of my Dad.  Much as I am not a peeker even to this day, I like to keep the surprise for the day, I did enjoy the build up of seeing my dolls house take shape.  When I think about it now my Mum and Dad must have spent many hours long into the night making this for me while I slept.

Now here is the funny thing.  All the time we peeked at the magical progress of the dolls house we never once lifted the blanket up far enough to see that on top of the dolls house a fort was taking shape!!!!  So on Christmas morning my brother had the biggest surprise of all when he received a fort so large that he could sit in it and play with his army of little cowboys and indians!!!  Happy Days ;-)


Here is a view of the inside of my clock.  I have used one of the Idea-ology Christmas trees and I dyed it (and my hands!) using Evergreen Bough Distress Ink and then decorated it with a beaded garland and jewels and sequins.  I found the perfect silver star charm for the topper!  It was fab to play with miniatures like this and I am already planning an Autumn, Summer and Spring clock too!!!!

I have made a video of this project so you can better see some of the fun I had wrapping miniature presents and sewing tiny stockings.


Here is a close up of the frosting I put on the clock using a whole host of sparkly product.  I used Silver Glass Glitter which I think was a Stampendous product, Iced Diamond from Pinflair, Cosmic Shimmer Pearl PVA and the sugary Ranger Rock Candy Distress Glitter with the odd gem thrown into the mix.    Lots of product there to produce a lovely icy frame to my Christmas scene.  I had a hard time photographing this project because of the glass in the clock and the photo does not do the frostiness justice at all.


Here is a closer look at the Christmas Tree.  You can see the silver charm that was the perfect tree topper and you can see the details of one of the Christmas stockings I patiently stitched.  I have decided to buy the Christmas Idea-ology word bands as although the one I have used here is a nice sentiment I want something a little more Christmassy.  This project taught me that I can reposition things I have hot glued into position by melting the glue with my heat gun.  That is how I will change the word band but my second lesson was that the glass on the Assemblage clock does not like the heat gun and I did crack the glass of one clock in the making of this project!!!  I was trying to heat emboss some snow flakes on to the glass - bad idea - don't do it!!!  I am glad I did it early on before I started to get into the details of the clock.  So it was a lesson learnt and I now have a clock without glass to dream up another project for!

The sun is shining here in the UK this Sunday morning and we are having a bit of an Indian Summer.  I have a few plans to increase my storage in my craft room.  A hubby job!!!!

Here is the before photo.


I am hoping to increase my storage and to have a good sort out of what is currently dumped here!!!! A me job!!!

So I am off to clear the shelves ready for hubby and then to edit the video I made of this project which I will share later. Hope you are all having a lovely Sunday.  We are planning probably the last BBQ of the year instead of Sunday Lunch later and I think I have to give up the computer to Callum for his Math homework shortly too so I had better get a wiggle on with this post!!

Have a great rest of the weekend and thank you for your patience with the Word Verification whilst I hopefully sort out the annoying spam!

Thank you for popping by X

Friday, 20 September 2013

Spam!

Just a quick post to let you know that I have had to turn my word verification on again as I am having problem with anonymous spam.  It is a pain but I hope it doesn't put you off commenting as I do love it when you say hi.  I will turn it off as soon as I can and hopefully that will deal with it.  I wondered why my Birthday Giveaway post from last year kept being my most popular item!!!!  Mr Anonymous seems to like that post so hopefully the word verification will sort him out :-(

On a brighter note I just wanted to say a big thank you to everyone for all your kind words of encouragement.  I really do love it when you take the time to say hi.  Thank you also to my new subscribers both here and on my You Tube Channel.  Don't forget to let me know if you want me to send you my Thank you tutorial as I need an email to be able to send the link.  Just a small token of my appreciation. x

It is late here in the UK and I am off to bed but I thought you might like a sneak peek of my next project.  I will be drifting off figuring out how I can achieve what is pictured in my head!!!


Can you guess the season???!!!!!!

Thanks for popping by ....night night X
Related Posts Plugin for WordPress, Blogger...